Replacing Altinator On 2009 Honda Odyeese
Alright, let's get into replacing the alternator on your 2009 Honda Odyssey. It's a job that, with some patience and the right tools, you can definitely tackle yourself. This guide assumes you're comfortable with basic automotive repairs, like using wrenches, sockets, and a multimeter. We'll break down the process step-by-step.
Safety First!
Before you even *think* about touching anything electrical, disconnect the negative (-) battery cable. This is absolutely crucial to prevent short circuits and potential electrocution. Use a wrench to loosen the nut on the negative terminal, and then carefully remove the cable. Tuck it away securely so it doesn't accidentally reconnect. Remember, safety glasses are your friend!
Tools You'll Need
Here's a comprehensive list of the tools you'll need for this job:
- Socket set (metric, typically 10mm, 12mm, 14mm)
- Wrench set (metric, same sizes as sockets)
- Screwdrivers (Phillips and flathead)
- Multimeter (for testing the battery and alternator)
- Breaker bar (for loosening stubborn bolts)
- Extension bars (for sockets)
- Torque wrench (for tightening bolts to spec)
- Pry bar (may be helpful, but use cautiously)
- Gloves (optional, but recommended)
- Eye protection (essential)
- Jack and jack stands (for safety if you need to access the alternator from below)
- Wheel chocks (for safety when jacking up the vehicle)
- Serpentine belt tool (or a suitable substitute)
- Pen and paper (for taking notes or labeling parts)
- WD-40 or penetrating oil (for rusty bolts)
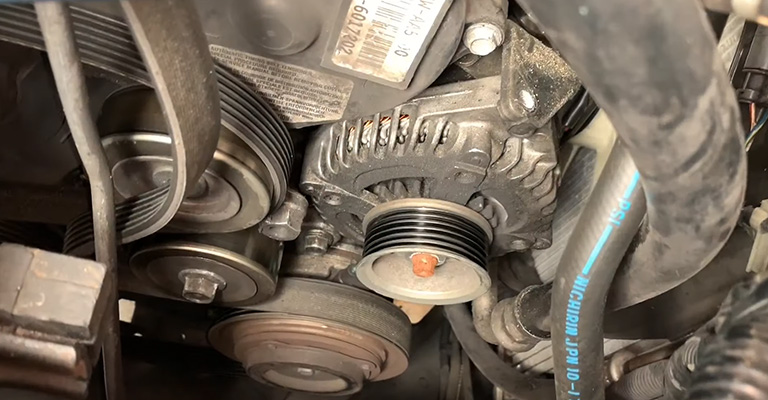
Step 1: Locating the Alternator
The alternator on the 2009 Odyssey is usually located on the front of the engine, often near the top. It's driven by the serpentine belt. Familiarize yourself with its location before proceeding. You'll see a large pulley, a housing, and several electrical connections.
Step 2: Removing the Serpentine Belt
The serpentine belt drives the alternator, so you need to remove it first. Locate the belt tensioner. This is a spring-loaded pulley that applies tension to the belt. There are two common types: a manual tensioner that you adjust with a bolt, or an automatic tensioner that you relieve with a wrench or socket.
Using a wrench or socket (usually a 14mm or 17mm), rotate the tensioner pulley *away* from the belt. This will relieve the tension, allowing you to slip the belt off the alternator pulley. It's a good idea to draw a diagram of how the belt is routed before you remove it. This will save you a lot of headache when you're putting it back on. A serpentine belt diagram can also be found online or in the repair manual for your vehicle.
Pro Tip: If the tensioner is seized or difficult to move, spray some penetrating oil on the pivot point and let it soak for a few minutes.
Step 3: Disconnecting the Electrical Connections
Now, disconnect the electrical connectors from the alternator. There will typically be two connections:
- B+ Terminal: This is a large terminal with a nut, carrying the main charging current.
- Connector Plug: This is a smaller plug with multiple wires, providing the alternator with voltage regulation and other signals.
Before disconnecting anything, make absolutely sure the negative battery cable is disconnected! Remove the nut from the B+ terminal and detach the wire. Then, carefully unplug the connector plug. Some plugs may have a locking tab that you need to depress before you can pull them apart.
Important: Label the wires if you're unsure which one goes where. Masking tape and a marker work great for this.
Step 4: Removing the Alternator Mounting Bolts
The alternator is held in place by several mounting bolts. These are usually located on the front and rear of the alternator. Use a socket and wrench to remove these bolts. You may need to use an extension bar or a breaker bar to loosen stubborn bolts.
Pro Tip: Support the alternator while you're removing the last bolt. It can be heavy and you don't want it to drop and damage anything.
Step 5: Removing the Alternator
Once all the mounting bolts are removed, you should be able to wiggle the alternator free. It may be a tight fit, so be patient and use a pry bar gently if needed. Be careful not to damage any surrounding components.
Step 6: Installing the New Alternator
Installation is the reverse of removal. Here's the process:
- Carefully position the new alternator in its mounting location.
- Install the mounting bolts and tighten them *finger-tight* first. This ensures that the alternator is properly aligned.
- Tighten the mounting bolts to the manufacturer's specified torque using a torque wrench. This is important to ensure that the alternator is securely mounted. Consult a repair manual or online resource for the correct torque specification.
- Reconnect the electrical connectors. Make sure they are securely plugged in.
- Reattach the B+ terminal wire and tighten the nut securely.
- Reinstall the serpentine belt. Make sure the belt is properly routed around all the pulleys.
- Release the tensioner to apply tension to the belt.
Step 7: Testing the New Alternator
Before you declare victory, you need to test the new alternator to make sure it's working correctly. Reconnect the negative battery cable. Start the engine and let it idle.
Using your multimeter, measure the voltage at the battery terminals. With the engine running, the voltage should be between 13.5 and 14.5 volts. If the voltage is outside this range, there may be a problem with the alternator, the voltage regulator (which is usually built into the alternator), or the wiring.
Troubleshooting: If the voltage is still low (around 12 volts), the alternator may be defective, or there may be a problem with the battery. Have both the alternator and battery tested at a local auto parts store.
Torque Specifications
Refer to a repair manual or online resource for the specific torque specifications for the alternator mounting bolts and the B+ terminal nut on your 2009 Honda Odyssey. Here are some example ranges, but always verify with a reliable source:
- Alternator mounting bolts: 33-48 Nm (24-35 lb-ft)
- B+ terminal nut: 10-15 Nm (7-11 lb-ft)
Final Checks
After you've tested the new alternator, double-check all your connections and make sure everything is secure. Make sure the serpentine belt is properly aligned and tensioned. Clean up your workspace and dispose of any old parts properly.
Congratulations! You've successfully replaced the alternator on your 2009 Honda Odyssey. By following these steps carefully, you've saved yourself some money and gained valuable experience working on your car.
Disclaimer: This guide is for informational purposes only. Always consult a repair manual or qualified mechanic for specific instructions and safety precautions. The author is not responsible for any damage or injury resulting from the use of this information.