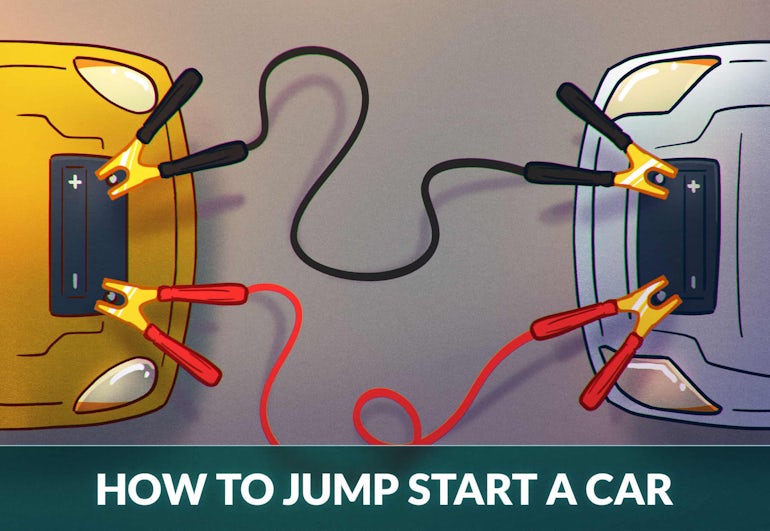
Steps To Jumping A Car With Jumper Cables

A dead battery is a universal automotive woe, striking at the most inconvenient times. Whether it's from leaving the lights on, a failing alternator, or simply the battery reaching the end of its lifespan (typically 3-5 years), knowing how to properly jump-start a car is a crucial skill for any driver. This guide provides a comprehensive, step-by-step process to safely jump-start a vehicle using jumper cables, along with preventative measures to minimize the risk of future battery failures.
Preparing for the Jump Start
Before you even reach for the jumper cables, safety is paramount. Ensure both vehicles are parked on a level surface, in park (P) or neutral (N) with the parking brakes firmly engaged. Turn off the ignition in both cars, and switch off all electrical accessories like headlights, radio, and air conditioning. This minimizes the surge of power when the connection is made, protecting sensitive electrical components. Visually inspect the battery in the disabled vehicle for any signs of damage, such as cracks or leaks. Do not attempt to jump-start a battery that is visibly damaged.
You'll need a set of quality jumper cables. Cheap, thin cables often struggle to deliver sufficient amperage, rendering them ineffective or, worse, causing them to overheat. Look for cables with thick gauge wires (e.g., 4-gauge or thicker) and well-insulated clamps. The thicker the gauge number, the thinner the wire. Therefore, a lower gauge number indicates a thicker wire, capable of carrying more current. Good quality jumper cables are a worthwhile investment, especially if you live in a region with harsh winters.
The Step-by-Step Jumping Procedure
Follow these steps carefully to ensure a safe and successful jump-start:
- Identify the Terminals: Locate the positive (+) and negative (-) terminals on both batteries. They are usually marked with a "+" and "-" symbol, respectively. If the terminals are corroded, carefully clean them with a wire brush or battery terminal cleaner.
- Connect the Positive Cable: Attach one red (positive) clamp to the positive (+) terminal of the dead battery. Then, connect the other red (positive) clamp to the positive (+) terminal of the working battery in the assisting vehicle.
- Connect the Negative Cable (Assisting Battery): Attach one black (negative) clamp to the negative (-) terminal of the working battery.
- Connect the Negative Cable (Ground): This is the crucial step to prevent sparks near the dead battery. Attach the final black (negative) clamp to a clean, unpainted metal surface on the disabled vehicle's engine block, frame, or chassis away from the battery. A good ground point is often a strut tower bolt or a metal bracket.
- Start the Assisting Vehicle: Start the engine of the vehicle with the good battery and let it run for a few minutes. This allows the assisting vehicle to charge the dead battery slightly.
- Attempt to Start the Disabled Vehicle: After a few minutes, try to start the disabled vehicle. If it doesn't start immediately, let the assisting vehicle run for a few more minutes and try again. Avoid cranking the engine for more than 10-15 seconds at a time to prevent overheating the starter motor.
- Disconnect the Cables (Reverse Order): Once the disabled vehicle starts, carefully disconnect the jumper cables in the reverse order of connection. Remove the negative clamp from the grounded metal surface first, then the negative clamp from the assisting battery, then the positive clamp from the assisting battery, and finally the positive clamp from the now-charged battery.
- Let the Vehicle Run: After disconnecting the cables, let the jump-started vehicle run for at least 20-30 minutes to allow the alternator to recharge the battery fully. Driving the vehicle is preferable, as it puts a load on the alternator and facilitates faster charging.
Troubleshooting and Preventative Measures
If the vehicle still doesn't start after several attempts, there may be a more serious underlying issue than just a dead battery. Potential problems include a faulty starter motor, a bad alternator, or a corroded battery cable. In such cases, it's best to consult a qualified mechanic. Regular battery maintenance, such as cleaning the terminals and checking the electrolyte levels (if applicable), can significantly extend battery life. Consider using a battery tender or maintainer, especially if you frequently leave your vehicle unused for extended periods. Battery tenders deliver a low, consistent charge, preventing the battery from discharging and sulfating (a buildup of lead sulfate crystals on the battery plates, reducing its capacity).
Knowing the approximate age of your battery is also crucial. Most batteries have a date code stamped on the casing, indicating the month and year of manufacture. Batteries typically last between 3 and 5 years, depending on driving conditions and maintenance. Proactively replacing an aging battery before it fails can save you the inconvenience of a roadside breakdown. Finally, understanding your vehicle's electrical system – the alternator's output, the battery's cold cranking amps (CCA) rating, and the parasitic draw from accessories – will empower you to diagnose and address potential battery issues before they become critical.
