
Where Is The Downstream O2 Sensor Located
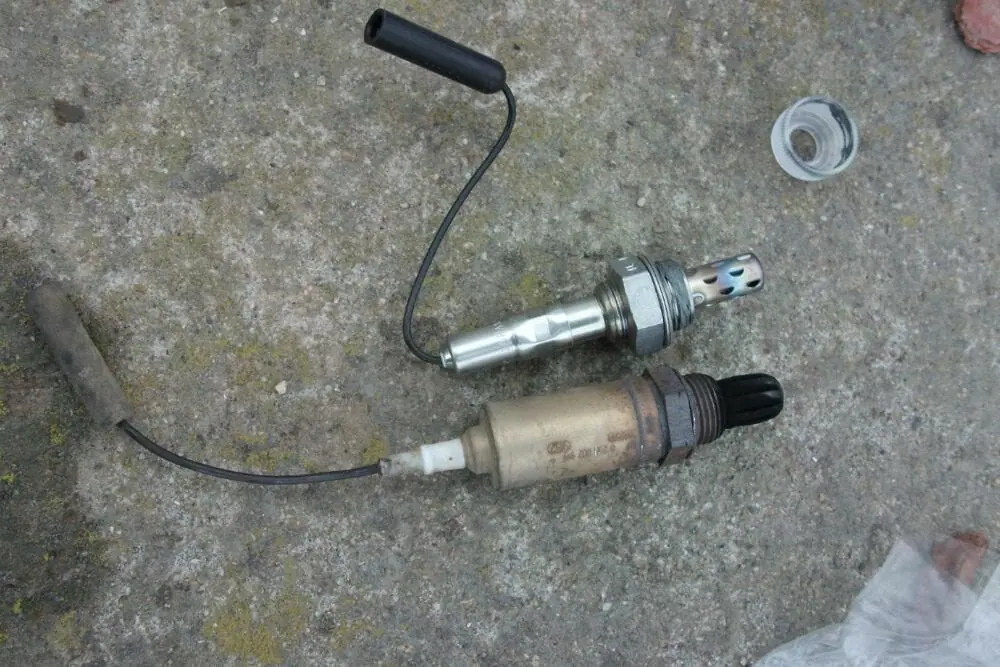
The downstream oxygen sensor, also known as the post-catalytic converter O2 sensor, plays a crucial role in modern automotive emission control systems. While often overshadowed by its upstream counterpart, its function is equally important in ensuring efficient engine operation and minimizing harmful pollutants. Understanding its location, purpose, and operation is key to diagnosing and maintaining your vehicle's performance and environmental compliance.
Purpose of the Downstream O2 Sensor
Unlike the upstream O2 sensor, which measures the oxygen content of the exhaust gas before it enters the catalytic converter, the downstream O2 sensor monitors the oxygen content after the exhaust gas has passed through the converter. This allows the engine control unit (ECU) to assess the effectiveness of the catalytic converter. The primary function of the catalytic converter is to reduce harmful emissions like hydrocarbons (HC), carbon monoxide (CO), and nitrogen oxides (NOx) into less harmful substances like carbon dioxide (CO2), water (H2O), and nitrogen (N2).
The downstream sensor provides feedback to the ECU, indicating how efficiently the converter is performing its chemical reactions. If the converter is functioning properly, the downstream O2 sensor readings should be relatively stable and show significantly less oxygen fluctuation compared to the upstream sensor. A failing or inefficient catalytic converter will result in increased oxygen fluctuations on the downstream sensor, signaling that the converter is not effectively reducing pollutants.
Here's a summary of its key functions:
- Catalytic Converter Monitoring: The primary purpose is to evaluate the efficiency of the catalytic converter.
- Emission Control: By monitoring converter performance, it helps maintain optimal emission levels.
- Diagnostic Information: It provides valuable data to the ECU, helping identify potential problems with the converter or other related systems.
- Fine-Tuning (Limited): In some advanced systems, the downstream sensor may provide minor adjustments to fuel trim, but this is secondary to the upstream sensor's role.
Locating the Downstream O2 Sensor
The downstream O2 sensor is typically located after the catalytic converter, further down the exhaust pipe. While the exact placement can vary depending on the vehicle make, model, and engine configuration, there are some common locations to check. Here's a breakdown:
General Location
The most common location is in the exhaust pipe, typically within a few feet after the catalytic converter. Look for a sensor that is threaded into the pipe, with wires leading to a connector. The sensor body is usually cylindrical, made of metal, and has a small, perforated sensor tip exposed to the exhaust gas.
Single Exhaust Systems
In vehicles with a single exhaust system, there's typically one catalytic converter and therefore one downstream O2 sensor located after it.
Dual Exhaust Systems
Vehicles with dual exhaust systems often have two catalytic converters, one for each bank of the engine (e.g., in a V6 or V8 engine). In this case, you'll likely find two downstream O2 sensors, one after each catalytic converter. Identifying which sensor corresponds to which bank is crucial for accurate diagnostics.
Inline Engines
For inline engines (like inline-4 or inline-6), the catalytic converter is usually located under the vehicle, near the engine or slightly further back along the exhaust pipe. The downstream O2 sensor will be found directly after it.
Specific Considerations
Heat Shields: Be aware that the downstream O2 sensor, like the upstream sensor and the catalytic converter itself, is often surrounded by heat shields to protect nearby components from excessive heat. You might need to remove or carefully move these shields to access the sensor.
Wiring Harness: Trace the wiring harness from the sensor back to its connector. This can help you pinpoint the sensor's location, especially in tight spaces. The connector is typically located in a relatively accessible area, often clipped to the chassis or exhaust system.
Sensor Design: O2 sensor design can vary slightly between manufacturers. Some downstream sensors may have longer or shorter bodies, different connector types, or even built-in protective shields. Familiarizing yourself with the specific sensor design for your vehicle can aid in locating it.
Using Repair Manuals: The best and most accurate way to find the downstream O2 sensor is to consult the vehicle's repair manual or a reliable online database. These resources usually provide detailed diagrams and instructions specific to your vehicle model.
Visual Inspection: A careful visual inspection of the exhaust system, starting from the catalytic converter and working your way downstream, is often the most effective method. Look for the characteristic sensor body and wiring harness.
Identifying a Faulty Downstream O2 Sensor
A faulty downstream O2 sensor can trigger the check engine light and store diagnostic trouble codes (DTCs). Common codes associated with the downstream sensor include P0420 (Catalyst System Efficiency Below Threshold) and related codes that indicate issues with the catalytic converter or sensor signal.
Other symptoms of a faulty downstream O2 sensor can include:
- Reduced fuel economy
- Failed emissions test
- Engine performance issues (although less pronounced than with a faulty upstream sensor)
Diagnosing a downstream O2 sensor typically involves using a scan tool to read the sensor's voltage output. A healthy sensor should show a relatively stable voltage, indicating that the catalytic converter is functioning properly. Erratic or fluctuating voltage readings, or a consistently low voltage, can indicate a problem with the sensor or the catalytic converter.
Replacing the Downstream O2 Sensor
Replacing a downstream O2 sensor is a relatively straightforward procedure, but it's important to follow safety precautions and use the correct tools. Here are the general steps:
- Disconnect the Negative Battery Terminal: This is a crucial safety step to prevent electrical shorts.
- Locate the Sensor and Disconnect the Connector: Carefully disconnect the wiring harness connector from the sensor.
- Remove the Old Sensor: Use an O2 sensor socket (a special socket with a slot for the wiring harness) to loosen and remove the old sensor. These sensors can often be seized into the exhaust pipe, so penetrating oil and patience may be required.
- Install the New Sensor: Apply anti-seize compound to the threads of the new sensor (if not already pre-applied). Install the new sensor by hand, then tighten it to the manufacturer's specified torque using the O2 sensor socket.
- Reconnect the Connector: Reconnect the wiring harness connector to the new sensor.
- Reconnect the Negative Battery Terminal: Reconnect the negative battery terminal.
- Clear Diagnostic Trouble Codes: Use a scan tool to clear any stored diagnostic trouble codes.
- Verify Proper Operation: Start the engine and monitor the downstream O2 sensor readings with a scan tool to ensure that the new sensor is functioning correctly.
Important Note: Always consult the vehicle's repair manual for specific instructions and torque specifications for replacing the downstream O2 sensor. Using the wrong torque can damage the sensor or the exhaust pipe.
By understanding the location, function, and troubleshooting procedures for the downstream O2 sensor, you can gain valuable insights into your vehicle's emission control system and ensure its optimal performance and environmental compliance. A healthy downstream O2 sensor not only contributes to cleaner air but also helps maintain fuel efficiency and prevent costly repairs down the road.