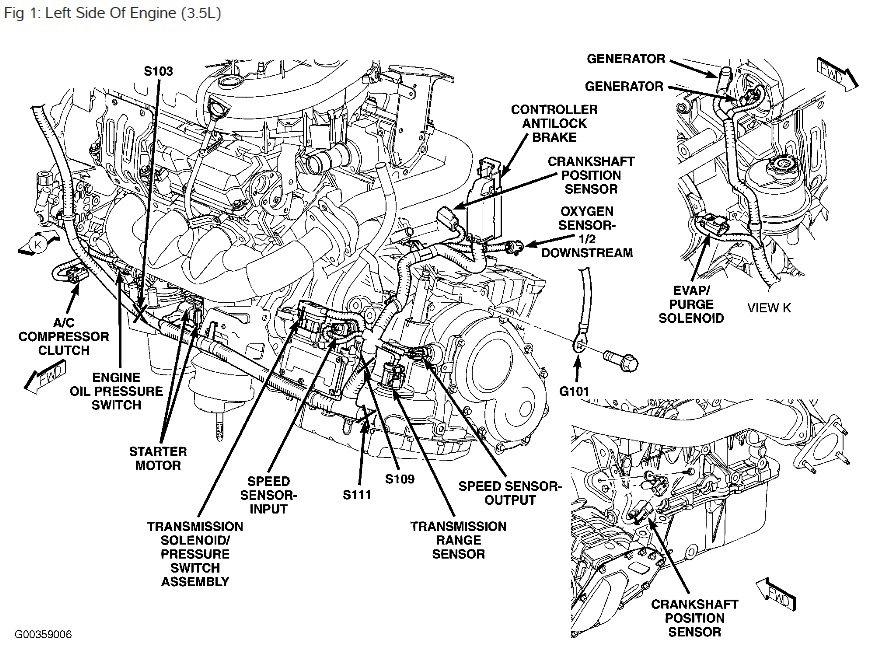
Where Is The Oxygen Sensor Bank 1 Located

So, you've got a check engine light blazing on your dash, and your code reader is screaming "P0131" or something equally cryptic involving "Oxygen Sensor Bank 1." Before you start frantically replacing every sensor in your exhaust system, let's get down to brass tacks: Where exactly is this Bank 1 oxygen sensor hiding? The answer, as with most things automotive, is "it depends."
Understanding Bank 1, Sensor 1 (and 2!)
First, a quick refresher. Modern cars use multiple oxygen sensors to monitor the efficiency of the catalytic converter. They're strategically placed before (upstream) and after (downstream) the catalytic converter. The "Bank 1" designation refers to the side of the engine containing cylinder number 1. If you have an inline engine, congrats! You only have one bank. If you have a V-engine (V6, V8, etc.), then you have two banks, each feeding into its own exhaust manifold.
Sensor numbers indicate the position relative to the catalytic converter. Sensor 1 is always upstream (before the cat), and Sensor 2 is downstream (after the cat).
Therefore, when troubleshooting code P0131, you are most likely looking for the oxygen sensor located before the catalytic converter on the side of the engine that contains cylinder number 1.
Locating the Beast: Model-Specific Examples
Let's explore a few common scenarios, highlighting the variations you'll encounter.
Scenario 1: Inline-Four Engine (e.g., Honda Civic, Toyota Corolla)
These are usually the easiest to diagnose. With only one exhaust manifold and a single catalytic converter, Bank 1 is the only bank!
Location: The upstream (Sensor 1) oxygen sensor is typically found screwed into the exhaust manifold, very close to where the manifold bolts to the cylinder head. The downstream (Sensor 2) sensor is screwed into the exhaust pipe after the catalytic converter.
Scenario 2: V6 Engine (e.g., Nissan Altima, Honda Accord V6)
Things get more interesting here. You have two banks, meaning you need to identify which bank contains cylinder #1. This information is typically found in your car's repair manual (or a quick Google search!).
Location: Once you know which bank is Bank 1, the upstream sensor (Sensor 1) will be located on that bank's exhaust manifold, before the catalytic converter dedicated to that bank. The downstream sensor (Sensor 2) will be after that catalytic converter.
Common Pitfalls: V6 engines often have limited space to work in. Access can be difficult, requiring special oxygen sensor sockets and extensions. Always disconnect the battery before working on electrical components.
Scenario 3: V8 Engine (e.g., Ford Mustang GT, Chevrolet Corvette)
Similar to the V6, but often with more complexity due to exhaust system design.
Location: Follow the same principle as the V6 – identify Bank 1, then locate the upstream oxygen sensor on that bank's exhaust manifold. Some V8s use multiple catalytic converters per bank, so be sure to pinpoint the sensor *before* the first cat.
Extra Credit: Wideband Sensors. Some high-performance vehicles use wideband oxygen sensors (also known as Air-Fuel Ratio sensors or AFR sensors) as their upstream sensors. These are more precise and react faster than traditional narrowband sensors. While the location is the same, replacement can be pricier.
Spec Table: Sensor Differences
| Sensor Type | Voltage Range (Typical) | Function | Cost (Approximate) |
|---|---|---|---|
| Narrowband | 0-1 Volt | Detects rich/lean conditions | $20-$50 |
| Wideband (AFR) | Variable, requires special meter | Measures precise air/fuel ratio | $80-$200+ |
Pros and Cons of DIY Oxygen Sensor Replacement
- Pros:
- Significant cost savings compared to a mechanic.
- Sense of accomplishment.
- Learn about your car's engine.
- Cons:
- Can be difficult to access in tight spaces.
- Risk of damaging the exhaust manifold or sensor threads.
- Requires basic tools and mechanical knowledge.
Real-World Driving Impressions: Sensor Health Matters!
I once replaced a faulty upstream oxygen sensor on my old '98 BMW 328i. Before the swap, the car felt sluggish, and fuel economy was atrocious. After installing the new sensor, the difference was night and day! The throttle response was noticeably sharper, and I gained about 3 mpg. A healthy oxygen sensor is crucial for optimal engine performance and fuel efficiency. Don't neglect it!
Similarly, a friend had a terrible experience with his turbo Subaru. He ignored the check engine light for far too long, and the faulty oxygen sensor caused the engine to run excessively rich, leading to premature catalytic converter failure – a much more expensive repair!
Important Considerations
- Use the Right Sensor: Match the correct sensor to your vehicle's make, model, and engine. Use a parts finder on a reputable auto parts website.
- Penetrating Oil: Generously apply penetrating oil to the sensor threads several hours (or even a day) before attempting removal.
- O2 Sensor Socket: Invest in a dedicated oxygen sensor socket with a slot for the wiring harness. It will make the job much easier.
- Torque Correctly: Don't overtighten the new sensor. Use a torque wrench and follow the manufacturer's specifications.
So, armed with this knowledge, you should be well-equipped to locate and potentially replace that Bank 1 oxygen sensor. Remember safety first, and don't hesitate to consult a professional if you're unsure. Happy wrenching!
Fun Fact & Debate Starter: Some argue that aftermarket oxygen sensors are just as good (or even better!) than OEM sensors, especially at a fraction of the price. Others swear by sticking with the original manufacturer. Where do you stand on the aftermarket vs. OEM oxygen sensor debate? Let the comments begin!
