08 Nissan Altima Front Bumper
Alright, let's talk about the front bumper of your 2008 Nissan Altima. This isn't just a cosmetic piece; it's a critical component for safety, aerodynamics, and even pedestrian protection. We'll go over its construction, removal, installation, and some common issues you might encounter. Think of this as your comprehensive guide to understanding and working on this part of your vehicle.
Bumper Assembly and Construction
The 2008 Altima's front bumper isn't a single piece of plastic. It's a carefully engineered assembly, usually constructed from several components:
- Bumper Cover: This is the painted, visible part you see. It's typically made of thermoplastic olefin (TPO), a type of plastic known for its flexibility and impact resistance. TPO allows the bumper to absorb minor impacts without shattering.
- Bumper Reinforcement: Located behind the cover, this is usually a metal or reinforced plastic beam. Its primary job is to absorb and distribute energy during a collision. It's often bolted directly to the vehicle's frame or to energy absorbers.
- Energy Absorbers (Crush Zones): These are typically made of foam or a honeycomb-like plastic structure. They sit between the bumper reinforcement and the vehicle's frame. Their purpose is to further absorb impact energy, protecting the occupants of the car. Think of them as sacrificial components designed to crumple in a crash.
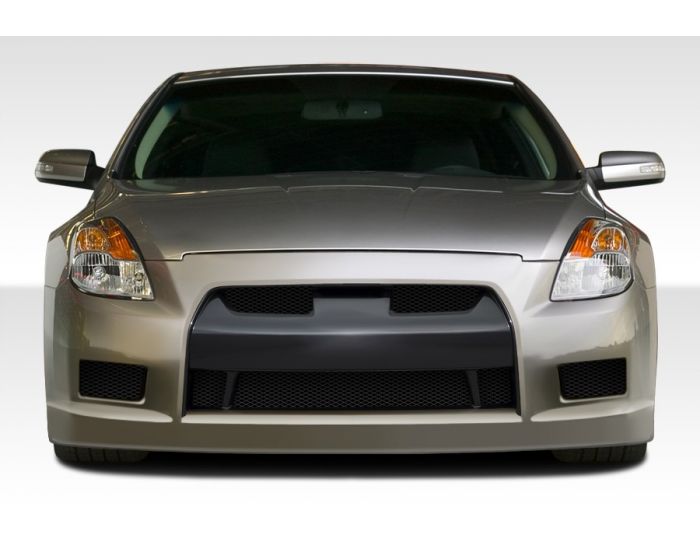
- Fog Light Housings (If Equipped): Some models include integrated fog lights within the bumper cover. These housings often have separate mounting points and wiring harnesses.
- Lower Valance/Spoiler: This is an optional piece that attaches to the bottom of the bumper cover. It can improve aerodynamics and give the car a sportier look.
- Mounting Brackets: These brackets, usually made of plastic or metal, attach the bumper assembly to the car's fender and body. They are often a weak point in the system and prone to damage in minor collisions.
Understanding this layered construction is crucial for diagnosing damage and planning repairs. A seemingly minor scrape on the cover could indicate more significant damage to the reinforcement or energy absorbers underneath.
Removal Procedure
Before you start any work, disconnect the negative terminal of your battery. This will prevent any accidental electrical shorts, especially if you're working near the fog lights or any other electrical components integrated into the bumper.
Here's a general outline of the removal process. Keep in mind that minor variations may exist depending on your specific Altima trim level:
- Locate and remove fasteners: Start by identifying all the screws, bolts, and plastic retainers (clips) holding the bumper in place. Look for fasteners in the following locations:
- Underneath the bumper, along the lower edge. These usually attach the bumper to the splash shield.
- Inside the wheel wells, where the bumper meets the fender.
- Along the top edge of the bumper, near the grille and headlights. These may be hidden under plastic trim pieces.
- Sometimes, there are fasteners hidden behind the fog light housings (if equipped). You may need to remove the fog lights to access them.
Pro-Tip: Use a small flathead screwdriver or a trim removal tool to gently pry out the plastic retainers without breaking them. Having a set of these tools is invaluable for working on modern cars.
- Detach the Splash Shield: The splash shield (also called an underbody panel) is usually attached to the bottom of the bumper. Remove any screws or clips securing it to the bumper. You may need to partially or fully remove the splash shield for easier access to the bumper fasteners.
- Disconnect Electrical Connectors: If your Altima has fog lights or parking sensors integrated into the bumper, carefully disconnect the wiring harnesses. Make sure to note the orientation of the connectors before disconnecting them. Use a small screwdriver to gently release any locking tabs.
- Carefully Pull the Bumper Forward: Once all fasteners and electrical connections are removed, gently pull the bumper forward. Start from one side and work your way to the other. Be careful not to scratch the fenders or damage any wiring. The bumper may be held in place by plastic clips or guides. Apply gentle but firm pressure to release them.
Once the bumper is free, carefully set it down on a soft surface (like a blanket or a piece of cardboard) to prevent scratches.
Installation Procedure
Installation is essentially the reverse of removal. However, pay close attention to these key points:
- Inspect for Damage: Before installing the bumper, inspect the mounting brackets, reinforcement, and energy absorbers for any signs of damage. Replace any damaged components.
- Align the Bumper: Carefully align the bumper with the fenders and the body of the car. Make sure all the mounting points line up correctly.
- Reattach Fasteners: Start by loosely installing all the fasteners. This will allow you to make minor adjustments to the bumper's alignment. Once you're satisfied with the alignment, tighten all the fasteners to the specified torque. Refer to your vehicle's service manual for the correct torque specifications. Over-tightening can damage the plastic components.
- Reconnect Electrical Connectors: Reconnect all the electrical connectors for the fog lights and other accessories. Make sure the connectors are securely locked in place.
- Reattach the Splash Shield: Reattach the splash shield to the bottom of the bumper.
Important Note: If you're replacing the bumper cover, you may need to transfer over some components from the old bumper, such as the fog light housings or the lower valance. Be careful when removing these components, as they can be brittle and easily damaged.
Common Issues and Troubleshooting
Here are some common problems you might encounter when dealing with the 2008 Altima's front bumper:
- Sagging Bumper: This is often caused by broken or damaged mounting brackets. The plastic brackets can become brittle over time, especially in hot climates. Replace the damaged brackets to restore the bumper's alignment.
- Loose Bumper: This could be due to missing or stripped fasteners. Replace any missing fasteners and repair any stripped threads. You can use thread repair inserts (like Heli-Coil) to repair stripped threads in plastic components.
- Misaligned Bumper: This can be caused by a previous collision or by improper installation. Loosen the fasteners and carefully realign the bumper. If the bumper is still misaligned, there may be underlying damage to the frame or body of the car.
- Fog Light Problems: If the fog lights are not working, check the bulbs, fuses, and wiring connections. The wiring harnesses for the fog lights can sometimes become damaged or corroded.
- Paint Damage: Scratches and chips in the paint are common, especially on the lower edge of the bumper. You can repair minor paint damage with touch-up paint. For more extensive damage, you may need to repaint the entire bumper cover.
Tools and Materials
Here's a list of tools and materials you'll likely need for removing and installing a 2008 Nissan Altima front bumper:
- Socket set
- Wrench set
- Screwdrivers (Phillips and flathead)
- Trim removal tool set
- Plastic retainers (clips) - have spares on hand!
- Torque wrench
- Gloves
- Safety glasses
- Floor jack and jack stands (optional, but helpful for accessing the underside of the bumper)
- Vehicle service manual (for torque specifications and detailed instructions)
Aftermarket Options and Upgrades
There are numerous aftermarket options available for the 2008 Altima's front bumper. These include:
- Sport Bumpers: These bumpers often have more aggressive styling and can improve the car's aerodynamics.
- Performance Bumpers: These bumpers are designed for high-performance applications and may include features like larger air intakes for improved cooling.
- Custom Bumpers: You can also find custom-made bumpers that are designed to be unique and eye-catching.
When choosing an aftermarket bumper, make sure it is made from high-quality materials and is designed to fit your specific Altima model. Also, be aware that some aftermarket bumpers may not meet federal safety standards.
Modifying the bumper is generally within the realm of experienced DIYers. Always prioritize safety and proper fitment. Remember, the bumper plays a crucial role in protecting your vehicle and its occupants in the event of a collision. If you are not comfortable working on the bumper yourself, it's best to take it to a qualified mechanic.