08 Nissan Titan Front Bumper
Alright, let's talk about the front bumper on your 2008 Nissan Titan. It's more than just a cosmetic piece; it plays a crucial role in safety and protecting vital components. This guide will give you a detailed look at its construction, common issues, removal/installation process, and potential upgrades you might consider.
Understanding the 2008 Titan's Front Bumper
The factory front bumper on the 2008 Titan is typically a combination of steel and plastic. The main structural component is usually a steel bumper beam, which sits behind the outer plastic fascia. This beam is designed to absorb impact in a collision. Think of it as the first line of defense.
The plastic fascia, often referred to as the bumper cover, is primarily for aesthetics and aerodynamics. It's usually made of polypropylene (PP) or a similar impact-resistant plastic. It’s what you see from the outside, and it’s typically painted to match the truck's color. Different trim levels might have slight variations in the fascia design, particularly around the fog light openings (if equipped).
Several smaller components attach to the bumper assembly:
- Fog lights (if equipped): These are usually mounted within the bumper fascia.
- Bumper brackets: These are steel or aluminum brackets that connect the bumper beam to the truck's frame. They’re crucial for proper alignment and impact transfer.
- Lower valance: This is a plastic piece that sits below the bumper, improving aerodynamics and sometimes providing additional protection.
- Impact absorbers (foam pads): Located between the bumper beam and the fascia, these pads help cushion minor impacts and prevent damage to the fascia.
The entire assembly is designed to meet specific Federal Motor Vehicle Safety Standards (FMVSS), particularly those related to low-speed impact protection. This means it's engineered to withstand certain impacts without causing damage to critical vehicle systems.
Common Issues with the 2008 Titan Front Bumper
Over time, several issues can arise with the front bumper:
- Damage from collisions: This is the most obvious. Even low-speed impacts can crack or break the plastic fascia, bend the bumper beam, or damage the mounting brackets.
- Rust: In regions with harsh winters or road salt, the steel bumper beam and brackets can be susceptible to rust. Surface rust is often cosmetic, but severe rust can weaken the structure.
- Faded or cracked fascia: Prolonged exposure to sunlight and weather can cause the plastic fascia to fade, crack, or become brittle.
- Loose mounting hardware: The bolts and fasteners that hold the bumper assembly together can loosen over time due to vibration.
- Damaged fog lights: Rocks and debris can easily damage fog lights, especially if the lens is cracked.
Diagnosing these issues is usually straightforward. A visual inspection is often sufficient to identify cracks, dents, rust, or loose components. To check for underlying damage to the bumper beam, you may need to remove the fascia. Look for any bends, creases, or signs of rust.
Front Bumper Removal and Installation: A Step-by-Step Guide
Before you start, always disconnect the negative terminal of your battery. This will prevent any accidental electrical shorts, especially if you're working near fog lights or other electrical components.
Tools you'll need:
- Socket set (metric)
- Wrench set (metric)
- Screwdrivers (Phillips and flathead)
- Pliers
- Penetrating oil (e.g., WD-40)
- Jack and jack stands (optional, but recommended for easier access)
- Torque wrench
- Plastic trim removal tools (optional, but helpful)
Step 1: Preparation
Park the Titan on a level surface and engage the parking brake. If you're working on the ground, use jack stands to safely lift the front of the truck. This will give you more room to maneuver. Spray penetrating oil on any rusted bolts or fasteners that you anticipate might be difficult to remove.
Step 2: Disconnect Electrical Connectors
If your Titan has fog lights, disconnect the electrical connectors to them. These are usually located behind the bumper fascia. Carefully detach the connectors, being mindful not to damage the wiring or connectors themselves. There might also be connectors for parking sensors, if equipped.
Step 3: Remove the Lower Valance (if equipped)
The lower valance is usually attached with a combination of screws, bolts, and plastic clips. Use a screwdriver or plastic trim removal tool to carefully detach it. Start by removing any visible screws or bolts, then gently pry the valance away from the bumper. Be careful not to break the plastic clips. Save all the hardware for reinstallation.
Step 4: Remove the Bumper Fascia
The bumper fascia is typically attached to the bumper beam with a combination of bolts, screws, and plastic clips. Start by removing any visible bolts or screws, usually located around the edges of the fascia and in the wheel wells. Then, carefully pry the fascia away from the bumper beam, working your way around the perimeter. Use plastic trim removal tools to avoid damaging the paint or plastic. You might need to gently flex the fascia to release it from the clips.
Step 5: Remove the Bumper Beam
The bumper beam is attached to the truck's frame with bumper brackets. These brackets are usually secured with several large bolts. Locate these bolts and remove them. The bumper beam can be heavy, so it's best to have a helper support it while you remove the last bolt. If the bolts are rusted, use penetrating oil and a breaker bar to loosen them. Once the bolts are removed, carefully detach the bumper beam from the frame. Inspect the brackets for any signs of damage or rust. If they're damaged, replace them.
Step 6: Installation
Installation is essentially the reverse of removal.
- Install the Bumper Beam: Position the bumper beam onto the frame brackets and align the bolt holes. Install the bolts and tighten them to the torque specification recommended by Nissan. This is crucial for ensuring the bumper is securely attached and can properly absorb impact. Refer to a service manual for the correct torque values.
- Install the Bumper Fascia: Align the bumper fascia with the bumper beam and carefully snap it into place. Make sure all the clips are securely engaged. Install the bolts and screws that you removed earlier.
- Install the Lower Valance: Align the lower valance and attach it with the screws, bolts, and clips.
- Reconnect Electrical Connectors: Reconnect the electrical connectors for the fog lights (if equipped) and any other electrical components.
- Test the Lights: Turn on the ignition and test the fog lights to make sure they are working properly.
Step 7: Final Check
Double-check that all bolts and fasteners are tightened properly. Inspect the bumper assembly to make sure it's properly aligned and securely attached. Lower the truck (if you used jack stands) and you're done.
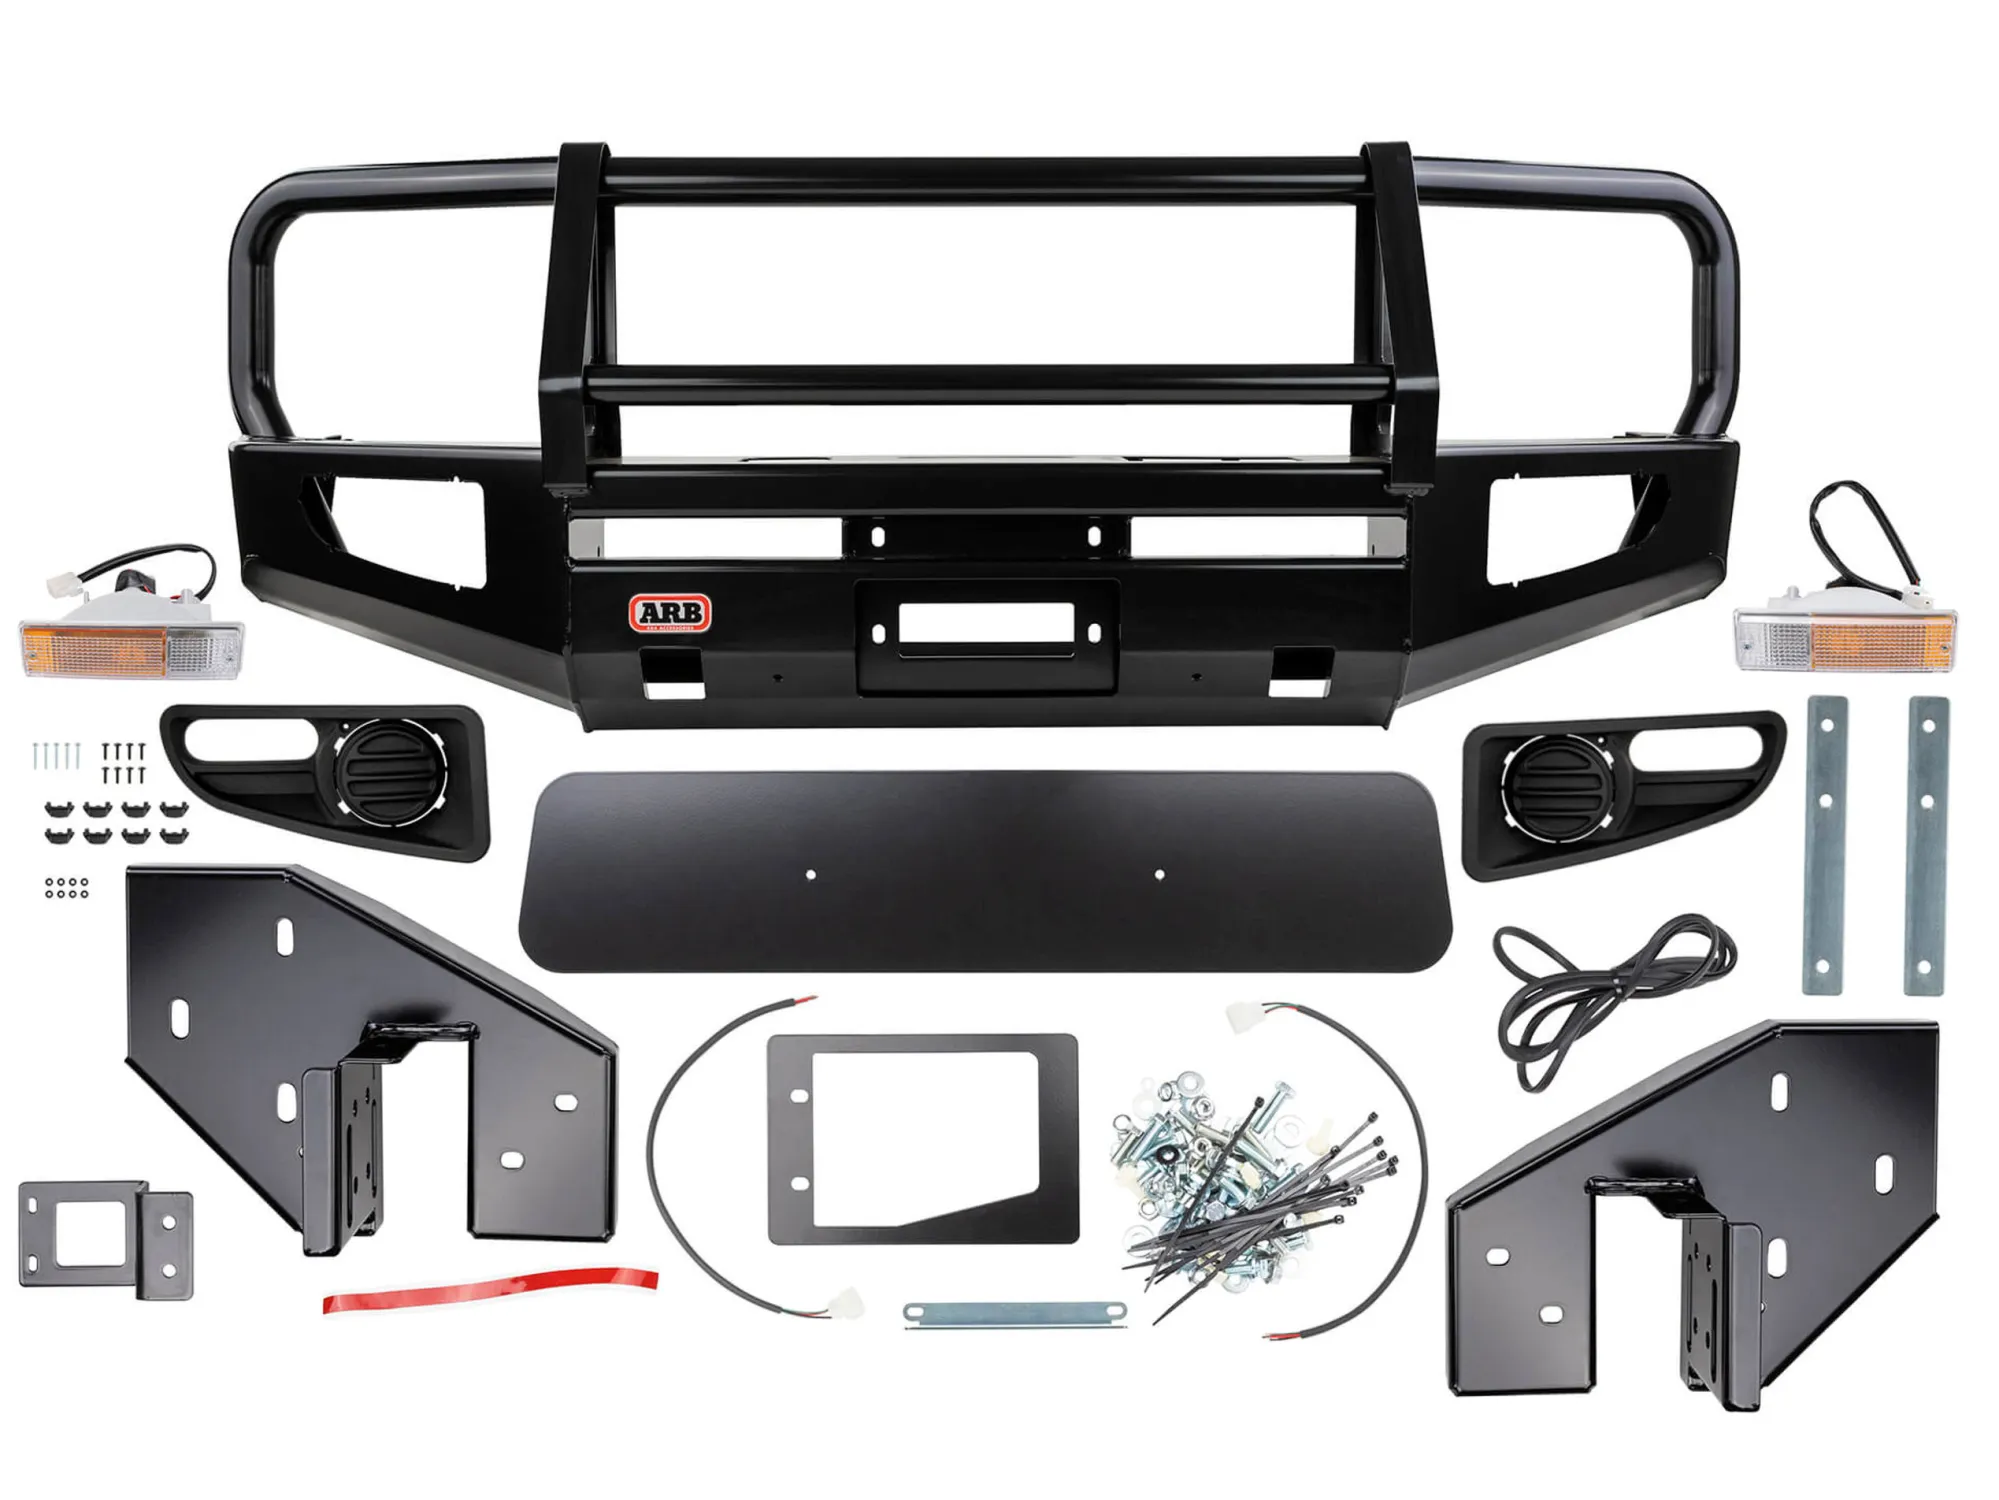
Upgrading Your 2008 Titan's Front Bumper
There are several reasons why you might want to upgrade your Titan's front bumper:
- Increased Protection: Aftermarket bumpers, particularly those made of heavy-duty steel, can provide significantly more protection in off-road situations or collisions.
- Improved Aesthetics: Many aftermarket bumpers offer a more aggressive or rugged look.
- Additional Features: Some aftermarket bumpers include features like winch mounts, light bars, or brush guards.
When choosing an aftermarket bumper, consider the following factors:
- Material: Steel bumpers are generally stronger and more durable than aluminum bumpers, but they are also heavier.
- Weight: A heavy bumper can negatively impact fuel economy and handling.
- Compatibility: Make sure the bumper is specifically designed for your 2008 Nissan Titan.
- Features: Choose a bumper with the features that you need, such as a winch mount or light bar.
- Installation: Some aftermarket bumpers require professional installation.
Popular aftermarket bumper brands for the Nissan Titan include ARB, Ranch Hand, Fab Fours, and Road Armor. Be sure to research different options and read reviews before making a purchase.
A word of caution: Upgrading your bumper can affect the crashworthiness of your vehicle. Choose a reputable brand and ensure the bumper is properly installed to maintain safety. Some modifications may also affect your vehicle's warranty or compliance with local regulations.
By understanding the construction, common issues, and removal/installation process of your 2008 Nissan Titan's front bumper, you can confidently tackle repairs, maintenance, and even upgrades. Remember to always prioritize safety and consult a professional mechanic if you're unsure about any aspect of the process.