2000 Nissan Xterra Water Pump
So, you're having trouble with your 2000 Nissan Xterra's water pump? Don't worry, you're not alone. These Xterras are fantastic vehicles, but like any car of that age, certain parts are bound to wear out. A failing water pump is a common issue, and luckily, it's usually a repair that's straightforward enough for a reasonably handy person to tackle. Let's get into the symptoms, the causes, and what you can do about it.
Symptoms of a Failing Water Pump
Before we dive into the repair itself, let's confirm that the water pump is indeed the culprit. Here are the most common signs your 2000 Xterra's water pump is on its way out:
- Overheating: This is the most obvious sign. If your temperature gauge is constantly creeping towards the red, especially during stop-and-go traffic or uphill climbs, a failing water pump could be the reason. The pump isn't circulating coolant effectively, leading to the engine overheating.
- Coolant Leaks: Take a look under the front of your Xterra, especially near the center. Do you see a puddle of coolant (usually green, orange, or sometimes even pink)? Coolant leaking from the water pump is a strong indicator of a problem. Look closely for drips coming from the weep hole on the pump itself.
- Noisy Water Pump: Listen carefully when the engine is running, especially at idle. A failing water pump often makes a grinding, whining, or squealing noise. This is usually caused by worn bearings inside the pump.
- Low Coolant Level: Are you constantly having to top off your coolant reservoir? Even without visible leaks, a failing water pump might be slowly leaking coolant internally, leading to a constantly decreasing coolant level.
- Steam Coming From the Engine Bay: In severe cases, a completely failed water pump can cause the engine to overheat so dramatically that steam starts pouring out from under the hood. If this happens, stop driving immediately to avoid further engine damage.
If you're experiencing one or more of these symptoms, chances are your water pump is indeed failing. Now let's talk about why these pumps fail in the first place.
Causes of Water Pump Failure
Several factors can contribute to the demise of your 2000 Xterra's water pump:
- Age and Mileage: Simply put, water pumps wear out over time. The bearings, seals, and impeller (the part that actually circulates the coolant) are all subject to wear and tear. After 100,000 miles or more, a water pump replacement is often considered preventative maintenance.
- Coolant Condition: Using the wrong type of coolant, or neglecting to flush and replace the coolant regularly, can significantly shorten the lifespan of the water pump. Old, acidic coolant can corrode the pump's internal components, leading to leaks and premature failure.
- Contamination: Debris, rust, and scale in the cooling system can damage the water pump's seals and impeller. This is another reason why regular coolant flushes are so important.
- Loose or Damaged Belt: The water pump is driven by the engine's serpentine belt. If the belt is loose, cracked, or damaged, it can cause the water pump to vibrate excessively, leading to premature wear.
- Overheating: Repeated overheating episodes can put excessive stress on the water pump, causing it to fail prematurely.
Understanding these causes can help you prevent future water pump failures. Now, let's get to the heart of the matter: replacing the water pump.
Replacing the Water Pump on a 2000 Nissan Xterra
Replacing the water pump on a 2000 Nissan Xterra is a moderately challenging job that can be done at home with the right tools and a bit of mechanical know-how. Here's a step-by-step guide, but remember to consult your Xterra's repair manual for specific instructions and torque specifications.
Tools You'll Need:
- New Water Pump: Make sure to get the correct water pump for your 2000 Xterra's engine (either the 3.3L V6 or the 2.4L inline-4).
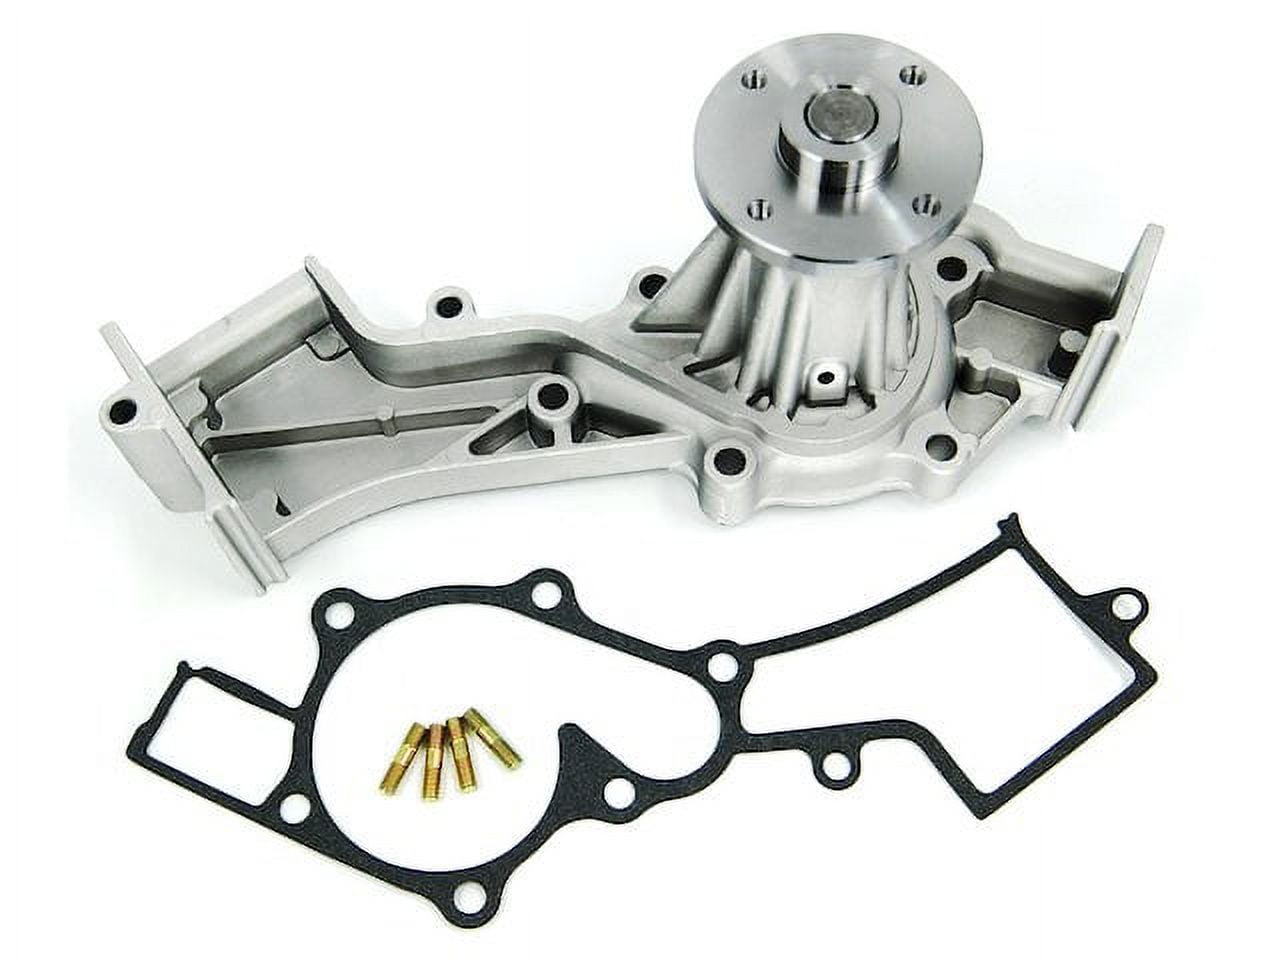
- New Water Pump Gasket: This is essential for a leak-free seal. Some water pumps come with a gasket, but it's always a good idea to double-check.
- Coolant: Use the correct type of coolant specified for your Xterra.
- Wrenches and Sockets: You'll need a variety of metric wrenches and sockets, including a socket for removing the fan clutch (if applicable).
- Pliers: For disconnecting hoses.
- Screwdrivers: Both flathead and Phillips head.
- Torque Wrench: Crucial for tightening bolts to the correct specifications.
- Drain Pan: To catch the old coolant.
- Funnel: For refilling the coolant.
- Gloves and Safety Glasses: Protect yourself!
- Jack and Jack Stands: To safely lift the vehicle (if necessary for access).
- Penetrating Oil: For loosening stubborn bolts.
- Shop Rags: For cleaning up spills.
- Repair Manual: A Haynes or Chilton manual is highly recommended.
Step-by-Step Instructions:
- Disconnect the Battery: Safety first! Disconnect the negative battery cable to prevent any electrical accidents.
- Drain the Coolant: Locate the drain plug on the bottom of the radiator (or on the engine block if the radiator doesn't have one) and place a drain pan underneath. Open the drain plug to allow the coolant to drain completely. Dispose of used coolant properly. It's toxic to animals and humans.
- Remove the Fan Shroud and Fan: The fan shroud is usually held in place by clips or bolts. Remove it to gain access to the fan. Then, use the appropriate wrench to loosen and remove the fan clutch nut (if applicable). Some Xterras have an electric fan, in which case you'll need to disconnect the electrical connector and remove the fan mounting bolts.
- Remove the Serpentine Belt: Locate the tensioner pulley and use a wrench or socket to relieve the tension on the belt. Slide the belt off the water pump pulley. It's a good idea to inspect the belt for wear and replace it if necessary.
- Disconnect Hoses: Carefully disconnect the hoses connected to the water pump. Be prepared for some coolant to spill out. Use pliers to loosen the hose clamps.
- Remove the Water Pump Pulley: The water pump pulley is usually held in place by bolts. Remove these bolts and carefully remove the pulley.
- Remove the Water Pump: Now you can access the water pump itself. It's usually held in place by several bolts. Use a wrench or socket to remove these bolts. You may need to use penetrating oil to loosen stubborn bolts. Once all the bolts are removed, carefully pry the water pump loose from the engine block.
- Clean the Mounting Surface: Use a scraper or razor blade to thoroughly clean the mounting surface on the engine block. Remove any old gasket material or corrosion. A clean surface is essential for a good seal.
- Install the New Water Pump: Install the new water pump gasket onto the water pump. Then, carefully position the water pump onto the engine block and align the bolt holes. Install the bolts and tighten them to the manufacturer's specified torque using a torque wrench.
- Reinstall the Water Pump Pulley: Reinstall the water pump pulley and tighten the bolts to the correct torque.
- Reconnect Hoses: Reconnect the hoses to the water pump and secure them with hose clamps.
- Reinstall the Serpentine Belt: Reinstall the serpentine belt, making sure it's properly routed around all the pulleys. Relieve the tension on the tensioner pulley and slide the belt onto the water pump pulley.
- Reinstall the Fan and Fan Shroud: Reinstall the fan and fan shroud. Tighten the fan clutch nut (if applicable) to the correct torque. Reconnect the electrical connector if you have an electric fan.
- Refill the Coolant: Slowly refill the cooling system with the correct type of coolant. Be sure to bleed the air out of the system according to your Xterra's repair manual.
- Reconnect the Battery: Reconnect the negative battery cable.
- Start the Engine and Check for Leaks: Start the engine and let it run for a few minutes. Carefully inspect the water pump and hoses for any leaks. Also, monitor the temperature gauge to make sure the engine is not overheating.
That's it! You've successfully replaced the water pump on your 2000 Nissan Xterra.
Estimated Repair Costs
If you're not comfortable tackling this job yourself, you can always take your Xterra to a mechanic. Here's a breakdown of the estimated costs:
- Parts: The cost of a new water pump can range from $50 to $200, depending on the brand and quality.
- Labor: Labor costs can vary depending on the shop rate, but you can expect to pay between $200 and $400 for labor.
- Total Cost: The total cost of replacing the water pump at a shop can range from $250 to $600.
Doing it yourself can save you a significant amount of money, but it's important to weigh the costs and benefits. If you're not confident in your mechanical abilities, it's always best to consult with a professional.
Preventative Maintenance Tips
To help prevent future water pump failures, consider these preventative maintenance tips:
- Regular Coolant Flushes: Flush and replace the coolant every 30,000 miles or every two years, whichever comes first.
- Use the Correct Coolant: Always use the type of coolant specified for your Xterra.
- Inspect the Serpentine Belt: Regularly inspect the serpentine belt for wear and replace it if necessary.
- Address Overheating Issues Promptly: If your Xterra is overheating, address the issue immediately to prevent further damage to the water pump and other engine components.
By following these tips, you can help extend the life of your water pump and keep your 2000 Nissan Xterra running smoothly for years to come. Good luck!