2004 Nissan Frontier V6 Timing Belt Water Pump Replacement Cost
Alright, let's talk about tackling a timing belt and water pump replacement on your 2004 Nissan Frontier with the V6 engine (the VG33E). This is a maintenance job that's often dreaded, but with the right knowledge and preparation, it's definitely achievable for the experienced DIYer. Understanding the costs involved is crucial, so we'll break down everything from parts to potential pitfalls.
Why a Timing Belt and Water Pump Replacement?
First, let's establish the importance. The timing belt is a critical component. It's a reinforced rubber belt responsible for synchronizing the crankshaft (which drives the pistons) and the camshaft(s) (which control the valves). If the timing belt breaks, the pistons can collide with the valves, resulting in catastrophic engine damage. Think bent valves, damaged pistons, and potentially a ruined cylinder head. This is why it's preventative maintenance.
The water pump is also vital. It circulates coolant throughout the engine, preventing overheating. The water pump is often driven by the timing belt, so it's a common practice to replace them together. Why? Because labor is a significant cost, and if the water pump fails shortly after replacing the timing belt, you'll be paying for essentially the same labor twice. Plus, a failing water pump can leak coolant onto the timing belt, degrading it prematurely.
The VG33E Engine's Particulars
The VG33E is an interference engine. This means that if the timing is off, or the belt breaks, the valves and pistons will definitely collide. Some engines are non-interference, where the valves have enough clearance to avoid hitting the pistons, even if the timing belt fails. The VG33E, unfortunately, is not one of them. Pay close attention to timing marks during installation!
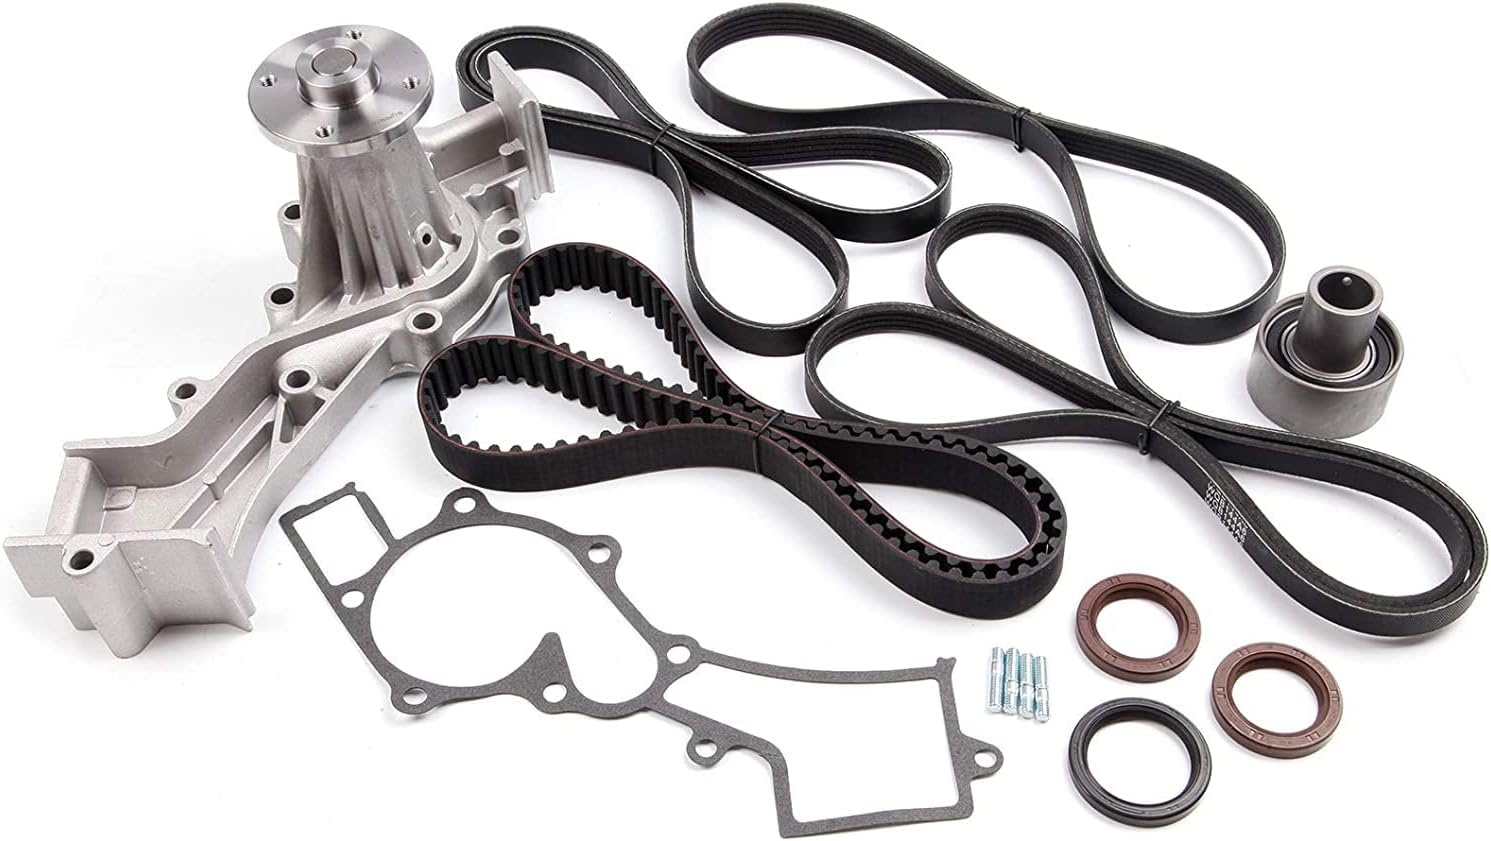
Cost Breakdown: Parts
Let's delve into the costs. Parts prices can vary depending on the brand and where you purchase them. Here's a general idea:
- Timing Belt Kit: This is typically the most expensive part. A good kit will include the timing belt itself, tensioner pulley, and idler pulley. Expect to pay anywhere from $80 to $250 for a reputable brand like Aisin, Gates, or Continental. Pay attention to the quality of the belt; cheaper belts can stretch or crack prematurely.
- Water Pump: Again, brand matters. Aim for a pump with a good reputation for reliability. Prices range from $40 to $150. Consider a pump with a metal impeller rather than a plastic one for added durability.
- Thermostat: While you're in there, it's a good idea to replace the thermostat. It's inexpensive (around $10 to $30) and regulates engine temperature.
- Coolant: You'll need to drain and refill the cooling system. Use the correct type of coolant specified for your Frontier. Figure on about $20 to $40 for the necessary amount. Nissan often recommends a specific type of coolant, so check your owner's manual or consult a reputable parts supplier.
- Drive Belts (Serpentine Belts): Since you'll have access to them, it's wise to inspect and potentially replace the drive belts (for the alternator, power steering, and AC compressor). They're relatively inexpensive, typically $15-$30 each.
- Camshaft Seals and Crankshaft Seal: These seals can leak over time. Replacing them while the timing belt is off provides easy access and can prevent future oil leaks. Expect to pay around $5-$15 per seal.
Total Parts Cost: A reasonable estimate for all the necessary parts would be between $170 and $500, depending on the brands you choose and whether you opt to replace the seals and drive belts.
Cost Breakdown: Labor (If Not DIY)
If you're not comfortable tackling this job yourself, labor costs can be significant. This is a fairly involved process, requiring several hours of work. Labor rates vary widely depending on your location and the mechanic's hourly rate, but here's a general estimate:
- Labor Time: Expect the job to take anywhere from 6 to 10 hours.
- Hourly Rate: Mechanics' hourly rates can range from $80 to $150 (or more in some areas).
Total Labor Cost: This translates to a labor cost of $480 to $1500. Combining parts and labor, you're looking at a total cost of $650 to $2000 if you have a shop do the work.
DIY: Tools and Considerations
If you're attempting this yourself, you'll need a good set of tools. Here's a rundown of essentials:
- Socket Set: Metric sockets are a must.
- Wrenches: A variety of metric wrenches will be needed.
- Torque Wrench: Absolutely essential for properly tightening bolts, especially the timing belt tensioner. Over- or under-tightening can lead to premature failure.
- Pliers: Various types for removing hoses and clips.
- Screwdrivers: Both Phillips and flathead.
- Timing Light (Optional): For checking and adjusting ignition timing after the job is complete. Not strictly necessary but recommended.
- Coolant Drain Pan: To catch the old coolant.
- Jack and Jack Stands: For safely lifting and supporting the vehicle. Never work under a vehicle supported only by a jack!
- Wheel Chocks: For added safety.
- Penetrating Oil: For loosening stubborn bolts.
- Service Manual: A repair manual (Haynes or Chilton) or access to an online database like Alldata or Mitchell OnDemand is invaluable. It provides torque specifications, diagrams, and step-by-step instructions.
- Timing Belt Tensioner Tool (or improvised solution): You'll need a tool to compress the timing belt tensioner. Some kits include one, but you might need to purchase it separately or fabricate a solution.
Step-by-Step Overview (Simplified)
Here's a highly simplified overview of the process. Always consult a detailed repair manual before starting!
- Disconnect the Battery: Safety first!
- Drain the Coolant: Properly dispose of the old coolant.
- Remove the Accessory Belts: The drive belts need to come off.
- Remove the Fan Shroud and Fan: To gain access to the front of the engine.
- Remove the Crankshaft Pulley: This can sometimes be tricky and may require a special tool.
- Remove the Timing Belt Covers: Exposing the timing belt.
- Rotate the Engine to TDC (Top Dead Center) on Cylinder #1: Align the timing marks on the crankshaft and camshaft pulleys. This is crucial!
- Loosen the Timing Belt Tensioner: Carefully release the tension on the old belt.
- Remove the Old Timing Belt and Water Pump: Inspect the area for leaks or damage.
- Install the New Water Pump: Use a new gasket and torque the bolts to the correct specification.
- Install the New Timing Belt: Carefully align the timing marks. Use the tensioner tool to compress the tensioner and secure the belt.
- Release the Timing Belt Tensioner: Allow the tensioner to apply the correct tension to the belt.
- Rotate the Engine Manually Two Revolutions: Recheck the timing marks to ensure they're still aligned.
- Reassemble Everything in Reverse Order: Double-check all connections and torque specifications.
- Refill the Coolant: Bleed the air from the cooling system.
- Start the Engine and Check for Leaks: Monitor the engine temperature.
Potential Pitfalls and Tips
- Timing Marks: Getting the timing marks correct is the most critical aspect of this job. Double- and triple-check them before proceeding. Misaligned timing can cause serious engine damage.
- Bolt Torque: Use a torque wrench and follow the specified torque values for all bolts.
- Stuck Bolts: Use penetrating oil and patience to remove stubborn bolts. Stripping a bolt can turn a manageable job into a nightmare.
- Coolant Bleeding: Ensure you properly bleed the air from the cooling system after refilling it. Air pockets can cause overheating.
- Inspection: While you have everything apart, inspect all related components, such as hoses, pulleys, and belts, for wear and tear.
- Take Pictures: Take pictures throughout the process. They can be invaluable if you get stuck or need to refer back to something.
- Organization: Keep all the removed parts organized and labeled to make reassembly easier.
- Ask for Help: Don't be afraid to ask for help from a more experienced mechanic or consult online forums if you run into trouble.
Conclusion
Replacing the timing belt and water pump on a 2004 Nissan Frontier V6 is a challenging but rewarding DIY project. Understanding the costs involved, having the right tools, and following a detailed repair manual are essential for success. If you're unsure of your abilities, it's best to leave this job to a professional. However, with careful planning and execution, you can save a significant amount of money by doing it yourself.