2006 Nissan Altima Fuel Pump Replacement
The 2006 Nissan Altima, like many vehicles, relies on a healthy fuel pump to deliver gasoline from the tank to the engine. Over time, the fuel pump can wear out, leading to various performance issues. This article provides a practical guide for car owners and mechanics on troubleshooting, replacing, and maintaining the fuel pump in a 2006 Nissan Altima, along with relevant information applicable to other popular car models.
Troubleshooting Fuel Pump Issues in Your 2006 Altima
Identifying a failing fuel pump early can prevent inconvenient breakdowns and costly repairs. Here are some common symptoms indicating a potential problem:
- Difficulty Starting: This is often the first sign of a weakening fuel pump. The engine might crank for an extended period before finally starting, or it might not start at all, especially when the engine is cold. Think of it like a heart struggling to pump blood; the engine isn't getting the fuel it needs to fire up quickly.
- Engine Stalling: A failing fuel pump can deliver inconsistent fuel pressure, causing the engine to stall, particularly when accelerating or climbing hills. This can be dangerous in traffic. Similar issues occur in Toyota Camrys and Honda Accords with aging fuel pumps.
- Loss of Power/Hesitation: The engine might feel sluggish or hesitate during acceleration. This is because the fuel pump can't supply enough fuel to meet the engine's demands under load. Think of a runner running out of breath during a sprint.
- Rough Idling: An inconsistent fuel supply can lead to rough or erratic idling. The engine might vibrate or sound uneven.
- Decreased Fuel Efficiency: A failing fuel pump might not be delivering fuel efficiently, resulting in lower gas mileage. You might notice you're filling up your tank more often than usual.
- Whining Noise from the Fuel Tank: A failing fuel pump often emits a noticeable whining or buzzing sound from the fuel tank, especially when the ignition is turned on. This sound indicates the pump is struggling to operate. Listen closely near the fuel tank while someone turns the key to the "on" position (without starting the engine).
Diagnosing the Problem
While the symptoms above are indicative of a fuel pump issue, it's important to properly diagnose the problem before replacing the pump. Here are some diagnostic steps:
- Check the Fuel Pump Relay and Fuse: The fuel pump relay and fuse are common failure points. Consult your Altima's owner's manual or a wiring diagram to locate the fuel pump relay and fuse in the fuse box. Use a multimeter to test the relay and visually inspect the fuse for any breaks. A blown fuse or a faulty relay can prevent the fuel pump from operating. A similar process applies to diagnosing fuel pump issues in Ford F-150 trucks.
- Fuel Pressure Test: Use a fuel pressure gauge to check the fuel pressure at the fuel rail. Consult your Altima's service manual for the correct fuel pressure specifications. Low fuel pressure indicates a failing fuel pump, a clogged fuel filter, or a leak in the fuel line.
- Scan for Error Codes: Use an OBD-II scanner to check for any diagnostic trouble codes (DTCs) related to the fuel system. Codes such as P0087 (Fuel Rail/System Pressure - Too Low) or P0088 (Fuel Rail/System Pressure - Too High) can provide valuable clues.
- Listen to the Fuel Pump: Have someone turn the ignition key to the "on" position (without starting the engine) while you listen near the fuel tank. You should hear the fuel pump prime for a few seconds. If you don't hear anything, or if you hear a weak or unusual sound, the fuel pump might be faulty.
Important Note: Always exercise caution when working with fuel systems. Disconnect the negative battery cable before starting any repairs to prevent electrical sparks. Work in a well-ventilated area and avoid open flames.
Replacing the Fuel Pump in Your 2006 Altima
If the diagnosis confirms a faulty fuel pump, replacement is necessary. Here's a general guide to the replacement process. Always consult your Altima's service manual for specific instructions and torque specifications.
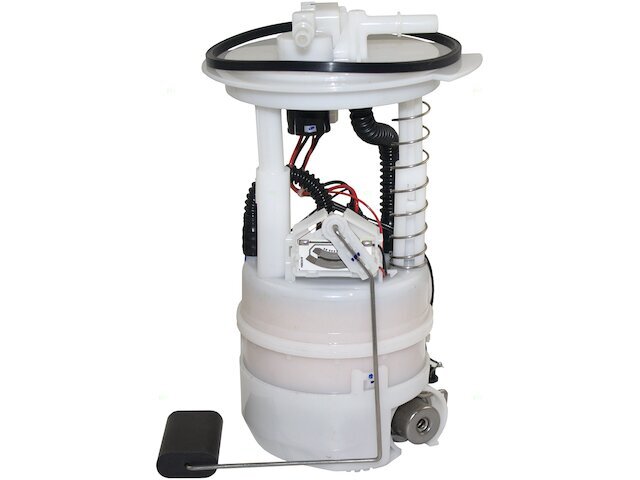
- Gather Your Tools and Parts: You'll need a new fuel pump assembly (including the fuel strainer), a fuel tank removal tool (if necessary), a socket set, wrenches, screwdrivers, pliers, a hammer, a punch, a fuel line disconnect tool (if applicable), safety glasses, and gloves.
- Depressurize the Fuel System: Locate the fuel pressure relief valve (usually on the fuel rail) and use the appropriate tool to relieve the fuel pressure. This minimizes the risk of fuel spraying during the removal process.
- Disconnect the Negative Battery Cable: This is crucial for safety.
- Access the Fuel Pump: In most Altimas, the fuel pump is located inside the fuel tank. Accessing it typically involves removing the rear seat cushion (if there's an access panel) or dropping the fuel tank. Check your car's repair manual. Removing the rear seat is easier; dropping the tank requires more work but may provide better access depending on the specific year/model.
- Remove the Fuel Tank (If Necessary): If dropping the fuel tank is required, safely drain the fuel using a siphon or a fuel transfer pump. Disconnect the fuel lines, electrical connectors, and any vent hoses connected to the tank. Support the tank with a jack and straps, and carefully lower it to the ground.
- Remove the Old Fuel Pump Assembly: Once you have access to the fuel pump, disconnect the electrical connector and the fuel lines. Use a fuel tank removal tool (if necessary) to unscrew the locking ring that holds the fuel pump assembly in place. Carefully remove the old fuel pump assembly from the tank.
- Install the New Fuel Pump Assembly: Install the new fuel pump assembly into the tank, ensuring that the fuel strainer is properly positioned. Tighten the locking ring to the specified torque. Connect the fuel lines and electrical connector.
- Reinstall the Fuel Tank (If Necessary): If you removed the fuel tank, carefully raise it back into position using the jack and straps. Reconnect the fuel lines, electrical connectors, and vent hoses. Secure the tank with the mounting straps.
- Reconnect the Negative Battery Cable:
- Prime the Fuel System: Turn the ignition key to the "on" position (without starting the engine) for a few seconds to prime the fuel system. Repeat this process several times.
- Start the Engine: Start the engine and check for any fuel leaks. Monitor the fuel pressure gauge to ensure that the fuel pressure is within the correct range.
- Test Drive the Vehicle: Take the vehicle for a test drive to ensure that the fuel pump is functioning properly and that there are no stalling or hesitation issues.
Real-World Issue Example: A common issue in older Altimas is corrosion around the fuel pump assembly, making it difficult to remove the locking ring. Applying penetrating oil and using a hammer and punch to gently tap the locking ring can help loosen it. Be patient and avoid excessive force, which could damage the fuel tank or the locking ring.
Fuel Pump Maintenance and Prevention
Preventing fuel pump failure is always better than replacing it. Here are some tips for maintaining your 2006 Altima's fuel pump and extending its lifespan:
- Keep the Fuel Tank Full: Running the fuel tank low can cause the fuel pump to overheat. The fuel acts as a coolant for the pump motor. Try to keep the fuel tank at least one-quarter full.
- Use High-Quality Fuel: Using clean, high-quality fuel can help prevent contaminants from clogging the fuel filter and straining the fuel pump.
- Replace the Fuel Filter Regularly: A clogged fuel filter puts extra strain on the fuel pump. Replace the fuel filter according to the manufacturer's recommended maintenance schedule. For Altimas, this is typically every 30,000 miles. Some Mazda models also benefit from regular fuel filter replacements to protect the pump.
- Avoid "Fuel System Cleaners" of Unknown Quality: Some fuel system cleaners can contain harsh chemicals that can damage the fuel pump and other fuel system components. Use reputable brands and follow the instructions carefully.
- Address Symptoms Promptly: If you notice any of the symptoms of a failing fuel pump, address them promptly. Delaying repairs can lead to further damage and more costly repairs.
Example: Regularly inspecting and replacing the fuel filter in a Chevy Silverado can prevent premature fuel pump failure, especially considering the work truck environment they often operate in.
Advice for Keeping Your Car in Top Condition
Maintaining your 2006 Nissan Altima, or any vehicle, in top condition requires a proactive approach. Here's some general advice:
- Follow the Manufacturer's Recommended Maintenance Schedule: This schedule outlines the services and inspections that are necessary to keep your vehicle running smoothly and reliably.
- Perform Regular Fluid Checks: Check the engine oil, coolant, brake fluid, power steering fluid, and transmission fluid levels regularly. Top off fluids as needed.
- Inspect Belts and Hoses: Inspect belts and hoses for cracks, wear, and leaks. Replace them as needed.
- Maintain Proper Tire Pressure: Proper tire pressure improves fuel efficiency, extends tire life, and enhances handling.
- Get Regular Oil Changes: Regular oil changes are essential for engine health. Use the correct type of oil and filter.
- Pay Attention to Warning Lights: Don't ignore warning lights on the dashboard. Investigate the cause and address the problem promptly.
- Keep Your Car Clean: Regular washing and waxing can protect the paint and prevent rust.
- Listen to Your Car: Pay attention to any unusual noises, vibrations, or smells. These can be early warning signs of potential problems.
- Find a Trustworthy Mechanic: Having a reliable mechanic you can trust is invaluable. Look for a mechanic with experience working on your make and model of vehicle.
By following these tips, you can extend the life of your 2006 Nissan Altima, minimize the risk of costly repairs, and enjoy a safe and reliable driving experience. Remember that preventative maintenance is always more cost-effective than reactive repairs.