2008 Nissan Altima Oil Change
The 2008 Nissan Altima, a popular mid-size sedan, relies on regular maintenance to ensure smooth operation and longevity. Among the most crucial maintenance tasks is the oil change. Neglecting this can lead to serious engine problems. This guide covers everything you need to know about performing an oil change on a 2008 Nissan Altima, including maintenance schedules, troubleshooting common issues, and real-world examples.
Maintenance Schedule and Importance
Nissan recommends changing the oil in your 2008 Altima every 7,500 miles or 6 months, whichever comes first, under normal driving conditions. However, if you frequently engage in severe driving conditions, such as:
- Stop-and-go traffic
- Towing
- Driving on dusty or gravel roads
- Short trips (less than 5 miles) in cold weather
... you should shorten the oil change interval to 3,750 miles or 3 months. Using the correct oil type is also critical. For the 2008 Altima, Nissan typically recommends 5W-30 conventional or synthetic blend oil. Always consult your owner's manual for the precise specifications for your specific engine (2.5L 4-cylinder or 3.5L V6).
Why is regular oil changes so vital? Oil serves several key functions:
- Lubrication: Reducing friction between moving engine parts.
- Cooling: Dissipating heat generated by engine combustion.
- Cleaning: Carrying away dirt, debris, and combustion byproducts.
- Sealing: Helping to seal the piston rings against the cylinder walls.
- Corrosion Prevention: Protecting engine components from rust and corrosion.
Over time, oil degrades, loses its viscosity, and becomes contaminated. This leads to increased friction, reduced cooling efficiency, sludge buildup, and accelerated engine wear.
Performing an Oil Change: Step-by-Step Guide
Here's a general guide for performing an oil change on a 2008 Nissan Altima. Always prioritize safety and consult your owner's manual and a repair manual for specific instructions and torque specifications for your vehicle.
Tools and Materials Needed:
- New oil (typically 4.2 quarts for the 2.5L and 4.8 quarts for the 3.5L, but confirm in your owner's manual)
- New oil filter
- Wrench for the oil drain plug
- Oil filter wrench
- Funnel
- Oil drain pan
- Rags or shop towels
- Jack and jack stands (or ramps)
- Gloves
- Safety glasses
Steps:
- Prepare the Vehicle: Warm up the engine slightly (a few minutes of idling is sufficient). This helps the oil flow more easily. Park the vehicle on a level surface and engage the parking brake.
- Raise the Vehicle: Use a jack to lift the vehicle and securely support it with jack stands. Alternatively, you can use ramps. Never work under a vehicle supported only by a jack.
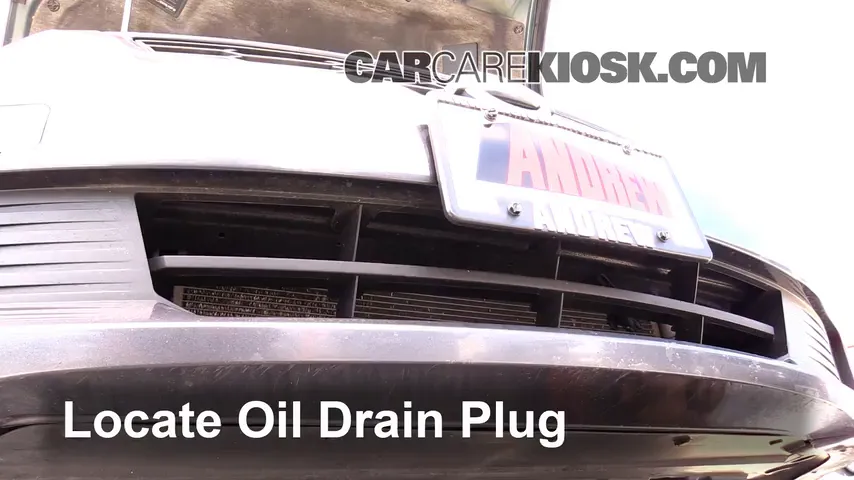
- Locate the Oil Drain Plug: The oil drain plug is located on the oil pan, usually at the bottom of the engine.
- Drain the Old Oil: Position the oil drain pan under the drain plug. Use the wrench to loosen and remove the drain plug. Be careful; the oil may be hot. Let the oil drain completely.
- Remove the Old Oil Filter: Locate the oil filter. Place the oil drain pan beneath it to catch any spills. Use the oil filter wrench to loosen and remove the old filter.
- Prepare the New Oil Filter: Lightly lubricate the rubber gasket on the new oil filter with fresh oil. This helps create a good seal.
- Install the New Oil Filter: Screw the new oil filter onto the engine by hand until the gasket makes contact. Then, tighten it another ¾ to 1 turn, according to the filter manufacturer's instructions. Do not overtighten.
- Reinstall the Drain Plug: Clean the oil drain plug and install a new crush washer (if applicable). Tighten the drain plug to the manufacturer's specified torque. Do not overtighten.
- Lower the Vehicle: Carefully lower the vehicle back to the ground.
- Add New Oil: Remove the oil filler cap on the engine. Use a funnel to pour in the correct amount of new oil, as specified in your owner's manual.
- Check the Oil Level: Use the dipstick to check the oil level. Add more oil if needed to reach the "full" mark.
- Start the Engine: Start the engine and let it idle for a few minutes. Check for any leaks around the drain plug and oil filter.
- Recheck the Oil Level: Turn off the engine and let it sit for a few minutes. Recheck the oil level on the dipstick and add more oil if necessary.
- Reset the Oil Life Monitoring System: Follow the instructions in your owner's manual to reset the oil life monitoring system (if equipped).
- Dispose of Used Oil Properly: Take the used oil to a recycling center or auto parts store for proper disposal. Do not pour used oil down the drain or onto the ground.
Troubleshooting Common Issues
Even with careful execution, you might encounter some issues during or after an oil change. Here are some common problems and their solutions:
Problem: Oil Drain Plug Stripped
- Symptoms: The drain plug won't tighten properly, and oil leaks.
- Causes: Overtightening the drain plug in the past.
- Solution: The best long-term solution is to repair the oil pan threads. This can be done with a thread repair kit (like a Helicoil) or by replacing the oil pan entirely. A temporary fix, if the damage isn't too severe, might be an oversized self-tapping drain plug, but this is not a recommended long-term solution as it can further damage the threads.
- Real-World Example: A mechanic working on a 2008 Honda Civic encountered this issue. He used a thread repair kit to restore the threads in the oil pan, saving the customer the expense of replacing the entire pan.
Problem: Oil Filter Stuck
- Symptoms: The oil filter is difficult to remove, even with an oil filter wrench.
- Causes: Overtightening the filter during the previous installation, or the filter being stuck due to heat and age.
- Solution: Try a different type of oil filter wrench (e.g., a cap-type wrench if you were using a band-type). If that doesn't work, carefully puncture the filter with a long screwdriver and use it to twist the filter off. Be extremely careful not to damage the engine block.
- Real-World Example: An owner of a 2010 Toyota Camry struggled to remove a stuck oil filter. After trying several types of wrenches, he successfully removed it using the screwdriver method, being extremely cautious.
Problem: Oil Leak After Oil Change
- Symptoms: Oil dripping from the drain plug or oil filter area.
- Causes: Loose drain plug, damaged crush washer (if applicable), loose oil filter, or improperly installed oil filter gasket.
- Solution: Check the drain plug and oil filter to ensure they are properly tightened. If the drain plug has a crush washer, replace it with a new one. Double-check that the oil filter gasket is properly seated.
- Real-World Example: After changing the oil on his 2007 Ford F-150, a mechanic noticed an oil leak from the drain plug. He realized he had forgotten to install a new crush washer. After installing one, the leak stopped.
Problem: Low Oil Pressure After Oil Change
- Symptoms: The oil pressure warning light illuminates on the dashboard.
- Causes: Insufficient oil in the engine, incorrect oil filter installed, or a clogged oil pickup tube.
- Solution: Immediately stop the engine and check the oil level. Add oil if needed. Ensure the correct oil filter is installed. If the problem persists, consult a mechanic, as a clogged oil pickup tube can indicate a more serious engine problem.
- Real-World Example: A woman driving her 2009 Chevrolet Malibu noticed the oil pressure light after an oil change. It turned out the mechanic had used the wrong type of oil filter, restricting oil flow. After replacing the filter with the correct one, the problem was resolved.
Keeping Your 2008 Altima in Top Condition
Regular oil changes are just one part of maintaining your 2008 Nissan Altima. Here are some additional tips to keep your car running smoothly for years to come:
- Follow the Recommended Maintenance Schedule: Consult your owner's manual for the recommended maintenance schedule and stick to it. This includes tasks such as replacing air filters, spark plugs, and coolant.
- Check Fluid Levels Regularly: Check the oil, coolant, brake fluid, power steering fluid, and transmission fluid levels regularly and top them off as needed.
- Inspect Tires Regularly: Check tire pressure and tread depth regularly. Rotate your tires every 6,000-8,000 miles to promote even wear.
- Address Problems Promptly: Don't ignore warning lights or unusual noises. Address problems promptly to prevent them from escalating into more serious and expensive repairs.
- Use Quality Parts: When replacing parts, use high-quality OEM (Original Equipment Manufacturer) or reputable aftermarket parts. This will ensure proper fit and performance.
- Keep Your Car Clean: Regularly wash and wax your car to protect the paint from the elements. Clean the interior to prevent dirt and grime from damaging the upholstery and dashboard.
By following these tips, you can help keep your 2008 Nissan Altima in top condition and enjoy many years of reliable service. Remember, regular maintenance is an investment in your vehicle's longevity and performance.