2009 Nissan Murano Alternator Connector
The 2009 Nissan Murano, known for its comfortable ride and stylish design, relies heavily on its electrical system. A crucial component in this system is the alternator, responsible for charging the battery and powering electrical accessories while the engine is running. The alternator connector, often overlooked, is a key point of failure that can lead to a multitude of frustrating issues. This article delves into the common problems associated with the 2009 Nissan Murano alternator connector, offering practical troubleshooting tips and repair solutions for both car owners and mechanics.
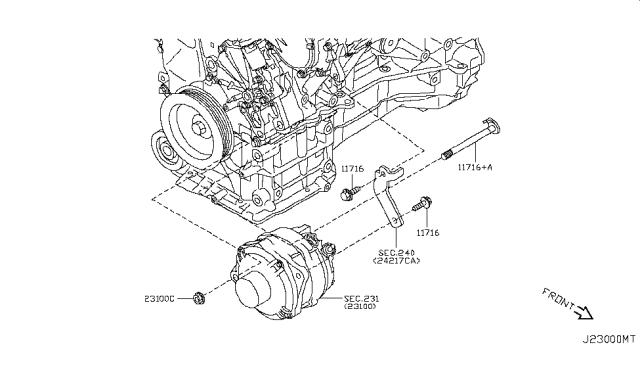
Understanding the Alternator Connector
The alternator connector is the physical interface between the vehicle's wiring harness and the alternator itself. It typically houses several wires, each serving a specific purpose: battery voltage sensing, ignition voltage, and sometimes a communication line to the vehicle's computer (ECU/PCM). A damaged or corroded connector can interrupt these signals, leading to erratic charging behavior or complete system failure.
Common Symptoms of a Faulty Alternator Connector
Several telltale signs can indicate a problem with your 2009 Nissan Murano's alternator connector. Recognizing these symptoms early can save you from more significant and costly repairs down the road.
- Battery Light Illumination: Perhaps the most common indicator is the battery warning light on the dashboard. While this light can signal a dying battery, it often points directly to charging system problems, including a faulty alternator connector. A flickering light, especially during acceleration or deceleration, strongly suggests an intermittent connection issue.
- Dimming Headlights: If your headlights dim noticeably when you use other electrical accessories like the power windows or air conditioning, it could be a sign that the alternator isn't providing enough power. This can be due to a poor connection at the alternator connector preventing proper voltage regulation.
- Electrical Accessory Malfunctions: Unusual behavior from other electrical components, such as erratic operation of the radio, power locks, or even the instrument cluster, can be attributed to voltage fluctuations caused by a bad alternator connector.
- Slow Engine Cranking: A weak or slow engine crank, even after the battery has been charged or tested good, can indicate that the alternator isn't properly maintaining the battery's charge due to connector problems.
- Stalling or Rough Idling: In severe cases, a malfunctioning alternator connector can disrupt the engine's electrical supply, leading to stalling or rough idling, particularly when electrical loads are high.
- Burning Smell: A burning smell emanating from the engine compartment, particularly around the alternator, could indicate overheating due to a short circuit or excessive resistance within the connector. Immediately investigate any burning smells, as they can be a fire hazard.
Troubleshooting the 2009 Nissan Murano Alternator Connector
Before replacing the alternator, it's crucial to thoroughly inspect and troubleshoot the connector. This can save you time and money, as the connector itself might be the only problem.
Visual Inspection
Start with a careful visual inspection of the connector and the surrounding wiring. Look for:
- Corrosion: Green or white deposits on the connector terminals are a sign of corrosion, which can impede electrical flow. This is especially common in areas with high humidity or road salt exposure.
- Damaged Wires: Check for cracked, frayed, or exposed wires near the connector. These can short circuit or create intermittent connections.
- Loose or Broken Terminals: Ensure that the terminals within the connector are securely attached to the wires and aren't bent or broken.
- Melted or Burned Plastic: This indicates overheating, suggesting a short circuit or excessive resistance.
Electrical Testing
Use a multimeter to perform electrical tests on the connector. Always disconnect the battery's negative terminal before working on electrical components.
- Continuity Test: Check the continuity of each wire in the connector. Disconnect the connector from both the alternator and the wiring harness, then use a multimeter set to the continuity setting (usually indicated by a diode symbol or audible beep) to test each wire individually. If there's no continuity, the wire is broken and needs to be repaired or replaced.
- Voltage Test: With the engine running, use a multimeter to measure the voltage at the battery voltage sensing wire in the connector. This voltage should be close to the battery voltage (around 12.6V with the engine off and 13.5-14.5V with the engine running). A significantly lower voltage indicates a problem with the wiring or the connector.
- Ground Test: Check the ground connection of the alternator. A poor ground can also cause charging problems.
Common Causes of Alternator Connector Failure
Several factors can contribute to the failure of the 2009 Nissan Murano's alternator connector.
- Corrosion: As mentioned earlier, corrosion is a major culprit, especially in regions with harsh weather conditions.
- Vibration: Engine vibration can gradually loosen the connector or damage the wires over time.
- Heat: The engine compartment's high temperature can degrade the plastic connector housing and insulation on the wires.
- Improper Installation: If the connector was not properly installed or secured during a previous repair, it can become loose or damaged.
- Overloading the Electrical System: Consistently using excessive electrical accessories (e.g., high-powered audio systems, aftermarket lighting) can put a strain on the alternator and its connector, leading to premature failure.
Repair Solutions
Depending on the severity of the damage, there are several repair options for a faulty alternator connector.
- Cleaning and Repairing the Connector: If the connector is only mildly corroded, you can try cleaning the terminals with a wire brush and electrical contact cleaner. Re-crimp any loose terminals with a terminal crimping tool. Always disconnect the battery before working on electrical components.
- Replacing the Connector: If the connector is severely damaged, melted, or corroded beyond repair, the best option is to replace it. You can purchase a new connector from a parts store or online retailer. Be sure to get the correct connector for your 2009 Nissan Murano. Splice the new connector into the existing wiring harness using proper wiring techniques, such as soldering and heat shrinking the connections. This ensures a secure and weatherproof connection.
- Replacing Damaged Wiring: If the wires near the connector are damaged, they should also be replaced. Cut out the damaged section of wire and splice in a new section using the same gauge wire. Solder and heat shrink the connections for a durable repair.
- Professional Repair: If you're not comfortable working with electrical wiring, it's best to take your vehicle to a qualified mechanic. They have the expertise and tools to diagnose and repair the problem correctly.
Real-World Examples and Solutions
Example 1: A 2009 Nissan Murano owner reports intermittent battery light illumination and occasional dimming of the headlights. Visual inspection reveals corrosion on the alternator connector terminals. Solution: The terminals are cleaned with a wire brush and electrical contact cleaner. Dielectric grease is applied to the terminals before reassembling the connector to prevent future corrosion. The problem is resolved.
Example 2: A mechanic finds a melted alternator connector on a 2009 Nissan Murano. The owner reports that the vehicle stalled several times. Solution: The melted connector is replaced with a new one. The mechanic also inspects the alternator itself to ensure it wasn't the cause of the overheating. The wiring harness is also checked for any signs of damage. After replacing the connector and inspecting the system, the stalling issue is resolved.
Example 3: A 2009 Nissan Murano owner experiences slow engine cranking. The battery tests good. Solution: Voltage drop testing is performed on the charging system. Excessive voltage drop is found across the alternator connector. The connector is replaced, and the voltage drop is reduced to an acceptable level. The slow cranking issue is resolved.
Preventative Maintenance and Long-Term Care
To prolong the life of your 2009 Nissan Murano's alternator connector and overall electrical system, consider these preventative maintenance tips:
- Regular Visual Inspections: Periodically inspect the alternator connector and surrounding wiring for any signs of corrosion, damage, or loose connections.
- Apply Dielectric Grease: Applying dielectric grease to the connector terminals can help prevent corrosion and ensure a good electrical connection.
- Secure the Connector: Make sure the connector is securely fastened to the alternator and the wiring harness to prevent it from vibrating loose.
- Avoid Overloading the Electrical System: Be mindful of the electrical load you're placing on the system. Avoid running too many high-powered accessories simultaneously.
- Regular Battery Testing: A healthy battery puts less strain on the alternator. Have your battery tested regularly to ensure it's in good condition.
- Address Issues Promptly: Don't ignore warning signs like a flickering battery light or dimming headlights. Address these issues promptly to prevent more significant and costly repairs down the road.
By understanding the common problems associated with the 2009 Nissan Murano alternator connector and implementing these troubleshooting and maintenance tips, car owners and mechanics can effectively diagnose and repair issues, ensuring the reliable operation of the vehicle's electrical system. Remember, a proactive approach to maintenance is key to keeping your vehicle in top condition and avoiding unexpected breakdowns.