2012 Nissan Altima Code P0101
Hey there, fellow 2012 Nissan Altima owner! Experiencing a P0101 code? Don't sweat it too much – it's a fairly common issue, and with a little know-how, you can often diagnose and even fix it yourself. This article will walk you through understanding the code, pinpointing potential causes, and exploring possible solutions. Think of me as your friendly neighborhood service advisor, guiding you through the process.
Understanding the P0101 Code
The P0101 code stands for "Mass Air Flow (MAF) Sensor Circuit Range/Performance." In simpler terms, your car's computer (the Engine Control Module or ECM) is detecting that the signal from the MAF sensor isn't what it expects. The MAF sensor is a critical component, responsible for measuring the amount of air entering the engine. This information is vital for the ECM to calculate the correct fuel mixture for optimal combustion.
When the MAF sensor's reading is out of range or performing poorly, the ECM throws the P0101 code. This can lead to a variety of drivability problems, and it's important to address it promptly to prevent further issues.
Symptoms You Might Experience
Besides the check engine light illuminating on your dashboard, you might notice several other symptoms associated with a P0101 code:
- Rough idling: The engine might stumble or vibrate excessively when stationary.
- Poor acceleration: The car might feel sluggish and lack its usual pep.
- Decreased fuel economy: You might find yourself filling up the gas tank more frequently.
- Stalling: The engine might unexpectedly shut off, especially at low speeds.
- Hesitation: The car might hesitate or stumble when you press the accelerator pedal.
- In some cases, no noticeable symptoms may be present, only the check engine light.
Possible Causes of the P0101 Code in Your 2012 Altima
The P0101 code can be triggered by several factors, and it's essential to systematically investigate each possibility:
1. Dirty or Contaminated MAF Sensor
This is the most common culprit. The MAF sensor's delicate wires or film can become coated with dirt, dust, oil, or other contaminants over time. This coating interferes with its ability to accurately measure airflow.
Tip: A dirty air filter can contribute to a dirty MAF sensor. Make sure to inspect and replace your air filter regularly.
2. Vacuum Leaks
Vacuum leaks can introduce unmetered air into the engine, disrupting the balance between air and fuel. The MAF sensor reads less air than is actually entering the engine, leading to the P0101 code.
3. Intake Air Leaks
Similar to vacuum leaks, leaks in the intake system (between the MAF sensor and the throttle body) can also cause unmetered air to enter the engine.
4. Faulty MAF Sensor Wiring or Connectors
Damaged, corroded, or loose wiring or connectors to the MAF sensor can disrupt the signal to the ECM. This includes checking the ground wire and the power wire to ensure they have proper voltage and continuity.
5. Faulty MAF Sensor
While less common than a dirty sensor, the MAF sensor itself can fail. Internal components can degrade over time, leading to inaccurate readings.
6. Exhaust Leaks
While less direct, exhaust leaks *can* sometimes contribute to a P0101 code. An exhaust leak near the oxygen sensors can affect the ECM's fuel trim calculations, indirectly impacting the MAF sensor readings.
7. PCM (Powertrain Control Module) Issues
This is the least likely scenario, but in rare cases, a faulty PCM can misinterpret the MAF sensor signal or have internal problems that lead to the P0101 code.
Troubleshooting and Solutions
Here's a step-by-step approach to diagnosing and resolving the P0101 code in your 2012 Altima:
Step 1: Gather Your Tools
Before you start, gather the necessary tools:
- OBD-II scanner: To read and clear diagnostic trouble codes.
- MAF sensor cleaner: Specifically designed for cleaning MAF sensors. Do NOT use carburetor cleaner or brake cleaner!
- Screwdrivers: Various sizes for removing components.
- Wrenches: For tightening and loosening bolts.
- Multimeter: For testing electrical circuits (optional, but helpful).
- Vacuum gauge: To check for vacuum leaks (optional).
- Flashlight or work light: To illuminate the engine bay.
- Safety glasses: To protect your eyes.
- Gloves: To protect your hands.
Step 2: Read and Clear the Code
Use your OBD-II scanner to confirm the P0101 code and record any other codes that may be present. Then, clear the code and see if it returns after driving the car.
Step 3: Inspect the Air Filter
A clogged air filter restricts airflow and can lead to a dirty MAF sensor. Replace the air filter if it's dirty or overdue for replacement. This is a quick and inexpensive maintenance item that can sometimes resolve the issue.
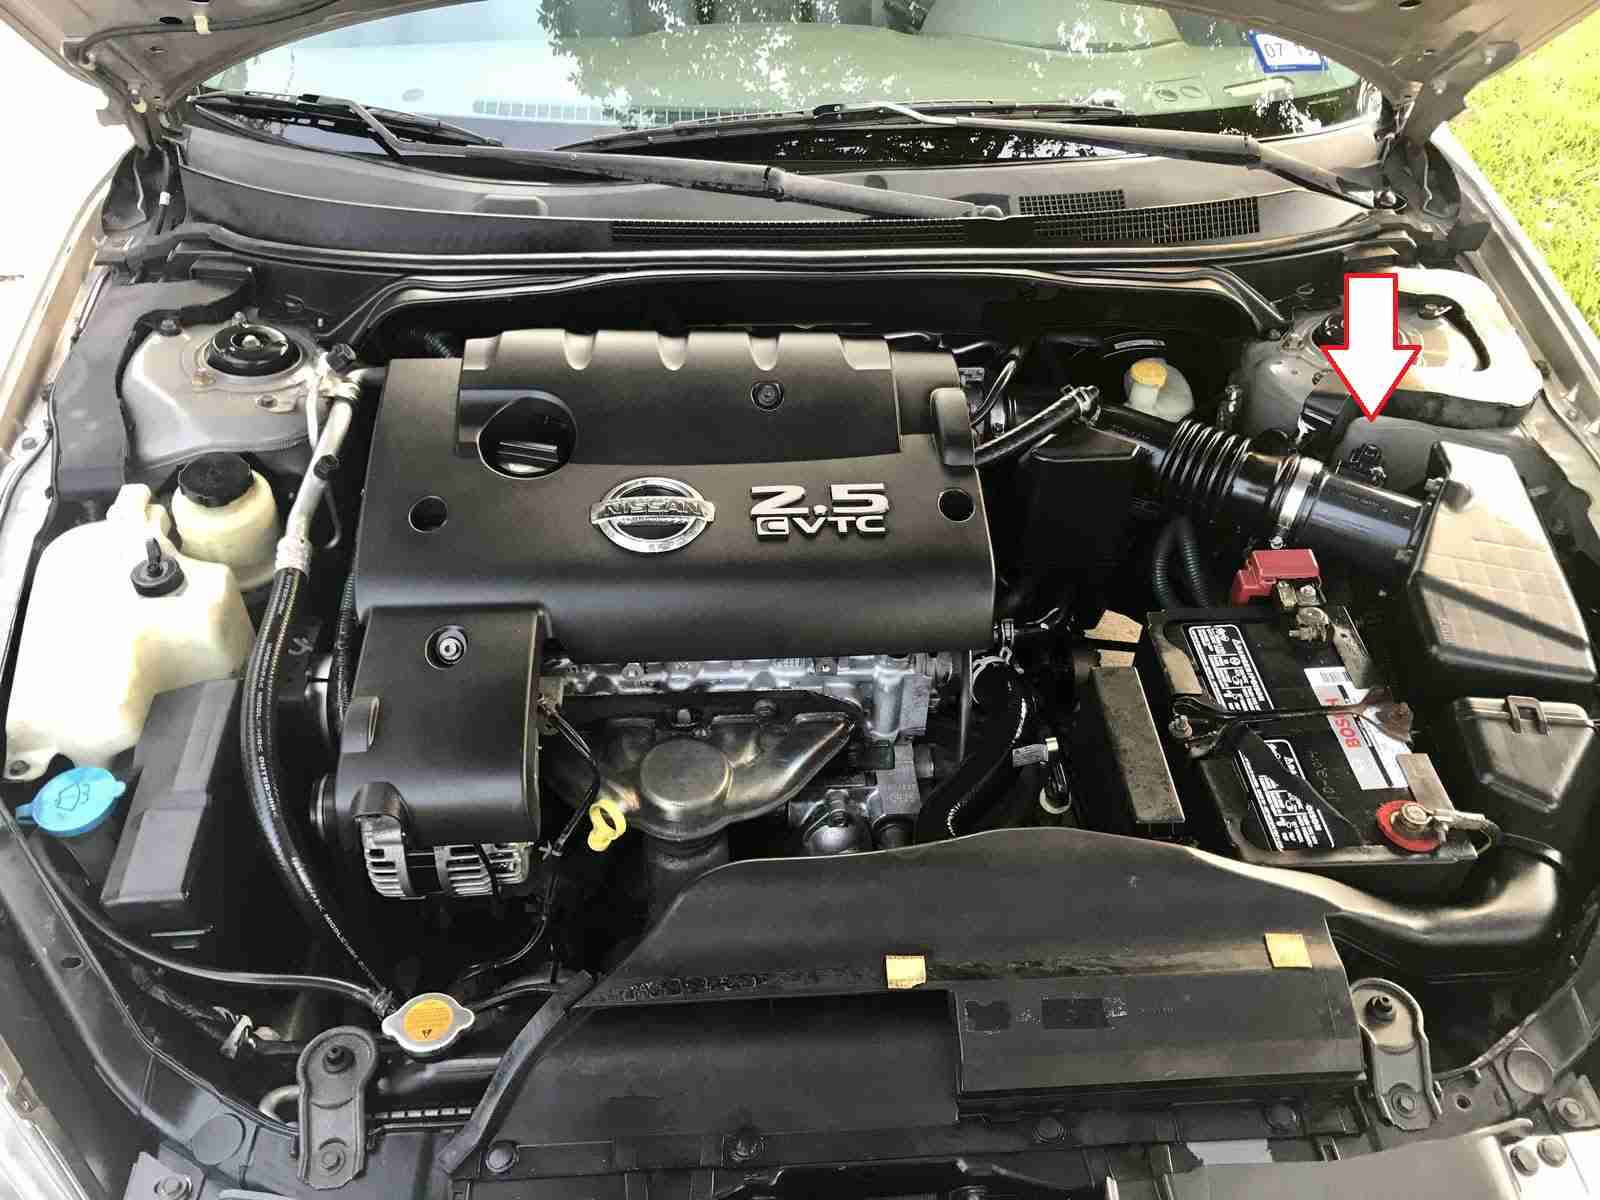
Step 4: Clean the MAF Sensor
This is often the first and most effective step. Locate the MAF sensor (usually near the air filter box). Disconnect the electrical connector. Carefully remove the MAF sensor from the intake tube. Spray the sensor element (the thin wires or film inside the sensor) with MAF sensor cleaner, following the product instructions. Let the sensor dry completely before reinstalling it. Reconnect the electrical connector and clear the code. Drive the car to see if the code returns.
Important: Be extremely gentle when cleaning the MAF sensor. The sensor element is fragile and easily damaged.
Step 5: Inspect for Vacuum Leaks
Visually inspect all vacuum hoses and connections for cracks, leaks, or disconnections. Pay close attention to hoses connected to the intake manifold, brake booster, and PCV valve. You can use a vacuum gauge or spray carburetor cleaner (carefully!) around the hoses while the engine is running to listen for changes in engine speed, which could indicate a leak. Replace any damaged hoses.
Step 6: Inspect the Intake System
Check the intake tube and air intake box for cracks, leaks, or loose connections. Ensure that all clamps are secure. Repair or replace any damaged components.
Step 7: Inspect the MAF Sensor Wiring and Connectors
Visually inspect the wiring harness and connectors leading to the MAF sensor for damage, corrosion, or loose connections. Use a multimeter to check for proper voltage and ground at the MAF sensor connector. Repair or replace any damaged wiring or connectors.
Step 8: Test the MAF Sensor (Optional)
If you have a multimeter and a wiring diagram for your car, you can test the MAF sensor's output voltage. Compare the readings to the specifications in the service manual. This can help determine if the sensor is functioning correctly. However, this step requires some electrical knowledge and is best left to experienced DIYers or professional mechanics.
Step 9: Consider Professional Diagnosis
If you've tried the above steps and the P0101 code persists, it's time to consult a qualified mechanic. They have specialized tools and expertise to diagnose more complex issues, such as a faulty MAF sensor or PCM problem.
Estimated Repair Costs
Here's a rough estimate of potential repair costs:
- Air filter replacement: $20 - $50
- MAF sensor cleaning (DIY): $10 - $20 (for MAF cleaner)
- Vacuum hose replacement (DIY): $5 - $20 per hose
- MAF sensor replacement: $100 - $300 (parts and labor)
- Professional diagnosis: $80 - $150 (diagnostic fee)
These are just estimates, and the actual cost may vary depending on the specific problem, the parts used, and the labor rates in your area.
Final Thoughts
The P0101 code can be a frustrating issue, but with a systematic approach, you can often diagnose and resolve it yourself. Remember to start with the simplest and most common solutions (like cleaning the MAF sensor and checking the air filter) before moving on to more complex troubleshooting steps. If you're not comfortable working on your car, don't hesitate to seek professional help. Good luck, and happy motoring!