2012 Nissan Rogue Blower Motor Not Working
Experiencing a 2012 Nissan Rogue blower motor not working can be a frustrating issue, especially when you need heat or air conditioning. A malfunctioning blower motor can leave you uncomfortable and potentially impact your vehicle's defogging capabilities, compromising safety. This article will guide you through the potential causes, troubleshooting steps, and solutions to get your Rogue's blower motor running again. We'll provide clear, actionable advice to help you diagnose and potentially fix the problem yourself, or at least be better informed when seeking professional help.
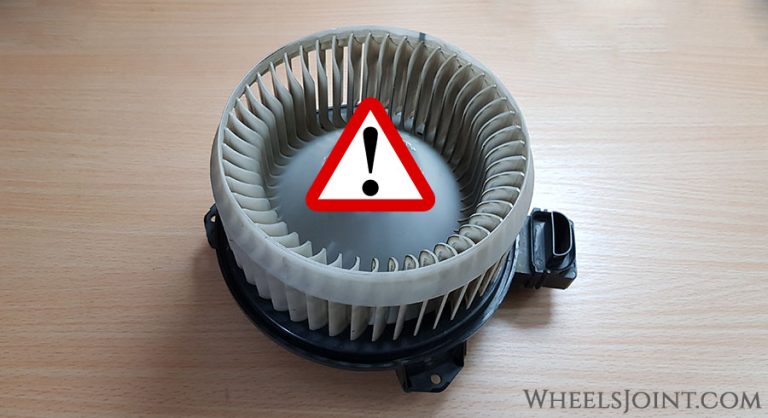
Understanding the Blower Motor System in Your 2012 Nissan Rogue
Before diving into troubleshooting, it's important to understand how the blower motor system works in your 2012 Nissan Rogue. The blower motor is responsible for circulating air through the HVAC (Heating, Ventilation, and Air Conditioning) system. When you turn on your heat or AC, the blower motor pushes air across the heater core or evaporator core, respectively, and then out through the vents into the cabin.
Several components work together to control the blower motor's operation:
- Blower Motor: The core component, an electric motor with a fan attached.
- Blower Motor Resistor (or Control Module): Controls the speed of the blower motor. Different settings (low, medium, high) regulate the voltage supplied to the motor. Many newer vehicles use a blower motor control module which is more sophisticated than a resistor.
- Fuse: Protects the blower motor circuit from overloads.
- Relay: A switch that controls the power to the blower motor.
- HVAC Control Panel: The controls on your dashboard that allow you to select fan speed, temperature, and air source.
- Wiring: The electrical connections that link all the components together.
When the blower motor fails to operate, it could be a problem with any of these components. Systematically checking each one is key to identifying the root cause.
Common Causes of a Blower Motor Failure in a 2012 Nissan Rogue
Several factors can contribute to a non-functional blower motor in your 2012 Nissan Rogue. Here are some of the most common:
1. Blown Fuse
This is the simplest and most common reason. The blower motor circuit is protected by a fuse, usually located in the main fuse box (often under the hood or inside the cabin near the driver's side). A surge in power or a short circuit can cause the fuse to blow, cutting power to the blower motor.
2. Faulty Blower Motor Resistor/Control Module
The blower motor resistor or control module regulates the speed of the blower motor. If the resistor fails, you may find that the blower motor only works on one speed (usually high) or not at all. A completely failed resistor/module will usually result in no blower function at any speed.
3. Defective Blower Motor
The blower motor itself can fail. Over time, the motor's bearings can wear out, leading to increased friction and eventually complete failure. Signs of a failing blower motor can include unusual noises (squealing, grinding), intermittent operation, or a burning smell.
4. Bad Relay
The blower motor relay controls the flow of power to the motor. A faulty relay can prevent the motor from receiving power, even if the other components are working correctly. This is less common than a blown fuse or bad resistor but still possible.
5. Wiring Issues
Damaged or corroded wiring can disrupt the electrical connection to the blower motor. This can include loose connections, broken wires, or corrosion at the connectors. Rodent damage is also a common cause of wiring issues, especially if the car sits for extended periods.
6. Faulty HVAC Control Panel
While less common, the HVAC control panel itself can malfunction, preventing the signal from reaching the blower motor. This is more likely if you are experiencing other issues with your climate control system.
Troubleshooting Steps for a Non-Working Blower Motor
Here's a step-by-step guide to help you diagnose the problem:
Step 1: Check the Fuse
Locate the fuse box diagram (usually in the owner's manual or printed on the fuse box cover). Find the fuse labeled "Blower Motor" or "HVAC." Remove the fuse and inspect it. If the thin wire inside the fuse is broken, the fuse is blown. Replace it with a new fuse of the same amperage. Turn on the blower motor. If the new fuse blows immediately, there's a short circuit in the system. You'll need to investigate further or consult a professional.
Step 2: Test the Blower Motor Resistor/Control Module
The blower motor resistor or control module is typically located near the blower motor housing, often under the dashboard on the passenger side. It usually has a wire harness connected to it. Depending on the resistor type:
- Resistor Type: If you can see the resistor coils (a series of metal coils), visually inspect them for breaks or damage. If a coil is broken, the resistor needs to be replaced. You can also use a multimeter to test the resistance of each coil. A significant difference in resistance between coils indicates a faulty resistor.
- Control Module Type: These usually cannot be visually inspected, nor can they be easily tested with a multimeter. However, you can test the power and ground wires going *into* the module with a multimeter. Make sure there is power and a good ground. If so, the module itself is likely the culprit.
Replacing the resistor/module is a relatively straightforward repair. Disconnect the wire harness, remove the screws holding the resistor in place, install the new resistor, and reconnect the harness.
Step 3: Inspect the Blower Motor Connector
Disconnect the electrical connector to the blower motor. Use a multimeter to check for voltage at the connector when the blower motor is turned on. If you have voltage, the problem is likely with the blower motor itself. If you don't have voltage, the problem lies upstream (fuse, relay, wiring, or control panel).
Step 4: Test the Blower Motor Directly
If you suspect the blower motor is faulty and you have voltage at the connector, you can test it directly. Disconnect the blower motor from its wiring harness. Using jumper wires, connect the blower motor terminals directly to a 12V battery (observe proper polarity: positive to positive, negative to negative). Be careful! A short circuit here can damage your battery. If the blower motor runs when connected directly to the battery, the motor is likely good, and the problem is elsewhere in the circuit. If the blower motor doesn't run, it's likely faulty and needs to be replaced.
Step 5: Check the Blower Motor Relay
Locate the blower motor relay (check your owner's manual for its location). You can try swapping it with a similar relay in the fuse box (e.g., the horn relay). If the blower motor starts working after swapping the relays, the original relay is faulty. You can also test the relay using a multimeter to check for continuity and proper operation.
Step 6: Inspect Wiring for Damage
Carefully inspect the wiring harness and connectors for any signs of damage, corrosion, or loose connections. Pay particular attention to areas where the wiring may be exposed to heat or moisture. Clean any corroded connections with electrical contact cleaner and ensure all connections are secure.
Step 7: Consider the HVAC Control Panel
If you've checked all the other components and the blower motor still isn't working, the HVAC control panel might be the problem. This is a more complex issue that may require professional diagnosis. However, ensure all connectors to the control panel are securely fastened.
Replacing the Blower Motor
If your testing indicates that the blower motor is faulty, you'll need to replace it. The process typically involves:
- Disconnecting the negative battery terminal. This is crucial for safety.
- Locating the blower motor. It's usually located under the dashboard on the passenger side. You may need to remove a lower dash panel to access it.
- Disconnecting the electrical connector.
- Removing any retaining screws or clips.
- Removing the old blower motor.
- Installing the new blower motor.
- Reconnecting the electrical connector.
- Reinstalling any retaining screws or clips.
- Reconnecting the negative battery terminal.
After replacing the blower motor, test the system to ensure it's working properly.
When to Seek Professional Help
While many blower motor issues can be resolved with basic troubleshooting and component replacement, there are times when it's best to seek professional help:
- You're uncomfortable working with electrical systems.
- You suspect a short circuit.
- You've replaced the fuse multiple times, and it keeps blowing.
- You're unable to locate the problem after performing the troubleshooting steps.
- You suspect the HVAC control panel is faulty.
A qualified mechanic can diagnose the problem accurately and perform the necessary repairs safely and efficiently.
Preventative Maintenance Tips
While blower motor failures can happen, here are a few tips to help prevent them:
- Replace the cabin air filter regularly. A clogged cabin air filter restricts airflow, putting extra strain on the blower motor. Check your owner's manual for the recommended replacement interval.
- Avoid running the blower motor at high speed unnecessarily. Running the blower motor at high speed for extended periods can shorten its lifespan.
- Address any unusual noises coming from the blower motor immediately. Squealing, grinding, or other unusual noises can be early signs of a failing motor.
- Inspect wiring regularly for damage, especially after rodent activity.
By following these tips, you can help extend the life of your 2012 Nissan Rogue's blower motor and avoid the inconvenience of a non-functional HVAC system. Regular maintenance is key to keeping your car running smoothly. Don't ignore warning signs – addressing them early can save you time and money in the long run. Remember to always prioritize safety when working on your vehicle. If you're unsure about any step, seek professional assistance.