2015 Nissan Rogue Alternator Replacement
The 2015 Nissan Rogue, a popular compact SUV, is known for its fuel efficiency and practicality. However, like any vehicle, it's susceptible to component failures over time. One crucial component is the alternator, responsible for keeping the battery charged and powering the electrical system while the engine is running. When an alternator fails, it can lead to a dead battery and a host of other electrical problems. This article provides a comprehensive guide to understanding and replacing the alternator on your 2015 Nissan Rogue.
Understanding the Alternator's Role
The alternator is essentially a small generator driven by the engine via a belt. Its primary function is to convert mechanical energy (engine rotation) into electrical energy. This electricity is then used to:
- Charge the battery
- Power the headlights, taillights, and interior lights
- Operate the radio, air conditioning, and other accessories
- Provide electricity for engine management systems like the fuel injection and ignition
Think of it like this: your battery is a reservoir of electrical energy, and the alternator is the pump that keeps the reservoir full. Without a functioning alternator, the battery will eventually be depleted, leaving you stranded. Compare this to an older car, like a classic 1967 Ford Mustang. While those cars had simpler electrical systems, they still relied on an alternator (or, in even older models, a generator) to keep the battery charged. A modern car, like the Rogue, just has far more sophisticated electrical demands.
Recognizing the Symptoms of a Failing Alternator
Identifying a failing alternator early can save you from a breakdown. Here are some common symptoms:
- Dim or Flickering Headlights: This is often one of the first signs. As the alternator struggles to provide enough power, the headlights may appear dim or flicker intermittently.
- Warning Lights: The battery warning light (shaped like a battery) or the "ALT" (alternator) light on your dashboard may illuminate. Don't ignore these warnings!
- Slow or Difficult Starting: A weak alternator may not be able to fully charge the battery, leading to slow cranking or difficulty starting the engine. It's like trying to start a cold engine on a freezing morning; it just takes longer and more effort.
- Electrical System Problems: You might experience issues with other electrical components, such as the radio cutting out, the power windows working slowly, or the air conditioning not blowing as cold.
- Growling or Whining Noise: The alternator contains bearings that can wear out over time. A worn-out bearing can produce a noticeable growling or whining noise, especially at higher engine speeds. This is similar to the sound a worn-out power steering pump might make in a Honda Civic.
- Stalling: In severe cases, a failing alternator can cause the engine to stall, especially at idle. This is because the engine management system may not receive enough power to function correctly.
- Dead Battery: If the alternator completely fails, the battery will eventually drain, leaving you with a dead battery.
If you experience any of these symptoms, it's important to have your alternator tested. Most auto parts stores offer free alternator testing services.
Tools and Materials Needed for Replacement
Replacing an alternator is a task that most DIY mechanics can handle with the right tools and knowledge. Here's a list of what you'll need:
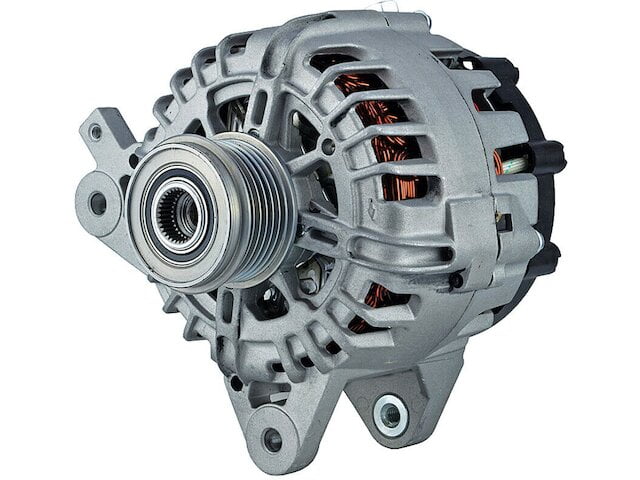
- New Alternator: Purchase a replacement alternator that is specifically designed for your 2015 Nissan Rogue. Make sure to check the part number and specifications to ensure compatibility. Buying a cheap, generic alternator might save money initially, but it could lead to premature failure, similar to using non-OEM parts in a luxury car like a BMW.
- Socket Set: You'll need a socket set with various sizes to remove the alternator mounting bolts and belt tensioner. Metric sockets are essential for working on a Nissan.
- Wrench Set: A wrench set will also be needed, especially for accessing some of the bolts and nuts in tight spaces.
- Screwdrivers: A Phillips head and a flathead screwdriver may be necessary for removing covers or clamps.
- Belt Tensioner Tool: This specialized tool is used to release the tension on the serpentine belt, allowing you to remove it from the alternator pulley. Some tensioners can be manipulated with a simple wrench, but a dedicated tool makes the job easier.
- Multimeter: A multimeter is useful for testing the battery voltage and confirming that the new alternator is charging correctly.
- Gloves: Wear gloves to protect your hands from dirt, grease, and sharp edges.
- Safety Glasses: Protect your eyes from debris.
- Battery Terminal Cleaner: Clean the battery terminals before reconnecting them to ensure a good connection.
- Penetrating Oil: If any bolts are rusted or stuck, penetrating oil can help loosen them.
- Shop Rags: Keep shop rags handy to wipe up spills and keep your workspace clean.
- Jack and Jack Stands (Optional): Depending on the location of the alternator, you may need to jack up the vehicle to gain better access. Always use jack stands for safety.
Step-by-Step Alternator Replacement Guide
Safety First: Before starting any work on your vehicle, disconnect the negative battery cable. This will prevent electrical shocks and protect the vehicle's electrical system.
- Locate the Alternator: The alternator on a 2015 Nissan Rogue is typically located on the front of the engine. Refer to your vehicle's repair manual if you're unsure of its exact location.
- Disconnect the Negative Battery Cable: Use a wrench to loosen and remove the negative battery cable from the battery terminal. Secure the cable away from the terminal to prevent accidental contact.
- Remove the Serpentine Belt: Locate the serpentine belt tensioner. Use the belt tensioner tool or a wrench to release the tension on the belt. Carefully remove the belt from the alternator pulley. Note the routing of the belt before removing it, as it needs to be reinstalled correctly. Taking a picture with your phone can be helpful.
- Disconnect the Electrical Connectors: Disconnect the electrical connectors from the alternator. There will typically be one or two connectors. Be careful not to damage the connectors.
- Remove the Alternator Mounting Bolts: Use a socket and wrench to remove the bolts that secure the alternator to the engine bracket. These bolts can sometimes be tight, so penetrating oil may be necessary.
- Remove the Alternator: Once all the bolts are removed, carefully remove the alternator from the vehicle. You may need to wiggle it slightly to free it from the bracket.
- Install the New Alternator: Position the new alternator in the engine bracket and align the mounting holes. Install the mounting bolts and tighten them to the manufacturer's specified torque.
- Reconnect the Electrical Connectors: Reconnect the electrical connectors to the alternator. Make sure the connectors are securely attached.
- Reinstall the Serpentine Belt: Route the serpentine belt around the alternator pulley and other pulleys, following the original routing pattern. Use the belt tensioner tool to release the tension and slip the belt onto the alternator pulley.
- Reconnect the Negative Battery Cable: Reconnect the negative battery cable to the battery terminal and tighten the nut securely.
- Start the Engine: Start the engine and check for proper charging. Use a multimeter to measure the voltage at the battery terminals. The voltage should be between 13.5 and 14.5 volts with the engine running.
- Test the Electrical System: Test the headlights, radio, air conditioning, and other electrical components to ensure they are functioning properly.
Troubleshooting Common Issues
Even with careful installation, you might encounter some issues. Here are a few common problems and how to address them:
- Battery Light Stays On: If the battery light remains illuminated after replacing the alternator, double-check all the electrical connections. A loose or corroded connection can prevent the alternator from charging properly. Also, ensure the serpentine belt is properly tensioned. If the problem persists, the new alternator may be defective.
- Alternator Noise: If you hear a whining or grinding noise after installing the new alternator, the belt may be misaligned or the alternator pulley may be damaged. Check the belt alignment and inspect the pulley for damage.
- No Charging: If the new alternator is not charging the battery, use a multimeter to check the voltage at the alternator output terminal. If there is no voltage, the alternator may be defective or there may be a wiring problem. Compare this to checking for voltage at the starter in a Toyota Corolla – a similar troubleshooting step for a different component.
Preventive Maintenance Tips
While alternators do eventually wear out, you can extend their lifespan by following these preventive maintenance tips:
- Regular Battery Checks: A healthy battery reduces the load on the alternator. Have your battery tested regularly and replace it if it's weak.
- Proper Belt Tension: Ensure the serpentine belt is properly tensioned. A loose belt can slip, reducing the alternator's output.
- Avoid Excessive Electrical Loads: Minimize the use of accessories when the engine is idling. This reduces the strain on the alternator.
- Keep the Engine Clean: A clean engine compartment allows for better ventilation, which can help prevent the alternator from overheating.
Practical Takeaways
- Recognize the Symptoms: Learn to identify the signs of a failing alternator early to avoid a breakdown.
- Gather the Right Tools: Ensure you have the necessary tools and materials before starting the replacement process.
- Follow the Steps Carefully: Follow the step-by-step guide carefully to avoid damaging the vehicle or the new alternator.
- Troubleshoot Effectively: Be prepared to troubleshoot common issues that may arise after the replacement.
- Maintain Regularly: Implement preventive maintenance tips to extend the lifespan of your alternator.
Replacing the alternator on your 2015 Nissan Rogue is a manageable task for most DIY mechanics. By understanding the alternator's function, recognizing the symptoms of failure, and following the steps outlined in this guide, you can save money on repair costs and keep your Rogue running smoothly for years to come. Remember safety first, and when in doubt, consult a qualified mechanic.