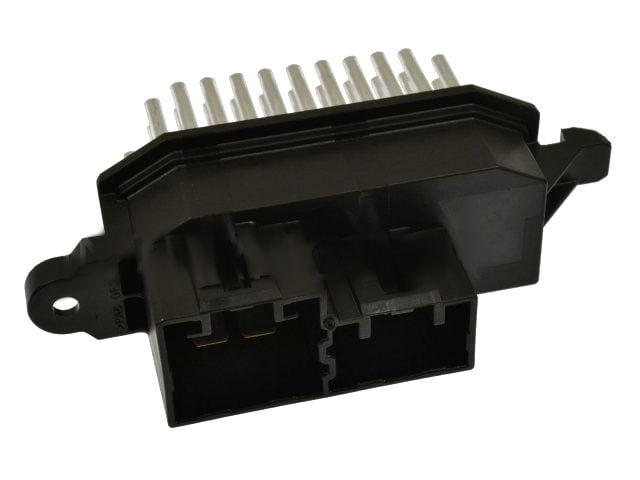
2016 Nissan Rogue Blower Motor Resistor
The 2016 Nissan Rogue, a popular compact SUV, relies on a complex climate control system to keep its occupants comfortable. Central to this system is the blower motor, responsible for circulating air throughout the cabin, and the blower motor resistor, a critical component that controls the speed of that blower motor. This guide delves deep into the function, operation, potential failures, and troubleshooting of the 2016 Nissan Rogue blower motor resistor, providing a comprehensive understanding for the technically inclined.
Blower Motor Basics
Before we examine the resistor, it's important to understand the blower motor itself. This small electric motor, typically located behind the glove compartment, is responsible for forcing air across the evaporator core (for cooling) or the heater core (for heating) and into the vehicle's vents. The speed at which the blower motor spins dictates the volume of air delivered. Without a way to control this speed, the blower would operate at a single, often excessively powerful, setting.
The Role of the Blower Motor Resistor
This is where the blower motor resistor comes into play. It acts as a voltage divider, reducing the voltage supplied to the blower motor, effectively reducing its speed. Think of it as a series of electrical speed bumps for the current flowing to the motor. Each resistor in the series drops a certain amount of voltage, resulting in different blower speeds.
Inside the resistor module, you'll typically find a series of thick-film resistors, often made from ceramic materials like cermet, due to their ability to withstand high temperatures. Each resistor has a specific resistance value. When the driver selects a lower blower speed, the electrical circuit routes the current through more of these resistors, dropping more voltage and slowing down the motor. Conversely, selecting a higher speed bypasses some of the resistors, allowing more voltage to reach the motor, resulting in faster operation.
For example, on the lowest blower speed setting, the current might pass through all the resistors in the module, resulting in a significant voltage drop and a very slow blower speed. On the highest setting, the current may bypass all the resistors entirely, allowing the full 12V (or slightly less, depending on system voltage) to reach the motor.
Circuit Diagram Overview (Generalized)
While specific wiring diagrams vary slightly depending on trim level and optional features, the basic concept remains consistent. Here's a generalized overview:
- Battery: Provides the 12V power source.
- Fuse: Protects the circuit from overcurrent situations. A blown fuse is a common symptom of a problem in the blower motor circuit.
- Blower Motor Relay: Often used to switch the high-speed blower setting. This is because the high-speed setting draws a significant amount of current, and a relay allows a smaller switch in the dashboard to control a larger current.
- Blower Motor Switch (in the HVAC control panel): This is the switch that allows the driver to select the desired blower speed. This switch doesn't directly handle the high current of the blower motor; instead, it signals the blower motor resistor or the blower motor relay.
- Blower Motor Resistor: Contains a series of resistors used to drop voltage to the blower motor, controlling its speed.
- Blower Motor: The electric motor that spins the fan.
- Ground: Completes the electrical circuit.
Common Failure Modes
The blower motor resistor is susceptible to several failure modes, primarily due to the harsh environment it operates in – high heat, humidity, and electrical stress. Here are the most common causes:
Overheating
The resistors in the module generate heat as they dissipate electrical energy. If the airflow across the resistor module is obstructed, the heat can build up, leading to premature failure. This obstruction is often caused by debris accumulation (leaves, dirt, etc.) in the blower motor housing or a failing blower motor drawing excessive current.
Corrosion
The resistor module is typically located in the HVAC housing, which can be exposed to moisture. Corrosion can develop on the resistor terminals or the resistors themselves, leading to increased resistance, intermittent operation, or complete failure.
Resistor Burnout
Individual resistors within the module can burn out due to excessive current or prolonged operation at high temperatures. This is particularly common if the blower motor is starting to fail and drawing more current than normal.
Connector Issues
The electrical connector that plugs into the resistor module can become damaged or corroded, leading to poor electrical contact. This can cause intermittent operation or complete failure of certain blower speeds.
Symptoms of a Failing Blower Motor Resistor in the 2016 Rogue
Recognizing the symptoms of a failing blower motor resistor is crucial for timely diagnosis and repair. Here are the most common indicators:
- Blower motor only works on one speed (usually high): This is the most classic symptom. When the resistors for the lower speeds fail, the blower will only operate when the resistor module is bypassed entirely, which is typically the high-speed setting.
- Some blower speeds don't work: You might find that speeds 1 and 2 don't work, but speeds 3 and 4 do. This indicates that specific resistors within the module have failed.
- Blower motor works intermittently: The blower motor might work sometimes and not others, or the speed might fluctuate erratically. This could be due to a loose connection, corrosion, or a partially failed resistor.
- No blower motor operation at all: In some cases, a completely failed resistor module will prevent the blower motor from operating at any speed. However, this can also be caused by other issues, such as a blown fuse, a faulty blower motor relay, or a bad blower motor itself.
- Burning smell: A burning smell coming from the vents can indicate that the resistor module is overheating or that a resistor has burned out. This is a serious symptom that requires immediate attention.
Troubleshooting the Blower Motor Resistor
Troubleshooting a blower motor resistor requires a systematic approach and some basic electrical knowledge. Here's a step-by-step guide:
- Check the Fuse: The first step is always to check the fuse for the blower motor. Refer to the owner's manual for the location of the fuse. A blown fuse is a common cause of blower motor failure and is easy to fix.
- Inspect the Connector: Disconnect the electrical connector from the resistor module and inspect it for corrosion, damaged wires, or loose terminals. Clean any corrosion with a contact cleaner and ensure that the connector is securely attached.
- Voltage Test: With the ignition on and the blower motor switch in the 'on' position, use a multimeter to check for voltage at the connector that plugs into the blower motor resistor. You should see voltage present, even if the blower isn't running. If there's no voltage, the problem likely lies upstream, such as in the blower motor switch, relay, or wiring.
- Resistance Test: This is the most definitive test for the resistor module. Using a multimeter set to measure resistance (Ohms), test the resistance across different terminals of the resistor module. Consult a repair manual or online resource for the correct resistance values for each terminal. If the resistance is significantly different from the specified value, the resistor is likely faulty. Note: This test is best performed with the module removed from the vehicle.
- Blower Motor Test: Rule out the blower motor itself as a source of the problem. You can directly power the blower motor with a 12V power source (e.g., a battery) to see if it spins. If it doesn't spin or spins erratically, the blower motor itself may be failing.
Replacement Procedure
Replacing the blower motor resistor on a 2016 Nissan Rogue is typically a straightforward process. Here's a general guide:
- Disconnect the Battery: Always disconnect the negative battery terminal before working on electrical components.
- Locate the Resistor Module: The resistor module is usually located near the blower motor, often behind the glove compartment. You may need to remove the glove compartment or other trim panels to access it. Refer to a repair manual for specific instructions.
- Disconnect the Electrical Connector: Disconnect the electrical connector from the resistor module.
- Remove the Resistor Module: The resistor module is typically held in place by a few screws or bolts. Remove these fasteners and carefully remove the module.
- Install the New Resistor Module: Install the new resistor module in the reverse order of removal. Ensure that the electrical connector is securely attached.
- Reconnect the Battery: Reconnect the negative battery terminal.
- Test the System: Turn on the ignition and test the blower motor at all speeds to ensure that the new resistor module is working correctly.
Prevention
While blower motor resistor failure can sometimes be unavoidable, you can take steps to minimize the risk:
- Regularly Replace Cabin Air Filter: A clogged cabin air filter restricts airflow to the blower motor and resistor. This can cause the resistor to overheat and fail prematurely. Replace the cabin air filter according to the manufacturer's recommended schedule.
- Address Unusual Noises: If you notice any unusual noises coming from the blower motor (e.g., squealing, grinding), have it inspected and repaired or replaced as soon as possible. A failing blower motor can draw excessive current and overload the resistor.
- Keep Vents Clear: Ensure the vents leading to the HVAC system are free from leaves and debris. These obstructions reduce airflow across the resistor, leading to overheating.
By understanding the function, potential failure points, and troubleshooting procedures for the 2016 Nissan Rogue blower motor resistor, you can effectively diagnose and address issues, ensuring a comfortable and reliable climate control system.