2018 Nissan Altima Airbag Light Stays On
The dreaded airbag light. Seeing it illuminated on your dashboard is never a good feeling. In a 2018 Nissan Altima, a persistent airbag light signals a potential problem with the Supplemental Restraint System (SRS), which includes airbags, seatbelt pretensioners, and sensors. Ignoring it isn't an option; it means your airbags might not deploy in an accident, putting you and your passengers at serious risk. This article provides practical troubleshooting steps and solutions for both car owners and mechanics facing this issue.
Understanding the SRS System
Before diving into troubleshooting, it's crucial to understand the SRS system's components. The SRS is a complex network of sensors, control modules, and actuators designed to protect occupants during a collision. Key components include:
- Airbag Control Module (ACM): The "brain" of the system, it monitors sensors and triggers airbag deployment.
- Airbags: Located in the steering wheel, dashboard, and seats, they inflate rapidly during a crash to cushion occupants.
- Seatbelt Pretensioners: Tighten seatbelts during a collision to restrain occupants.
- Crash Sensors: Detect the severity of an impact and send signals to the ACM.
- Occupant Classification System (OCS): Determines if a seat is occupied and adjusts airbag deployment accordingly (especially in the passenger seat).
- Clock Spring: Allows electrical connection to the airbag and controls in the steering wheel while allowing it to rotate.
When the airbag light is on, it signifies that the ACM has detected a fault within the SRS. This fault could be a minor sensor issue or a major problem that disables the entire system.
Common Symptoms & Initial Checks
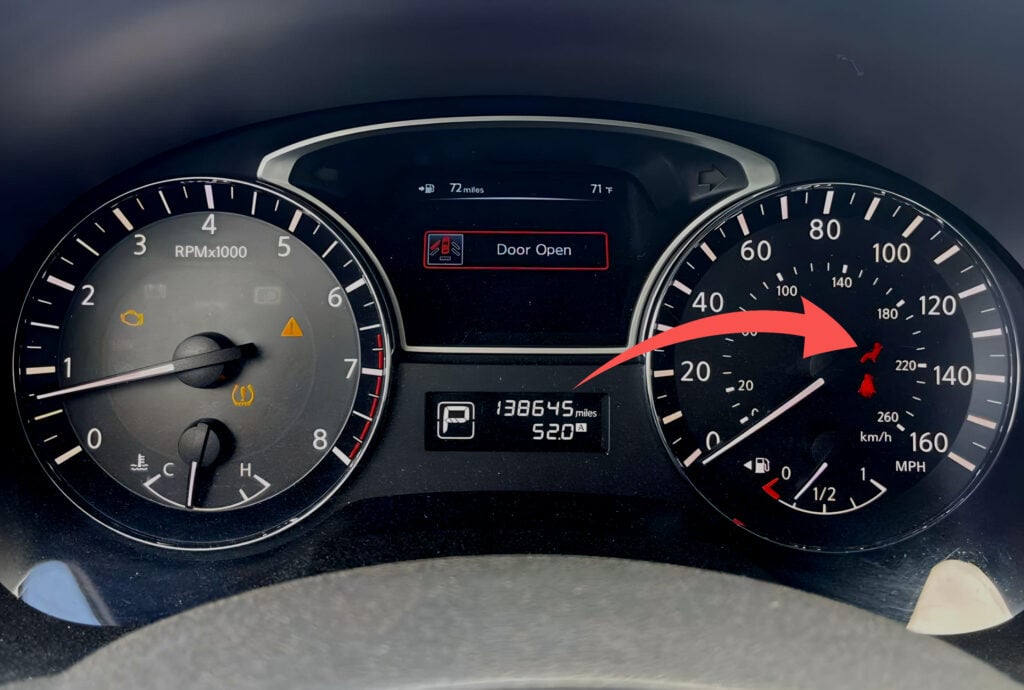
The primary symptom is, of course, the illuminated airbag warning light on the instrument cluster. However, other symptoms might accompany it:
- The airbag light may flash in a specific pattern (this pattern is a diagnostic code, explained later).
- The passenger airbag OFF indicator may be illuminated even when a passenger is seated.
- Seatbelt pretensioners may not function correctly.
Initial Checks (for Car Owners):
- Visual Inspection: Check under the seats for loose connectors or damaged wiring, especially for the seat occupancy sensor. Look for any signs of physical damage to the airbag covers on the steering wheel, dashboard, or seats.
- Seatbelt Buckles: Ensure that all seatbelts are functioning correctly and that the buckles latch securely.
- Battery Voltage: A low battery voltage can sometimes trigger false airbag warnings. Check the battery voltage with a multimeter. It should be around 12.6 volts with the engine off.
- Fuse Check: Consult your owner's manual and locate the fuse for the SRS system. Check if the fuse is blown. Replace it with the same amperage fuse if necessary. If the fuse blows again immediately, there's likely a short circuit in the system that requires professional attention.
Troubleshooting & Diagnostic Steps (For Mechanics & Advanced DIYers)
If the initial checks don't resolve the issue, a more in-depth diagnosis is required. This involves using a scan tool to read the Diagnostic Trouble Codes (DTCs) stored in the ACM.
Reading Diagnostic Trouble Codes (DTCs)
Connect a compatible scan tool to the OBD-II port (usually located under the dashboard). Select the SRS or Airbag system in the scan tool menu. Retrieve any stored DTCs. These codes provide valuable information about the nature of the problem. Common DTCs for a 2018 Nissan Altima airbag system include:
- B1018: Driver Airbag Module Resistance High
- B1019: Driver Airbag Module Resistance Low
- B1022: Passenger Airbag Module Resistance High
- B1023: Passenger Airbag Module Resistance Low
- B1049: Side Airbag Circuit Malfunction (Left/Right)
- B1054: Seatbelt Pretensioner Circuit Malfunction
- B1069: Occupant Classification System Malfunction
- B1078: Clock Spring Malfunction
- U1000: CAN Communication Circuit
Important: Always record the DTCs before clearing them. Clearing the codes without addressing the underlying issue will only result in the light returning.
Troubleshooting Common Issues Based on DTCs
Let's examine some common DTCs and their respective troubleshooting steps:
1. Airbag Module Resistance Codes (B1018, B1019, B1022, B1023)
Cause: These codes usually indicate a problem with the airbag module itself or the wiring connecting it to the ACM.
Troubleshooting Steps:
- Check Connectors: Disconnect the battery (very important!) and carefully disconnect and reconnect the airbag module connector. Inspect the connector pins for corrosion or damage. Apply dielectric grease to the connector.
- Wiring Continuity Test: Use a multimeter to check the continuity of the wiring between the airbag module connector and the ACM connector. Look for open circuits or shorts to ground. Consult the vehicle's wiring diagram for pin locations.
- Airbag Module Replacement: If the wiring and connectors are good, the airbag module itself might be faulty. Important: Airbag module replacement should only be performed by a qualified technician. After replacement, the system will require programming with a compatible scan tool.
Real-World Example: A similar issue occurs in some Honda Civics where corrosion builds up on the driver's airbag connector, causing a high resistance code.
2. Seatbelt Pretensioner Circuit Malfunction (B1054)
Cause: Issues with the seatbelt pretensioner itself, its wiring, or the connector.
Troubleshooting Steps:
- Connector Inspection: Disconnect the battery and inspect the seatbelt pretensioner connector under the seat. Look for damage, corrosion, or loose connections.
- Wiring Check: Test the continuity of the wiring between the pretensioner connector and the ACM.
- Pretensioner Replacement: If the wiring is good, the pretensioner might be faulty. Important: Replacing a seatbelt pretensioner is a safety-critical repair that should be performed by a qualified technician.
Real-World Example: Many Ford F-150 trucks experience pretensioner failures due to water intrusion affecting the electrical connector.
3. Occupant Classification System Malfunction (B1069)
Cause: Problems with the sensors in the passenger seat that detect weight and position, or the OCS module itself.
Troubleshooting Steps:
- Sensor Calibration: Some scan tools can perform an OCS calibration procedure. This may resolve issues caused by incorrect weight readings.
- Sensor Testing: Use a scan tool to monitor the output of the OCS sensors while placing different weights on the seat. The readings should be within the specified range.
- OCS Module Replacement: If the sensors are faulty or the OCS module is malfunctioning, replacement is necessary. Important: OCS module replacement may require programming with a compatible scan tool.
Real-World Example: Subaru Outbacks are prone to OCS issues, often requiring recalibration or sensor replacement.
4. Clock Spring Malfunction (B1078)
Cause: A broken or damaged clock spring, which allows the steering wheel to rotate while maintaining electrical connections.
Troubleshooting Steps:
- Visual Inspection: Disconnect the battery and carefully remove the steering wheel airbag. Inspect the clock spring for any visible damage or broken wires.
- Continuity Test: Use a multimeter to test the continuity of each circuit in the clock spring.
- Clock Spring Replacement: If the clock spring is damaged, it must be replaced. Important: Replacing the clock spring requires careful attention to alignment. Improper installation can damage the clock spring and disable the airbag system.
Real-World Example: Many Toyota Corollas experience clock spring failures, often accompanied by a squeaking sound when turning the steering wheel.
5. CAN Communication Circuit (U1000)
Cause: This code indicates a problem with the Controller Area Network (CAN) bus, which allows different modules in the vehicle to communicate. This can be a complex issue to diagnose.
Troubleshooting Steps:
- Check for Other DTCs: A U1000 code often accompanies other DTCs in other modules. Address those codes first.
- CAN Bus Testing: Use a scan tool with CAN bus diagnostic capabilities to monitor the communication signals between modules.
- Wiring Inspection: Inspect the CAN bus wiring for damage, corrosion, or loose connections.
- Module Replacement: In rare cases, a faulty module can disrupt the CAN bus.
Real-World Example: GM vehicles can sometimes experience U1000 codes due to loose or corroded CAN bus connectors in the engine compartment.
After the Repair
Once you've identified and fixed the problem, clear the DTCs using the scan tool. Turn the ignition on and verify that the airbag light turns off after the self-test completes (usually a few seconds). Road test the vehicle to ensure that the airbag light doesn't reappear.
Preventative Maintenance & Tips for Car Owners
Here are some tips to help prevent airbag system issues:
- Keep the Interior Clean: Avoid spilling liquids on the seats, as this can damage the OCS sensors and wiring.
- Regular Inspections: Periodically inspect the wiring and connectors under the seats for any signs of damage or corrosion.
- Professional Servicing: Have the SRS system checked by a qualified technician during routine maintenance.
- Battery Health: Maintain a healthy battery. A weak battery can cause electrical glitches that trigger the airbag light.
- Avoid Aftermarket Modifications: Avoid installing aftermarket seat covers or making modifications to the seats or steering wheel that could interfere with the SRS system.
Important Safety Note: Working on the SRS system can be dangerous. Always disconnect the battery and wait at least 10 minutes before working on any airbag components. Airbags can deploy unexpectedly, causing serious injury. If you're not comfortable working on the SRS system, seek assistance from a qualified technician.
By understanding the SRS system, performing thorough troubleshooting, and following these guidelines, you can effectively diagnose and resolve airbag light issues in your 2018 Nissan Altima and ensure the safety of yourself and your passengers.