2020 Nissan Kicks Oil Filter
So, you're having a bit of trouble finding the right oil filter for your 2020 Nissan Kicks, or perhaps you're running into snags during the oil change process itself? Don't worry, you're not alone! It's a common concern, and thankfully, usually a pretty straightforward fix. Let's dive into the common problems and their solutions to keep your Kicks running smoothly.
Problem: Identifying the Correct Oil Filter
One of the most frequent issues is simply making sure you've got the right oil filter. There can be slight variations even within the same model year, and misidentification can lead to leaks, poor filtration, and even engine damage in the long run. Using the wrong filter can affect oil pressure and flow, potentially starving vital engine components of lubrication. Always double-check!
Solution: Cross-Reference and Verification
The best approach is a combination of methods:
- Refer to your Owner's Manual: This is your first and most reliable source of information. The manual should specify the exact oil filter part number recommended by Nissan for your 2020 Kicks.
- Check Reputable Parts Retailers Online: Websites like AutoZone, Advance Auto Parts, O'Reilly Auto Parts, and RockAuto usually have vehicle-specific lookup tools. Enter your year, make, and model, and it will narrow down the compatible oil filters. Pay close attention to any notes about engine types or variations.
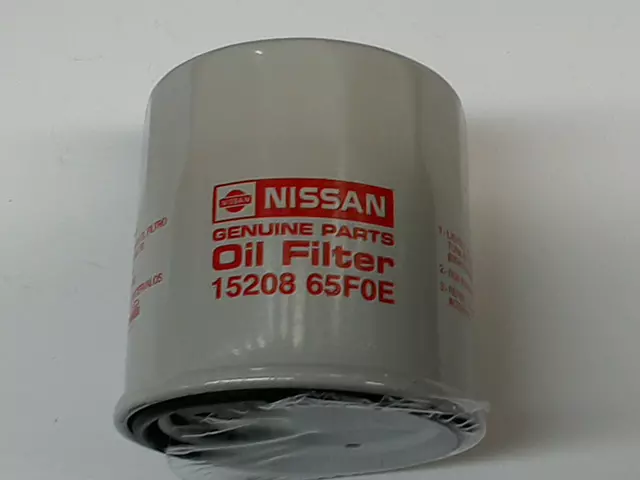
- Cross-Reference with Existing Filter: If you're replacing an old filter, look for the part number printed directly on the filter itself. You can then use this number to cross-reference with other brands to find a suitable replacement. Common brands include Nissan (OEM), Bosch, Mobil 1, Purolator, and Fram.
- When in Doubt, Ask a Professional: If you're unsure, don't hesitate to call your local Nissan dealership or a trusted mechanic. They can quickly verify the correct filter for your vehicle based on your VIN (Vehicle Identification Number).
Practical Tip: Write down the correct oil filter part number in your vehicle's maintenance log or on a sticker inside the engine compartment. This will save you time and hassle the next time you need to change your oil.
Problem: Difficulty Removing the Old Oil Filter
Another common headache is struggling to remove the old oil filter. Over-tightening during the previous installation, heat cycling, and general grime can make it incredibly difficult to budge.
Solution: Leverage and Proper Tools
Before you resort to brute force, try these methods:
- Oil Filter Wrench: This is the essential tool for removing stubborn oil filters. There are several types available:
- Cap-Type Wrenches: These fit over the end of the filter and grip it as you turn. Make sure you get the right size for your specific filter.
- Band-Type Wrenches: These feature a metal or fabric band that tightens around the filter as you apply pressure. They are more universal but may slip if the filter is excessively tight.
- Pliers-Type Wrenches: These have adjustable jaws that grip the filter. They are useful in tight spaces but can damage the filter if not used carefully.
- Proper Technique: Ensure the wrench is securely seated on the filter before applying force. Turn counterclockwise to loosen.
- Penetrating Oil: If the filter is extremely stuck, spray penetrating oil (like WD-40 or PB Blaster) around the base of the filter where it meets the engine block. Let it soak for 10-15 minutes to help loosen any corrosion or grime.
- Hammer and Screwdriver (Last Resort): This is a risky method and should only be used if all else fails. Carefully puncture the filter with a screwdriver and use it as a lever to turn the filter. Be extremely cautious to avoid damaging the engine block or causing injury. Wear safety glasses.
- Warm Up the Engine (Slightly): Running the engine for a minute or two can warm up the oil and potentially make it easier to loosen the filter. However, be careful not to burn yourself on hot engine parts.
Important Note: Always place a drain pan underneath the filter before removing it to catch any spilled oil. Have plenty of rags on hand to clean up any messes.
Tools Needed:
- Oil filter wrench (appropriate type and size)
- Drain pan
- Rags or shop towels
- Penetrating oil (optional)
- Safety glasses
Problem: Leaks After Oil Filter Installation
After installing a new oil filter, you might notice oil leaking from around the filter itself. This is usually due to improper installation or a faulty filter.
Solution: Inspection and Proper Installation
Here's how to diagnose and fix oil filter leaks:
- Check the Gasket: Before installing the new filter, make sure the rubber gasket is in good condition and properly seated. Lightly lubricate the gasket with fresh engine oil to ensure a good seal.
- Tighten to Specifications: Most oil filters have instructions printed on the side indicating how much to tighten them. A common guideline is to tighten the filter by hand until the gasket contacts the engine block, then tighten an additional ¾ to 1 full turn. Do not overtighten! Overtightening can damage the gasket and cause leaks.
- Inspect for Damage: Check the filter and engine block for any signs of damage or debris that could be preventing a proper seal. Clean the mating surface on the engine block before installing the new filter.
- Double-Check the Old Gasket: Make sure the old oil filter gasket isn't stuck to the engine block. If it is, carefully remove it before installing the new filter. Stacking two gaskets will almost certainly cause a leak.
- Run the Engine and Check Again: After installing the new filter, start the engine and let it run for a few minutes. Check around the filter for any signs of leaks. If you see a leak, carefully tighten the filter a little more. If the leak persists, remove the filter and inspect the gasket and mating surface again.
Practical Tip: Some people like to use a torque wrench to tighten the oil filter to the manufacturer's specified torque. This is a good way to ensure consistent and accurate tightening, but it's not always necessary if you follow the hand-tightening guidelines.
Problem: Difficulty Locating the Oil Filter
While usually not a major issue, some owners, especially those new to working on their Kicks, might have a little trouble initially locating the oil filter.
Solution: Visual Aid and Familiarization
The oil filter on the 2020 Nissan Kicks is typically located on the front of the engine, near the bottom, close to the exhaust manifold and behind the radiator. However, here's how to find it if you're unsure:
- Consult Your Owner's Manual: The manual may have a diagram or illustration showing the location of the oil filter.
- Follow the Exhaust Manifold: The oil filter is often located near the exhaust manifold. Look for a cylindrical object with flutes or ridges for gripping.
- Look from Underneath: Jack up the vehicle and secure it with jack stands. From underneath, you should be able to easily see the oil filter.
- Online Resources: Search online for images or videos of the 2020 Nissan Kicks oil filter location. Visual aids can be very helpful.
Safety First: Always use jack stands when working underneath a vehicle. Never rely solely on a jack to support the weight of the car.
Approximate Repair Costs
If you're not comfortable changing the oil filter yourself, here's a general idea of what you can expect to pay at a shop:
- Oil Change Service (including filter): $50 - $120 (depending on the type of oil used and the shop's labor rates)
- Oil Filter Replacement Only: $20 - $50 (This is usually only done if there's a specific issue with the filter itself)
These are just estimates. Prices can vary depending on your location and the specific shop.
Conclusion
Changing the oil filter on your 2020 Nissan Kicks is a relatively simple task that can save you money and help keep your engine running smoothly. By following these tips and solutions, you can overcome common problems and ensure a successful oil change every time. Remember to always use the correct oil filter, tighten it to the proper specifications, and double-check for leaks. If you're ever unsure about any step of the process, don't hesitate to seek professional assistance. Happy motoring!