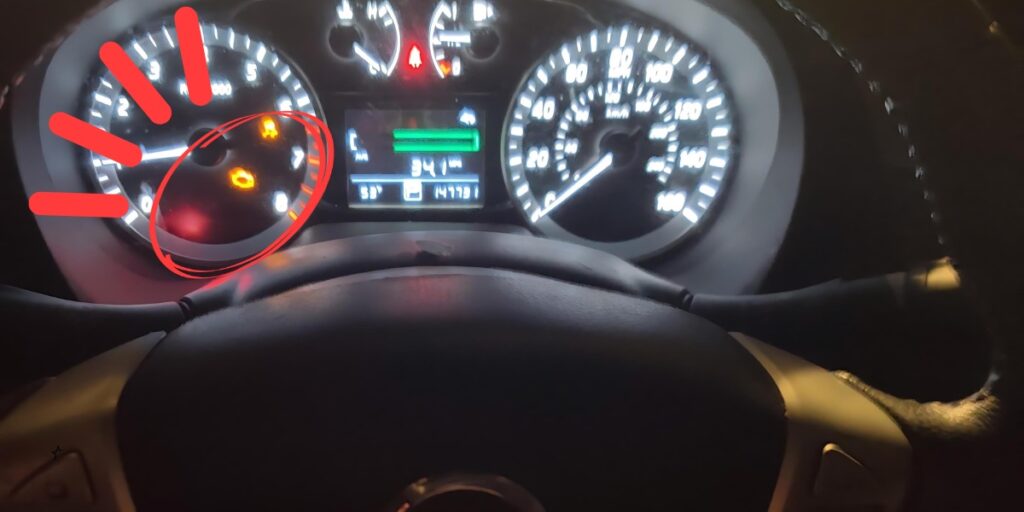
If the check engine light comes on in your Nissan Sentra, don’t worry! It’s just your car’s way of saying it needs a little love. We’ll show you how to reset the check engine light safely and easily so you can get back to smooth sailing on your favorite Nissan car.
The check engine light, also known as the Malfunction Indicator Light (MIL), is part of your vehicle’s onboard diagnostics system (OBD-II). It illuminates when the system detects a problem that could affect the vehicle’s emissions, engine performance, or overall safety. The light can either be steady or blinking. A steady light typically indicates a less severe issue, while a blinking light signals a more serious problem, such as an engine misfire.
When the check engine light comes on, it’s essential to diagnose and fix the underlying issue before attempting to reset the light. Ignoring the problem can lead to more severe damage and costly repairs.

Using an OBD-II Scanner to Reset the Light
The most reliable method to reset the check engine light on your Nissan Sentra is by using an OBD-II scanner. Here’s how to do it:
- Purchase or Borrow an OBD-II Scanner: These devices are available at auto parts stores or online. They range from basic models to more advanced ones with additional features.
- Locate the OBD-II Port: In your Nissan Sentra, the port is usually located under the dashboard on the driver’s side.
- Connect the Scanner: Plug the OBD-II scanner into the port. Turn the ignition to the “On” position without starting the engine.
- Read the Codes: Follow the scanner’s instructions to read the diagnostic trouble codes (DTCs). These codes will help you identify the specific issue.
- Clear the Codes: After fixing the underlying problem, use the scanner to clear the codes. This action will reset the check engine light.
Disconnecting the Battery
Another method to reset the check engine light is by disconnecting the battery. This method is straightforward but has its drawbacks, such as resetting all your vehicle’s settings. Here’s how to do it:
- Turn Off the Ignition: Ensure your car is off before starting.
- Locate the Battery: Open the hood and find the battery.
- Disconnect the Negative Terminal: Use a wrench to loosen the nut on the negative terminal. Remove the cable from the terminal and let it sit for about 15 minutes.
- Reconnect the Terminal: Reattach the negative cable to the battery and tighten the nut.
- Start the Vehicle: Turn on your Nissan Sentra. The check engine light should be off. If it remains on, the issue might still be present, and further diagnosis is required.
Driving Your Car
Sometimes, simply driving your car can reset the check engine light. If the issue is minor and has been resolved, the light might turn off after several driving cycles. Here’s what to do:
- Fix the Problem: Ensure the underlying issue has been addressed.
- Drive Normally: Drive your Nissan Sentra as you usually would. The vehicle’s computer will run diagnostics, and if it doesn’t detect the issue anymore, it will turn off the check engine light.
- Be Patient: This process can take a few days and several driving cycles to complete.
Common Causes of the Check Engine Light
Before resetting the check engine light, it’s helpful to understand some common causes:
- Loose or Faulty Gas Cap: A loose or damaged gas cap can cause the check engine light to illuminate. This is a simple fix but a common cause of the light coming on.
- Faulty Oxygen Sensor: The oxygen sensor monitors the amount of unburned oxygen in the exhaust system. A malfunctioning sensor can affect fuel efficiency and engine performance.
- Catalytic Converter Issues: Problems with the catalytic converter can trigger the check engine light. This component helps reduce harmful emissions.
- Spark Plug or Ignition Coil Issues: Faulty spark plugs or ignition coils can cause engine misfires, leading to the check engine light turning on.
- Mass Air Flow Sensor Problems: This sensor measures the amount of air entering the engine to ensure proper fuel mixing. Issues here can affect engine performance.
Preventing Future Check Engine Light Issues
Regular maintenance is key to preventing issues that trigger the check engine light. Here are some tips:
- Regular Oil Changes: Keep your engine’s oil fresh to ensure it runs smoothly and reduces the risk of issues that can trigger the check engine light.
- Replace Air and Fuel Filters: Clean filters ensure your engine gets the proper air and fuel mixture. Replace them as needed to avoid problems.
- Check and Replace Spark Plugs: Faulty spark plugs can cause misfires. Replace them at the intervals suggested in your owner’s manual.
- Secure the Gas Cap: Make sure the gas cap is tightly secured after refueling. Replace it if it’s damaged or missing.
- Monitor Fluid Levels: Keep an eye on coolant, transmission fluid, and other essential fluids. Regular checks and top-ups can prevent many issues.
- Inspect Hoses and Belts: Regularly check for wear and tear on hoses and belts and replace them as necessary.
If you’ve tried resetting the check engine light and it remains on, or if it comes back on shortly after resetting, it’s time to seek professional help. A certified mechanic has the tools and expertise to diagnose and fix the problem accurately. Ignoring the check engine light can lead to more severe issues and expensive repairs.


