Amplifier Remote Turn On Wire
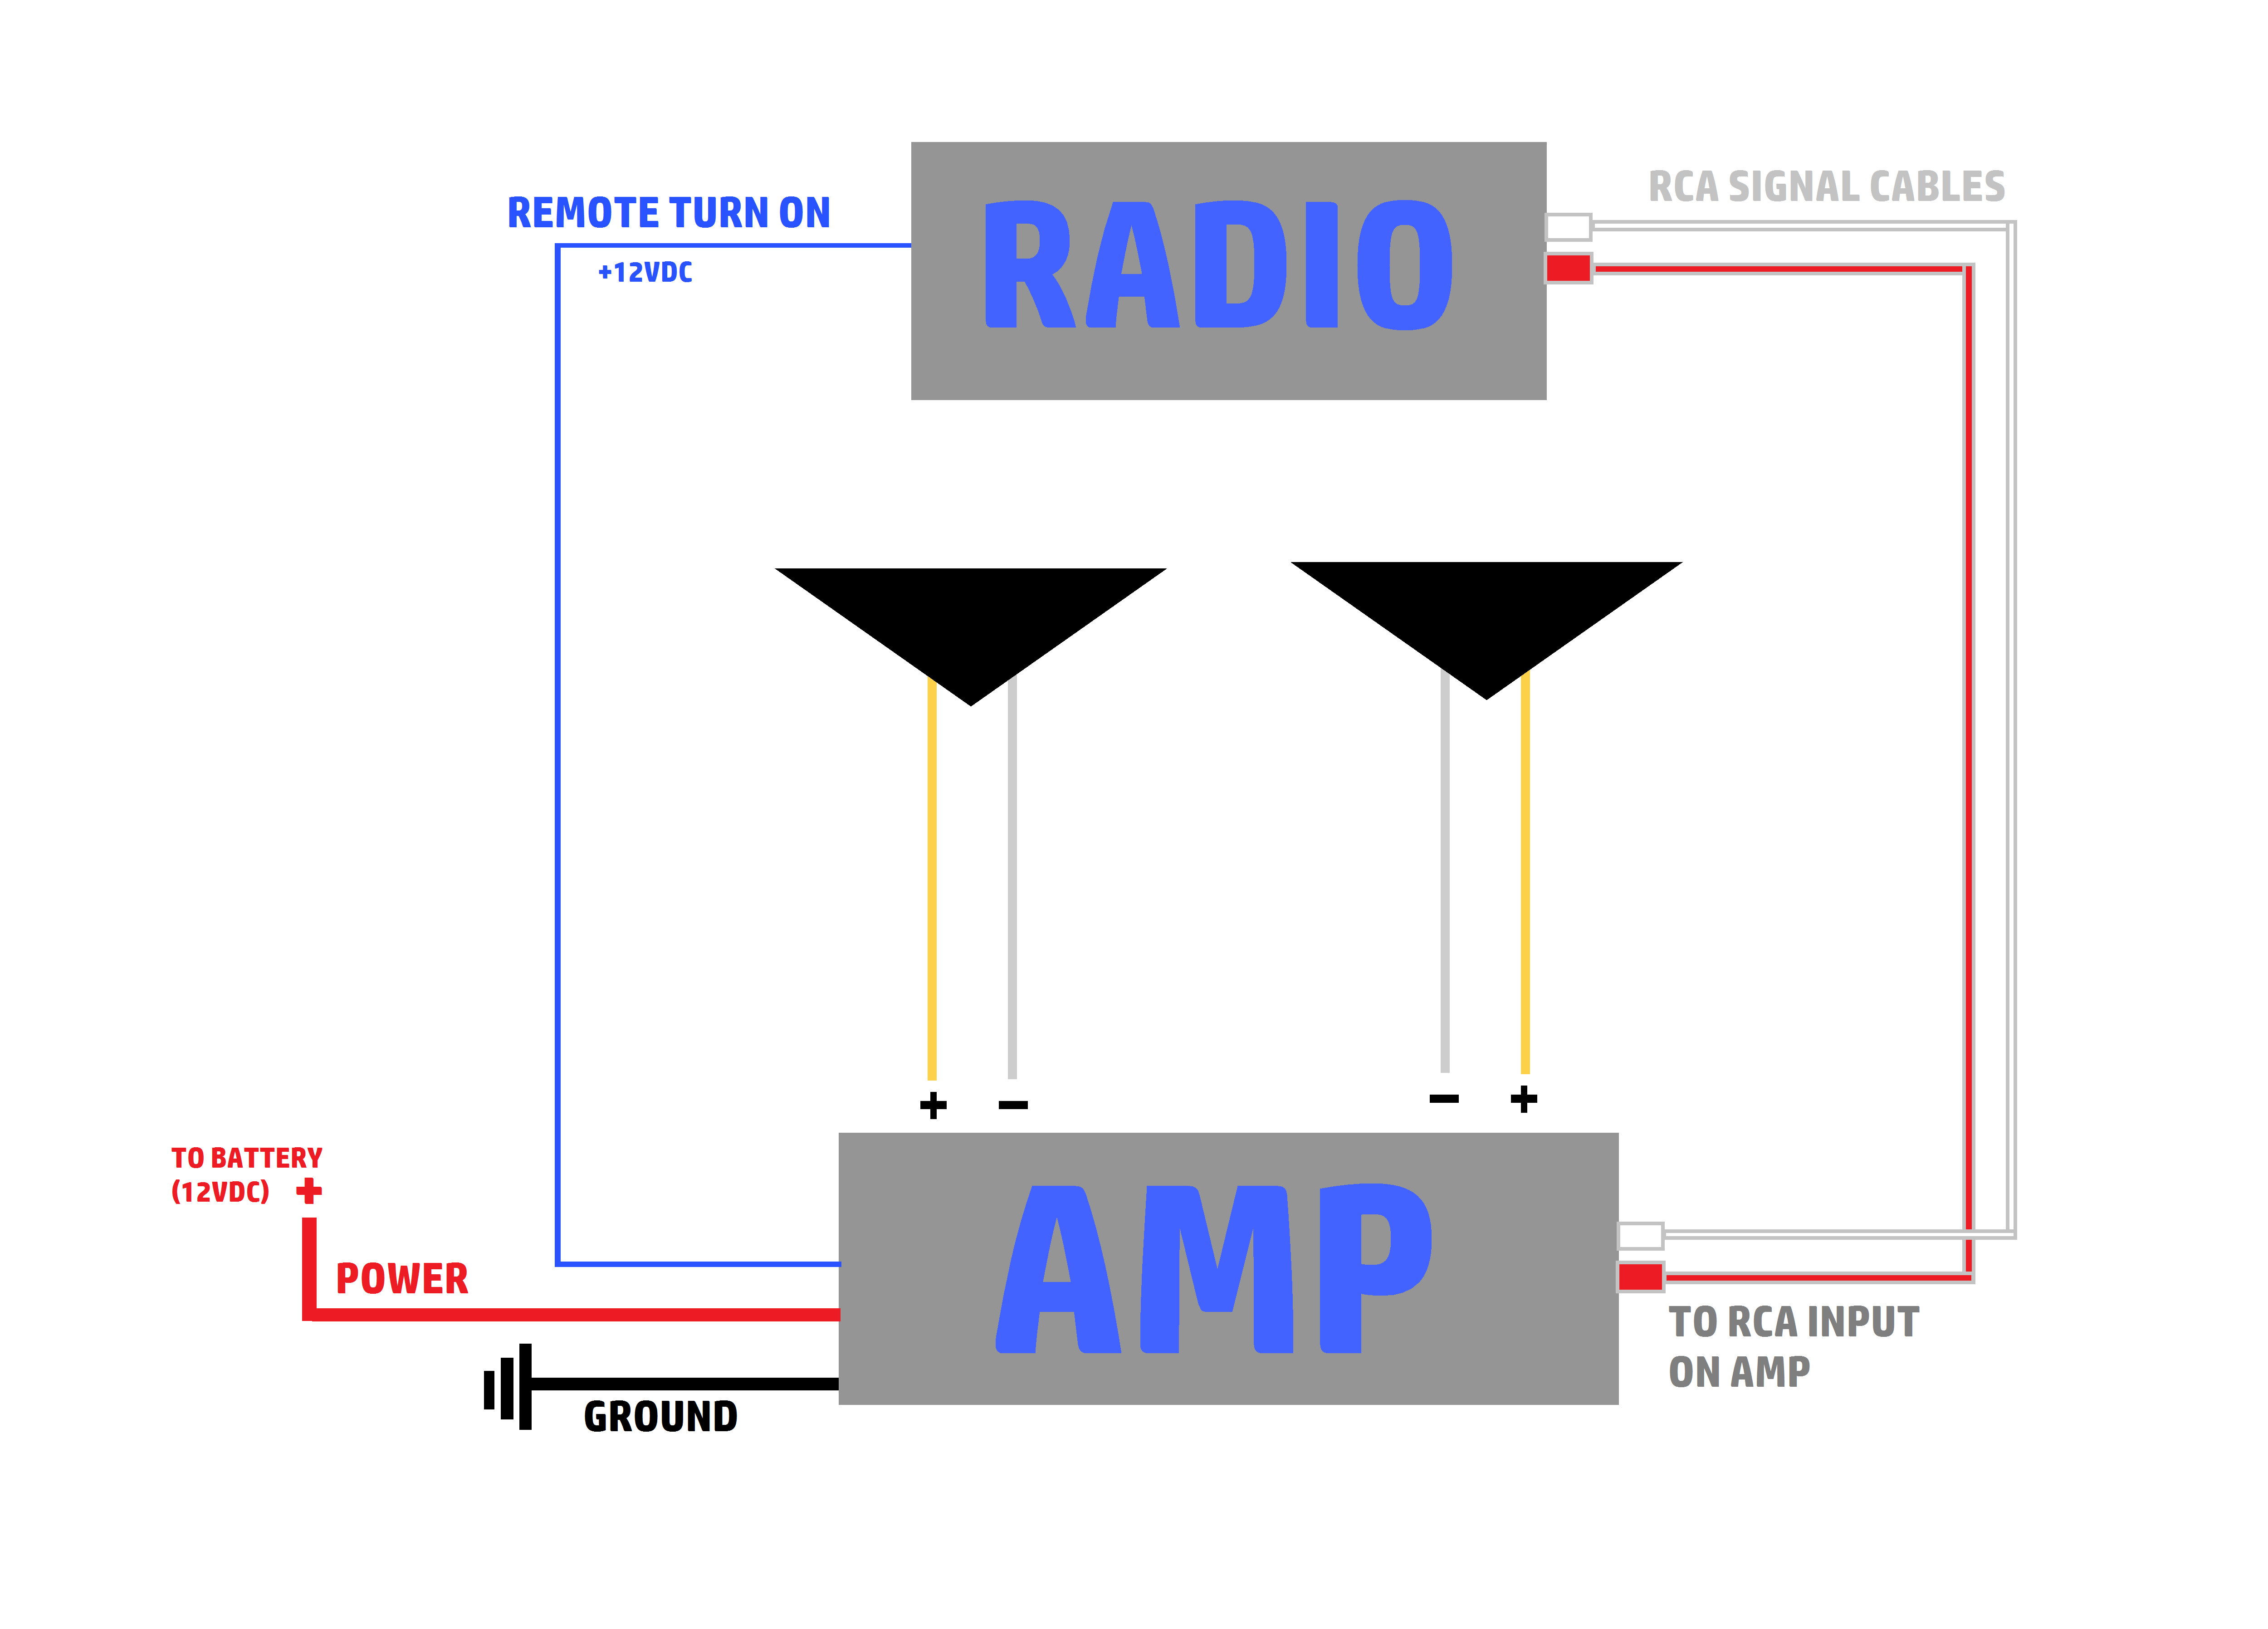
The unsung hero of any aftermarket car audio system, the amplifier remote turn-on wire, often simply referred to as the "remote wire," plays a critical role in ensuring your amplifier powers on and off in sync with your head unit. It's a small gauge wire, typically blue, that acts as a signal conductor, preventing your amplifier from draining your battery when the car is off. Understanding its function, troubleshooting potential issues, and implementing best practices for its installation are crucial for achieving a reliable and high-performing audio setup.
The Role of the Remote Turn-On Wire
At its core, the remote turn-on wire is a 12-volt signal wire. It doesn't carry any significant current to power the amplifier directly. Instead, it sends a signal to the amplifier's internal circuitry, telling it to switch on when the head unit is active and switch off when the head unit is powered down. Without this signal, the amplifier would remain on constantly, rapidly draining the car's battery. Think of it like a light switch for your amp, controlled by the head unit.
Here's a breakdown of the operational sequence:
- Head Unit On: When the head unit is turned on, either via the ignition switch or a dedicated power button, it sends a 12-volt signal through the remote turn-on wire.
- Amplifier Activation: The amplifier detects this 12-volt signal and activates its internal power supply, bringing the amplifier online and ready to amplify audio signals.
- Head Unit Off: When the head unit is powered off, it ceases sending the 12-volt signal.
- Amplifier Deactivation: The amplifier detects the absence of the signal and shuts down its power supply, preventing battery drain.
This seemingly simple process is essential for the longevity of your car's battery and the proper operation of your audio system.
Identifying the Remote Turn-On Wire
Locating the remote turn-on wire is generally straightforward, but it can vary depending on the head unit and wiring harness used. Here are the most common scenarios:
- Aftermarket Head Unit: Most aftermarket head units have a dedicated remote turn-on wire labeled as "Remote," "Remote Out," "Amp Remote," or similar. It's typically a solid blue wire or a blue wire with a white stripe. The head unit's wiring diagram, usually included in the product manual, will clearly identify this wire.
- Factory Head Unit with Line Output Converter (LOC): If you're retaining your factory head unit, you'll likely need a Line Output Converter (LOC) to tap into the speaker wires and provide RCA outputs for your amplifier. Many LOCs have a built-in remote turn-on wire generation feature. The LOC detects the audio signal from the speaker wires and automatically generates a 12-volt signal to activate the amplifier. Refer to the LOC's manual for specific wiring instructions.
- Using an Add-An-Amp Interface: Some specialized interfaces are designed for specific vehicles. These interfaces provide clean audio outputs and, critically, a remote turn-on signal derived from the vehicle's CAN-bus or other data networks. Consult the interface's documentation for the proper connection point.
Caution: Never assume the color coding is consistent across all manufacturers. Always refer to the wiring diagram of your specific head unit or LOC to confirm the correct wire.
Wiring the Remote Turn-On Wire: Best Practices
Proper wiring is crucial to prevent issues like amplifier turn-on pops, alternator whine, and premature amplifier failure. Follow these best practices for a reliable connection:
- Use Quality Wire: While the remote turn-on wire doesn't carry much current, using a quality 18-gauge wire is recommended. Avoid using thin, flimsy wires that could easily break or corrode.
- Make Secure Connections: Employ proper crimping techniques and high-quality connectors. Butt connectors, spade connectors, or ring terminals are all suitable, depending on the connection point. Ensure the connectors are securely crimped and insulated to prevent shorts.
- Avoid Wire Taps: While tempting for their convenience, wire taps (also known as Scotchloks) are generally discouraged. They can damage the existing wire's insulation and create a weak, unreliable connection that is prone to corrosion. Solder and heat shrink tubing provide a more robust and reliable connection.
- Proper Grounding: Ensure both the head unit and the amplifier have solid ground connections. A poor ground can introduce noise into the system and interfere with the remote turn-on signal.
- Fuse Protection: Although the remote wire doesn't carry a large current, consider adding a small inline fuse (e.g., 1 amp) near the head unit's remote turn-on output. This protects the head unit's remote turn-on circuit from overcurrent in case of a short circuit in the amplifier's remote input.
Troubleshooting Common Remote Turn-On Wire Problems
Even with careful installation, issues can arise with the remote turn-on wire. Here are some common problems and their solutions:
- Amplifier Not Turning On:
- Check Voltage: Use a multimeter to verify that the remote turn-on wire is receiving 12 volts when the head unit is on. If there's no voltage, check the head unit's remote output and the wiring connections.
- Inspect the Fuse: Check the inline fuse (if installed) on the remote turn-on wire. A blown fuse indicates a short circuit.
- Amplifier Protection Circuit: The amplifier itself might be in protection mode due to a short circuit in the speaker wires or a low voltage supply. Check the amplifier's power and ground connections, and inspect the speaker wires for any damage.
- Remote Wire Grounded: Ensure the remote wire isn't accidentally shorted to ground somewhere along its run.
- Amplifier Staying On:
- Faulty Head Unit: The head unit might be sending a constant 12-volt signal even when turned off. Disconnect the remote wire from the head unit. If the amplifier turns off, the head unit is likely the problem.
- Faulty LOC: If using an LOC, it might be malfunctioning and continuously generating a remote turn-on signal. Disconnect the LOC's remote output. If the amplifier turns off, the LOC is likely the problem.
- Short Circuit: A short circuit between the remote wire and a 12-volt source can cause the amplifier to stay on. Carefully inspect the wiring for any signs of damage or exposed wires.
- Amplifier Turn-On Pop:
- Ground Loop: A ground loop occurs when there are multiple ground paths with different potentials, creating unwanted noise. Ensure the head unit, amplifier, and any other audio components share a common ground point.
- DC Offset: Some head units produce a small DC voltage on their RCA outputs, which can cause a turn-on pop. Using a DC blocking capacitor on the RCA inputs of the amplifier can mitigate this.
- Turn-On Delay: Some amplifiers have a built-in turn-on delay circuit. If not, an external turn-on delay module can be added to delay the amplifier's activation until the head unit has fully powered on.
- Alternator Whine:
- Grounding Issues: Incorrect or insufficient grounding is the primary cause of alternator whine. Review and improve all ground connections.
- RCA Cable Routing: Route RCA cables away from power wires to minimize interference.
- Noise Filter: A noise filter can be installed on the power or ground wires of the head unit or amplifier to reduce alternator whine.
Advanced Remote Turn-On Solutions
For more complex audio systems or vehicles with challenging factory head units, advanced remote turn-on solutions might be necessary:
- CAN-Bus Interfaces: Modern vehicles often use CAN-bus networks to control various functions. CAN-bus interfaces can extract information from the CAN-bus data stream to generate a reliable remote turn-on signal. These interfaces are typically vehicle-specific and require proper programming.
- Signal Sensing Amplifiers: Some amplifiers have a built-in signal sensing feature. They automatically turn on when they detect an audio signal on their input. While convenient, these amplifiers may not always be reliable and can sometimes turn on even with very low levels of background noise.
- Remote Turn-On Delay Modules: These modules delay the amplifier's turn-on, preventing pops and thumps. They can be particularly useful in systems with multiple amplifiers.
Conclusion
The remote turn-on wire is a small but crucial component in any aftermarket car audio system. Understanding its function, following best practices for its installation, and knowing how to troubleshoot common issues will ensure a reliable and enjoyable audio experience. By paying attention to this often-overlooked detail, you can prevent headaches and maximize the performance of your sound system.