Battery And Brake Light On Nissan Altima
Alright, let's talk about a problem that can be a real head-scratcher: both your battery light and brake light illuminating simultaneously on your Nissan Altima's dashboard. Seeing those two lights together usually points to a charging system issue, but the brake light adds a layer of complexity. We're going to dive deep into the potential causes, troubleshooting steps, and how to diagnose this issue systematically. Remember, safety first! Disconnect the negative battery terminal before working on any electrical components, and if you're not comfortable with any of these procedures, it's best to consult a professional mechanic.
Understanding the Indicators: Battery & Brake Lights
Before we start digging into the potential causes, let's make sure we understand what each light is *supposed* to indicate:
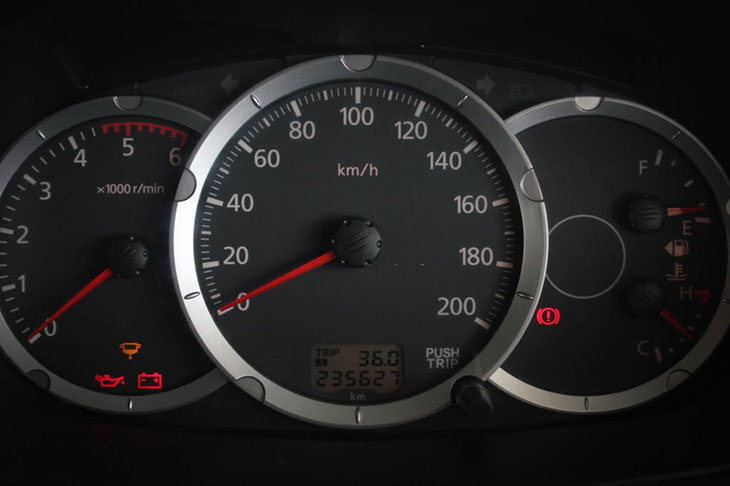
- Battery Light: This light, often shaped like a battery, indicates a problem with the vehicle's charging system. The *alternator* is responsible for charging the battery while the engine is running. If the battery light is on, it generally means the alternator isn't producing enough voltage to keep the battery properly charged.
- Brake Light: This light can indicate a few different things, which is why it's important to be precise. It might mean:
- Low brake fluid level.
- Parking brake is engaged.
- Faulty brake system components like the ABS (Anti-lock Braking System) or EBD (Electronic Brakeforce Distribution).
When both are illuminated, it heavily suggests a shared root cause or a system malfunction that's affecting both circuits. We're looking for something that can influence both the charging system and the brake system (either directly or indirectly).
Potential Causes & Diagnostic Steps
Now, let's break down the most likely culprits and how to diagnose them:
1. Alternator Issues
The alternator is the primary suspect. If it's not charging properly, the battery voltage will drop, triggering the battery light. This low voltage can also cause other electrical components to malfunction, potentially affecting the brake system control module, which could then illuminate the brake light.
Diagnostic Steps:
- Visual Inspection: Check the alternator belt for proper tension and signs of wear (cracks, fraying). A loose or damaged belt won't allow the alternator to spin at the correct speed. Also, inspect the wiring harness and connectors to the alternator for corrosion or damage.
- Voltage Test: With the engine running, use a multimeter to check the voltage at the battery terminals. You should see approximately 13.5-14.5 volts. If the voltage is significantly lower (e.g., below 13 volts), the alternator is likely failing. Set your multimeter to DC voltage mode, usually indicated by "VDC" or "DCV" and a straight line, sometimes with a dashed line underneath.
- Alternator Load Test: Many auto parts stores offer free alternator load testing. This test puts the alternator under simulated load to see if it can maintain the correct voltage output. This is a more reliable test than simply checking the voltage.
Technical Term: *Stator* and *Rotor* are the main components in the alternator. Stator windings produce AC current when the rotor, which is driven by the engine, rotates. A faulty stator or rotor will prevent the alternator from generating sufficient electricity.
2. Battery Problems
A weak or failing battery can also cause both lights to illuminate. A battery that can't hold a charge puts extra strain on the alternator, potentially leading to its failure and also causing voltage fluctuations that might affect the brake system electronics.
Diagnostic Steps:
- Visual Inspection: Check the battery terminals for corrosion and ensure they are securely connected. Clean any corrosion with a wire brush and a baking soda solution.
- Voltage Test: With the engine off, check the battery voltage. A fully charged battery should read around 12.6 volts. If it's significantly lower (e.g., below 12 volts), the battery is likely discharged or failing.
- Load Test: Just like with the alternator, many auto parts stores offer free battery load testing. This test simulates the drain of starting the engine and reveals if the battery can deliver the necessary current.
3. Grounding Issues
Poor grounding can create all sorts of electrical gremlins. A bad ground connection can cause voltage drops and erratic behavior in various electrical systems, including the charging system and brake system. The charging system needs a solid ground connection to function correctly and voltage spikes or drops will cause issues with ECU (Engine Control Unit) communications. Similarly, the ABS module or brake light circuits rely on good ground connections.
Diagnostic Steps:
- Visual Inspection: Locate and inspect all the major ground connections in the engine bay and around the chassis. Look for corrosion, loose connections, or damaged wires. Pay close attention to the ground wires connected to the engine block, chassis, and battery.
- Voltage Drop Test: Use a multimeter to measure the voltage drop across each ground connection. To do this, connect one lead of the multimeter to the negative battery terminal and the other lead to the ground point you're testing. A voltage drop of more than 0.1-0.2 volts indicates excessive resistance in the ground connection. Clean and tighten the connections if necessary.
4. Brake Fluid Level Sensor
While less likely to directly cause the battery light to come on, a faulty brake fluid level sensor might be triggering the brake light, and an associated electrical issue (like a short) could be influencing the overall electrical system and thus affecting the alternator's performance. This is a less common scenario, but worth investigating.
Diagnostic Steps:
- Check Brake Fluid Level: Obvious, but start here! Ensure the brake fluid reservoir is filled to the appropriate level.
- Inspect Sensor Wiring: Examine the wiring and connector for the brake fluid level sensor for any signs of damage or corrosion.
- Disconnect Sensor (for Testing): Carefully disconnect the brake fluid level sensor. If the brake light turns off after disconnecting the sensor, it indicates a faulty sensor. *Important: Do not drive the vehicle with the sensor disconnected if it is a critical part of the brake system's functionality*.
5. ABS (Anti-lock Braking System) Issues
Problems with the ABS system, particularly the ABS control module, can sometimes trigger the brake light. While it's unusual for an ABS fault to *directly* cause the battery light, the complex electronic system can sometimes create unforeseen interactions. A faulty wheel speed sensor or hydraulic control unit within the ABS system can trigger the light.
Diagnostic Steps:
- Scan for ABS Codes: Use an OBD-II scanner that's capable of reading ABS codes. Any stored codes can provide valuable clues about the nature of the problem. Common codes could include wheel speed sensor faults, hydraulic modulator issues, or ABS module failures.
- Wheel Speed Sensor Inspection: Visually inspect the wheel speed sensors for damage or contamination. Check the wiring harness for any breaks or shorts.
Technical Term: *OBD-II (On-Board Diagnostics II)* is a standardized system used to monitor and diagnose vehicle problems. A scanner connects to the OBD-II port and retrieves diagnostic trouble codes (DTCs).
6. Wiring Harness Problems
A damaged or shorted wiring harness can cause a wide range of electrical problems. Look for chafed, cut, or melted wires, especially in areas where the harness is routed near hot engine components or moving parts. A short circuit can draw excessive current, potentially affecting the charging system and triggering both lights.
Diagnostic Steps:
- Visual Inspection: Carefully inspect the entire wiring harness for any signs of damage. Pay close attention to areas where the harness is routed near the engine, exhaust, or suspension components.
- Continuity Testing: Use a multimeter to check the continuity of individual wires in the harness. Disconnect the battery and the component at both ends of the wire you're testing. Set the multimeter to the continuity setting (usually indicated by a diode symbol or a buzzer). Touch the probes to each end of the wire. If the multimeter shows continuity (a beep or a low resistance reading), the wire is intact. If not, the wire is broken.
- Short-to-Ground Testing: Use a multimeter to check for short circuits to ground. Disconnect the battery and the component at one end of the wire you're testing. Set the multimeter to the resistance setting (Ohms). Connect one probe to the wire and the other probe to a good ground point on the vehicle's chassis. If the multimeter shows a low resistance reading (close to zero), the wire is shorted to ground.
Putting it all together: A Systematic Approach
The key to resolving this issue is a systematic approach. Here's a recommended sequence:
- Start with the basics: Check the battery terminals, alternator belt, and brake fluid level.
- Test the battery: Check the battery voltage and have it load tested.
- Test the alternator: Check the alternator voltage with the engine running and have it load tested.
- Inspect grounds: Locate and inspect all the major ground connections. Perform voltage drop tests to identify any high-resistance grounds.
- Scan for codes: Use an OBD-II scanner to check for any diagnostic trouble codes (DTCs) in the engine control unit (ECU), ABS module, and other relevant modules.
- Wiring harness inspection: If the above steps don't reveal the problem, carefully inspect the wiring harness for any signs of damage or short circuits.
Important Note: Always consult your Nissan Altima's repair manual for specific wiring diagrams and component locations. This guide provides general troubleshooting steps, but the exact details may vary depending on the year and model of your vehicle.
Troubleshooting electrical issues can be complex, but with a methodical approach, you can usually pinpoint the cause and get your Altima back on the road safely. Don't hesitate to consult a qualified mechanic if you're unsure about any of these procedures.