Cabin Air Filter Honda Pilot
Okay, let's talk about the cabin air filter in your Honda Pilot. It's a seemingly small component, but it plays a crucial role in the overall air quality inside your vehicle. Think of it as the lungs of your HVAC (Heating, Ventilation, and Air Conditioning) system. We're going to dive into the specifics of its function, location, replacement procedure, and some common issues you might encounter.
What Does a Cabin Air Filter Do?
Simply put, the cabin air filter cleans the air that enters your Pilot's cabin through the ventilation system. It's designed to trap airborne particles like dust, pollen, mold spores, exhaust fumes, and even some larger debris like leaves or insects. Without a functioning cabin air filter, all of these contaminants would be circulating inside your car, potentially causing allergic reactions, respiratory irritation, and generally making the driving experience less pleasant.
Technically speaking, most cabin air filters use a pleated design made of paper or a synthetic fiber material. The pleats increase the surface area available for filtration, maximizing the filter's efficiency. Some filters are even enhanced with activated carbon, which further helps to absorb odors and pollutants. These are often marketed as "premium" or "odor-eliminating" filters.
Why is Regular Replacement Important?
Over time, the cabin air filter becomes clogged with the particles it's designed to trap. This restriction in airflow can have several negative consequences:
- Reduced HVAC Performance: A clogged filter restricts the airflow through your ventilation system. This means your AC won't cool as effectively, and your heater won't warm up as quickly. You might also notice that the blower motor has to work harder to push air through, potentially shortening its lifespan.
- Increased Allergen Exposure: A dirty filter can become a breeding ground for mold and bacteria, actually increasing the allergen levels inside your cabin. Instead of filtering out contaminants, it can become a source of them.
- Unpleasant Odors: A clogged filter can trap musty odors and circulate them through the cabin.
- Potential for Mold Growth: As mentioned above, a damp, dirty filter is prime real estate for mold.
Locating the Cabin Air Filter in Your Honda Pilot
Fortunately, replacing the cabin air filter in most Honda Pilots is a relatively straightforward process. On most models, the filter is located behind the glove box. Here's a general guideline, but always refer to your owner's manual for the specific procedure for your Pilot's year and trim.
Typical Location: Behind the Glove Box
Step-by-Step Removal and Installation
- Prepare the Area: Clear out the glove box completely. You'll need all the space you can get.
- Detach the Glove Box Damper (if equipped): Some Pilots have a small damper arm on the right side of the glove box that slows its opening. Carefully detach this arm by gently pushing it inwards and then sliding it off its mounting pin. Don't force it!
- Release the Glove Box Stops: On either side of the glove box, you'll find stops that prevent it from opening too far. These are typically small tabs or levers that you need to either squeeze inwards or rotate outwards to release the glove box. Refer to your owner's manual for the exact mechanism on your model.
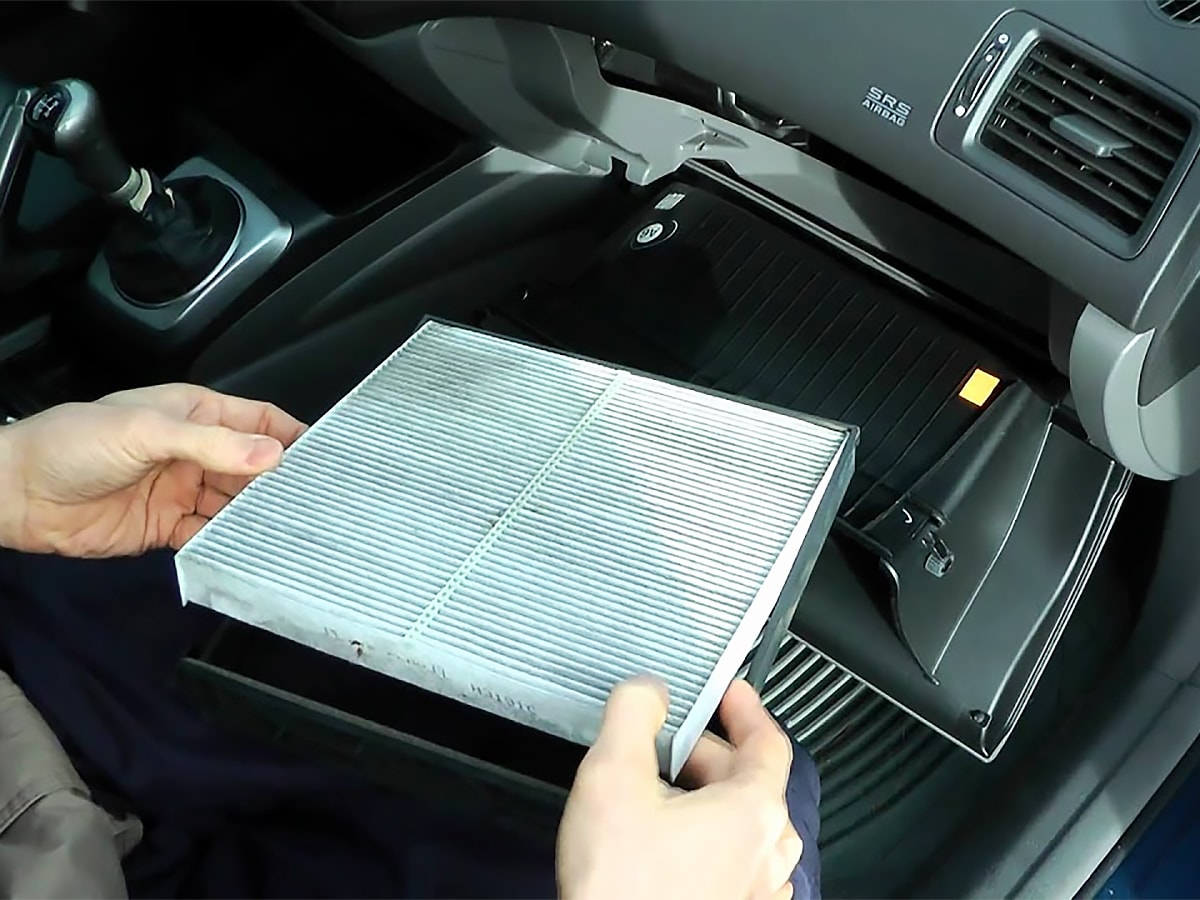
- Lower the Glove Box: Once the stops are released, the glove box should swing down further, revealing the cabin air filter housing.
- Remove the Filter Housing Cover: The filter housing cover is usually held in place by clips or tabs. Squeeze the tabs or unclip the cover to remove it.
- Remove the Old Filter: Carefully slide out the old cabin air filter. Pay attention to the direction of airflow, which is usually indicated by an arrow printed on the filter. Note this direction; you'll need to install the new filter the same way. If the filter is heavily soiled, you might want to wear gloves.
- Clean the Filter Housing: Before installing the new filter, take a moment to vacuum out any debris from the filter housing.
- Install the New Filter: Insert the new cabin air filter into the housing, making sure the airflow arrow is pointing in the correct direction (the same direction as the old filter).
- Reinstall the Filter Housing Cover: Replace the filter housing cover and secure it with the clips or tabs.
- Reattach the Glove Box Stops: Push the glove box back up and reattach the stops on either side.
- Reattach the Glove Box Damper (if equipped): Reconnect the damper arm to its mounting pin.
- Repopulate the Glove Box: Put your belongings back in the glove box.
Important Note: Some Pilot models may have slight variations in the glove box removal procedure. Always consult your owner's manual or a reputable online source for specific instructions for your vehicle.
Choosing the Right Cabin Air Filter
When selecting a replacement cabin air filter for your Honda Pilot, you'll encounter a few different options:
- Standard Particulate Filter: This is the most common and basic type of cabin air filter. It effectively traps dust, pollen, and other airborne particles.
- Activated Carbon Filter: As mentioned earlier, these filters incorporate activated carbon to absorb odors and pollutants like exhaust fumes. They're a good choice if you're particularly sensitive to smells or live in an area with heavy traffic.
- Electrostatic Filter: These filters use an electrostatic charge to attract and trap even smaller particles, like bacteria and viruses. They're often marketed as "allergy filters."
Consider your driving environment and personal needs when choosing a filter. If you have allergies or live in a polluted area, an activated carbon or electrostatic filter might be worth the extra cost.
Pro Tip: Always check the filter's dimensions to ensure it's the correct size for your Honda Pilot. Use your vehicle's year, make, and model when searching for a filter online or at your local auto parts store.
Troubleshooting Common Issues
Here are some common issues you might encounter when replacing your cabin air filter:
- Difficulty Removing the Glove Box: If you're having trouble releasing the glove box stops, double-check your owner's manual for the specific procedure. The mechanism can vary slightly depending on the model year. Don't force anything; you could damage the glove box.
- Broken Glove Box Damper Arm: The damper arm is a relatively fragile part. If it breaks, you can usually purchase a replacement damper arm separately.
- Incorrect Filter Size: If the new filter doesn't fit properly, double-check that you've selected the correct part for your vehicle. Return the incorrect filter and get the right one.
- Airflow Direction Confusion: Make absolutely sure you install the new filter with the airflow arrow pointing in the same direction as the old filter. Incorrect installation can significantly reduce the filter's effectiveness.
If you encounter any other issues or are unsure about any step of the process, it's always best to consult a qualified mechanic. They can diagnose the problem and ensure that the cabin air filter is replaced correctly.
How Often Should You Replace Your Cabin Air Filter?
The recommended replacement interval for the cabin air filter in your Honda Pilot is typically every 15,000 to 30,000 miles, or every year to two years, whichever comes first. However, this can vary depending on your driving conditions. If you frequently drive in dusty or polluted environments, you may need to replace the filter more often. A good rule of thumb is to check the filter at every oil change and replace it if it looks dirty or clogged.
"Replacing your cabin air filter is a small investment that can make a big difference in your comfort and overall air quality inside your Honda Pilot."
By understanding the function, location, and replacement procedure for your cabin air filter, you can keep your HVAC system running efficiently and enjoy a cleaner, healthier driving environment.