Camper Shell Roof Rack Mounts
For the adventurous souls among us, a camper shell transforms a pickup truck from a utilitarian workhorse into a versatile basecamp. But the real potential unlocks when you add a roof rack. Mounting a roof rack to a camper shell, however, isn’t as straightforward as slapping on magnetic mounts. It requires careful consideration, proper hardware, and a solid understanding of load limits. This guide dives deep into the world of camper shell roof rack mounts, covering everything from types and installation to best practices and common pitfalls.
Understanding Your Camper Shell
Before even considering mounting systems, it's critical to assess your camper shell itself. Not all shells are created equal. Factors like material (fiberglass, aluminum), construction quality, and the presence of internal reinforcement directly impact the rack's weight-bearing capacity. Lightweight fiberglass shells, for example, will require a different approach than robust, commercially-rated aluminum models.
Fiberglass Shells: These are the most common type. While relatively affordable, their inherent flexibility means they're typically less capable of handling heavy loads without significant reinforcement. Pay close attention to the shell's thickness and look for models with integrated internal support structures designed for roof rack installations. Proper weight distribution is paramount.
Aluminum Shells: Offering superior strength-to-weight ratio, aluminum shells are a popular choice for serious overlanders and those regularly hauling substantial gear. The inherent rigidity allows for higher load capacities and reduces the risk of stress fractures. However, aluminum is more susceptible to galvanic corrosion when in contact with dissimilar metals, so ensuring proper isolation is essential when installing mounting hardware.
Shell Reinforcement: Many manufacturers offer reinforced shells specifically designed for roof rack use. These usually feature thicker fiberglass layers, integrated metal bracing, or a combination of both. Check the manufacturer's specifications for the maximum static and dynamic load ratings. Exceeding these limits can compromise the shell's integrity and lead to catastrophic failure.
Types of Camper Shell Roof Rack Mounts
The market offers a variety of mounting solutions, each with its own strengths and weaknesses. Choosing the right type depends on your shell type, intended load, and budget.
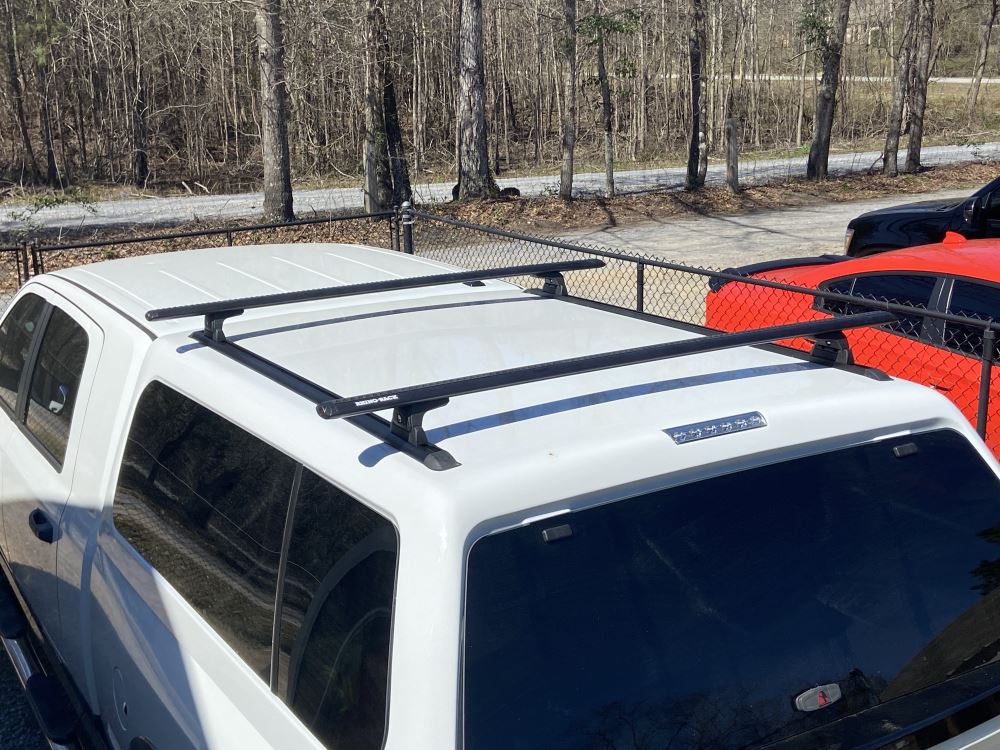
Track Systems
Track systems consist of two or more parallel tracks permanently mounted to the camper shell roof. Adjustable towers and crossbars then attach to these tracks, providing a flexible and adaptable platform for carrying various loads. These are often considered the gold standard due to their strength, adjustability, and versatility.
Pros:
- High Load Capacity: Tracks distribute weight evenly across a larger surface area.
- Adjustability: Crossbars can be easily repositioned along the tracks to accommodate different cargo.
- Versatility: Compatible with a wide range of rack accessories.
Cons:
- More Expensive: Track systems generally cost more than other options.
- Requires Drilling: Permanent installation involves drilling into the camper shell.
Popular brands include Yakima, Thule, and Rhino-Rack, which offer complete track systems and individual components.
Fixed Point Mounts
Fixed point mounts, as the name suggests, utilize pre-existing mounting points or require drilling fixed locations into the camper shell. These are typically less adjustable than track systems but can be a more cost-effective solution for lighter loads.
Pros:
- Less Expensive: Generally more affordable than track systems.
- Simpler Installation: Fewer components and potentially less drilling.
Cons:
- Limited Adjustability: Crossbar positioning is fixed.
- Lower Load Capacity: Concentrated weight distribution can limit the maximum load.
- Shell Compatibility: Requires specific mounting points or drilling in precise locations.
These mounts often consist of a foot that bolts directly to the shell, supporting a crossbar. Check the manufacturer's load ratings carefully and ensure the shell is adequately reinforced at the mounting points.
Clamp-On Mounts
Clamp-on mounts are designed to grip the edges of the camper shell. While offering a no-drill installation option, they are generally not recommended for heavy loads or demanding conditions. The clamping force can damage the shell over time, and the security of the system is often compromised.
Pros:
- No Drilling: Avoids permanent modifications to the camper shell.
- Easy Installation: Relatively quick and simple to install.
Cons:
- Low Load Capacity: Not suitable for heavy loads or off-road use.
- Potential for Damage: Clamping force can crack or deform the shell.
- Limited Security: More susceptible to theft or dislodgement.
These are best suited for very light items like surfboards or lightweight camping gear, and only on reinforced shell edges. Consider them a temporary solution at best.
Installation Best Practices
Regardless of the mounting system you choose, proper installation is crucial for safety and longevity. Here are some key considerations:
- Measure and Plan: Carefully measure the camper shell roof and plan the location of the mounting points. Consider the placement of internal supports and avoid drilling into unsupported areas.
- Use a Template: Most track systems and fixed point mounts come with templates. Use these to accurately mark the drilling locations.
- Pilot Holes: Drill pilot holes before using larger drill bits to prevent cracking or splintering the fiberglass.
- Waterproofing: Apply a generous amount of sealant (e.g., silicone or polyurethane) to all mounting holes to prevent water leaks.
- Reinforcement: If the shell is not pre-reinforced, consider adding internal backing plates to distribute the load. These can be made from metal or thick plastic.
- Torque Specifications: Follow the manufacturer's torque specifications when tightening the mounting hardware. Over-tightening can damage the shell, while under-tightening can lead to loosening over time.
- Regular Inspection: Periodically inspect the mounting hardware for signs of corrosion, loosening, or damage. Re-torque as needed and replace any worn components.
Proper Sealing Is Critical: Water intrusion can lead to delamination of fiberglass, corrosion of metal components, and mold growth inside the camper shell. Use high-quality marine-grade sealant and apply it liberally around all mounting holes and hardware.
Load Capacity and Distribution
Understanding the load capacity of your roof rack and camper shell is paramount for safe and reliable operation. Never exceed the manufacturer's specified weight limits. These limits typically refer to the static load (when the vehicle is stationary) and the dynamic load (when the vehicle is in motion). The dynamic load is typically lower due to the added stress of acceleration, braking, and vibration.
Weight Distribution: Distribute the load evenly across the crossbars to minimize stress on the mounting points. Place heavier items closer to the center of the roof and avoid concentrating weight on one side. Secure all cargo properly with straps or tie-downs to prevent shifting during transit. Uneven distribution dramatically reduces the effective weight capacity. For example, having all the weight on the front of the roof rack can lead to cracking of the shell from the front edge.
Real-World Example: Imagine you're carrying a rooftop tent (RTT) weighing 150 lbs. Your camper shell's roof rack has a dynamic load rating of 200 lbs. While the RTT is technically within the limit, adding extra gear inside the tent (sleeping bags, pillows, etc.) could easily push the weight over the limit. Furthermore, the placement of the RTT relative to the mounting points is critical. If the majority of the weight is concentrated on one end, it could overload the mounting hardware. To mitigate this, consider adding more crossbars to evenly distribute the load and reinforce the mounting points.
Common Pitfalls and Troubleshooting
Even with careful planning and installation, problems can sometimes arise. Here are some common issues and their potential solutions:
- Water Leaks: The most common issue. Re-seal the mounting holes with a generous amount of sealant. Inspect the sealant regularly for cracks or deterioration.
- Loose Mounting Hardware: Re-torque the mounting bolts to the manufacturer's specifications. Consider using threadlocker to prevent loosening.
- Cracked or Damaged Shell: This is often caused by overloading or improper weight distribution. Repair the shell using fiberglass repair techniques and reinforce the mounting points.
- Rack Noise: Wind noise can be a nuisance. Consider adding a wind fairing to the front of the rack.
Conclusion
Adding a roof rack to your camper shell significantly expands its versatility, allowing you to carry more gear and explore further off the beaten path. By carefully considering the type of shell, selecting the appropriate mounting system, and following proper installation practices, you can create a safe and reliable platform for your adventures. Remember to always prioritize safety and never exceed the manufacturer's specified load limits. With the right approach, your camper shell roof rack will be a valuable asset for years to come.