Car Stereo Parking Brake Wire
Hey there, fellow car audio enthusiast! Ever found yourself wrestling with a new car stereo installation, only to be stumped by that pesky parking brake wire? It's a common headache, and you're definitely not alone. Many modern head units, especially those with DVD players or advanced features, require a connection to the parking brake system as a safety measure. This prevents you (or your passengers) from watching videos or accessing certain settings while the car is in motion. But what happens when this system malfunctions, causes issues, or becomes a hurdle during installation? Let's dive into the common problems and, more importantly, the solutions!
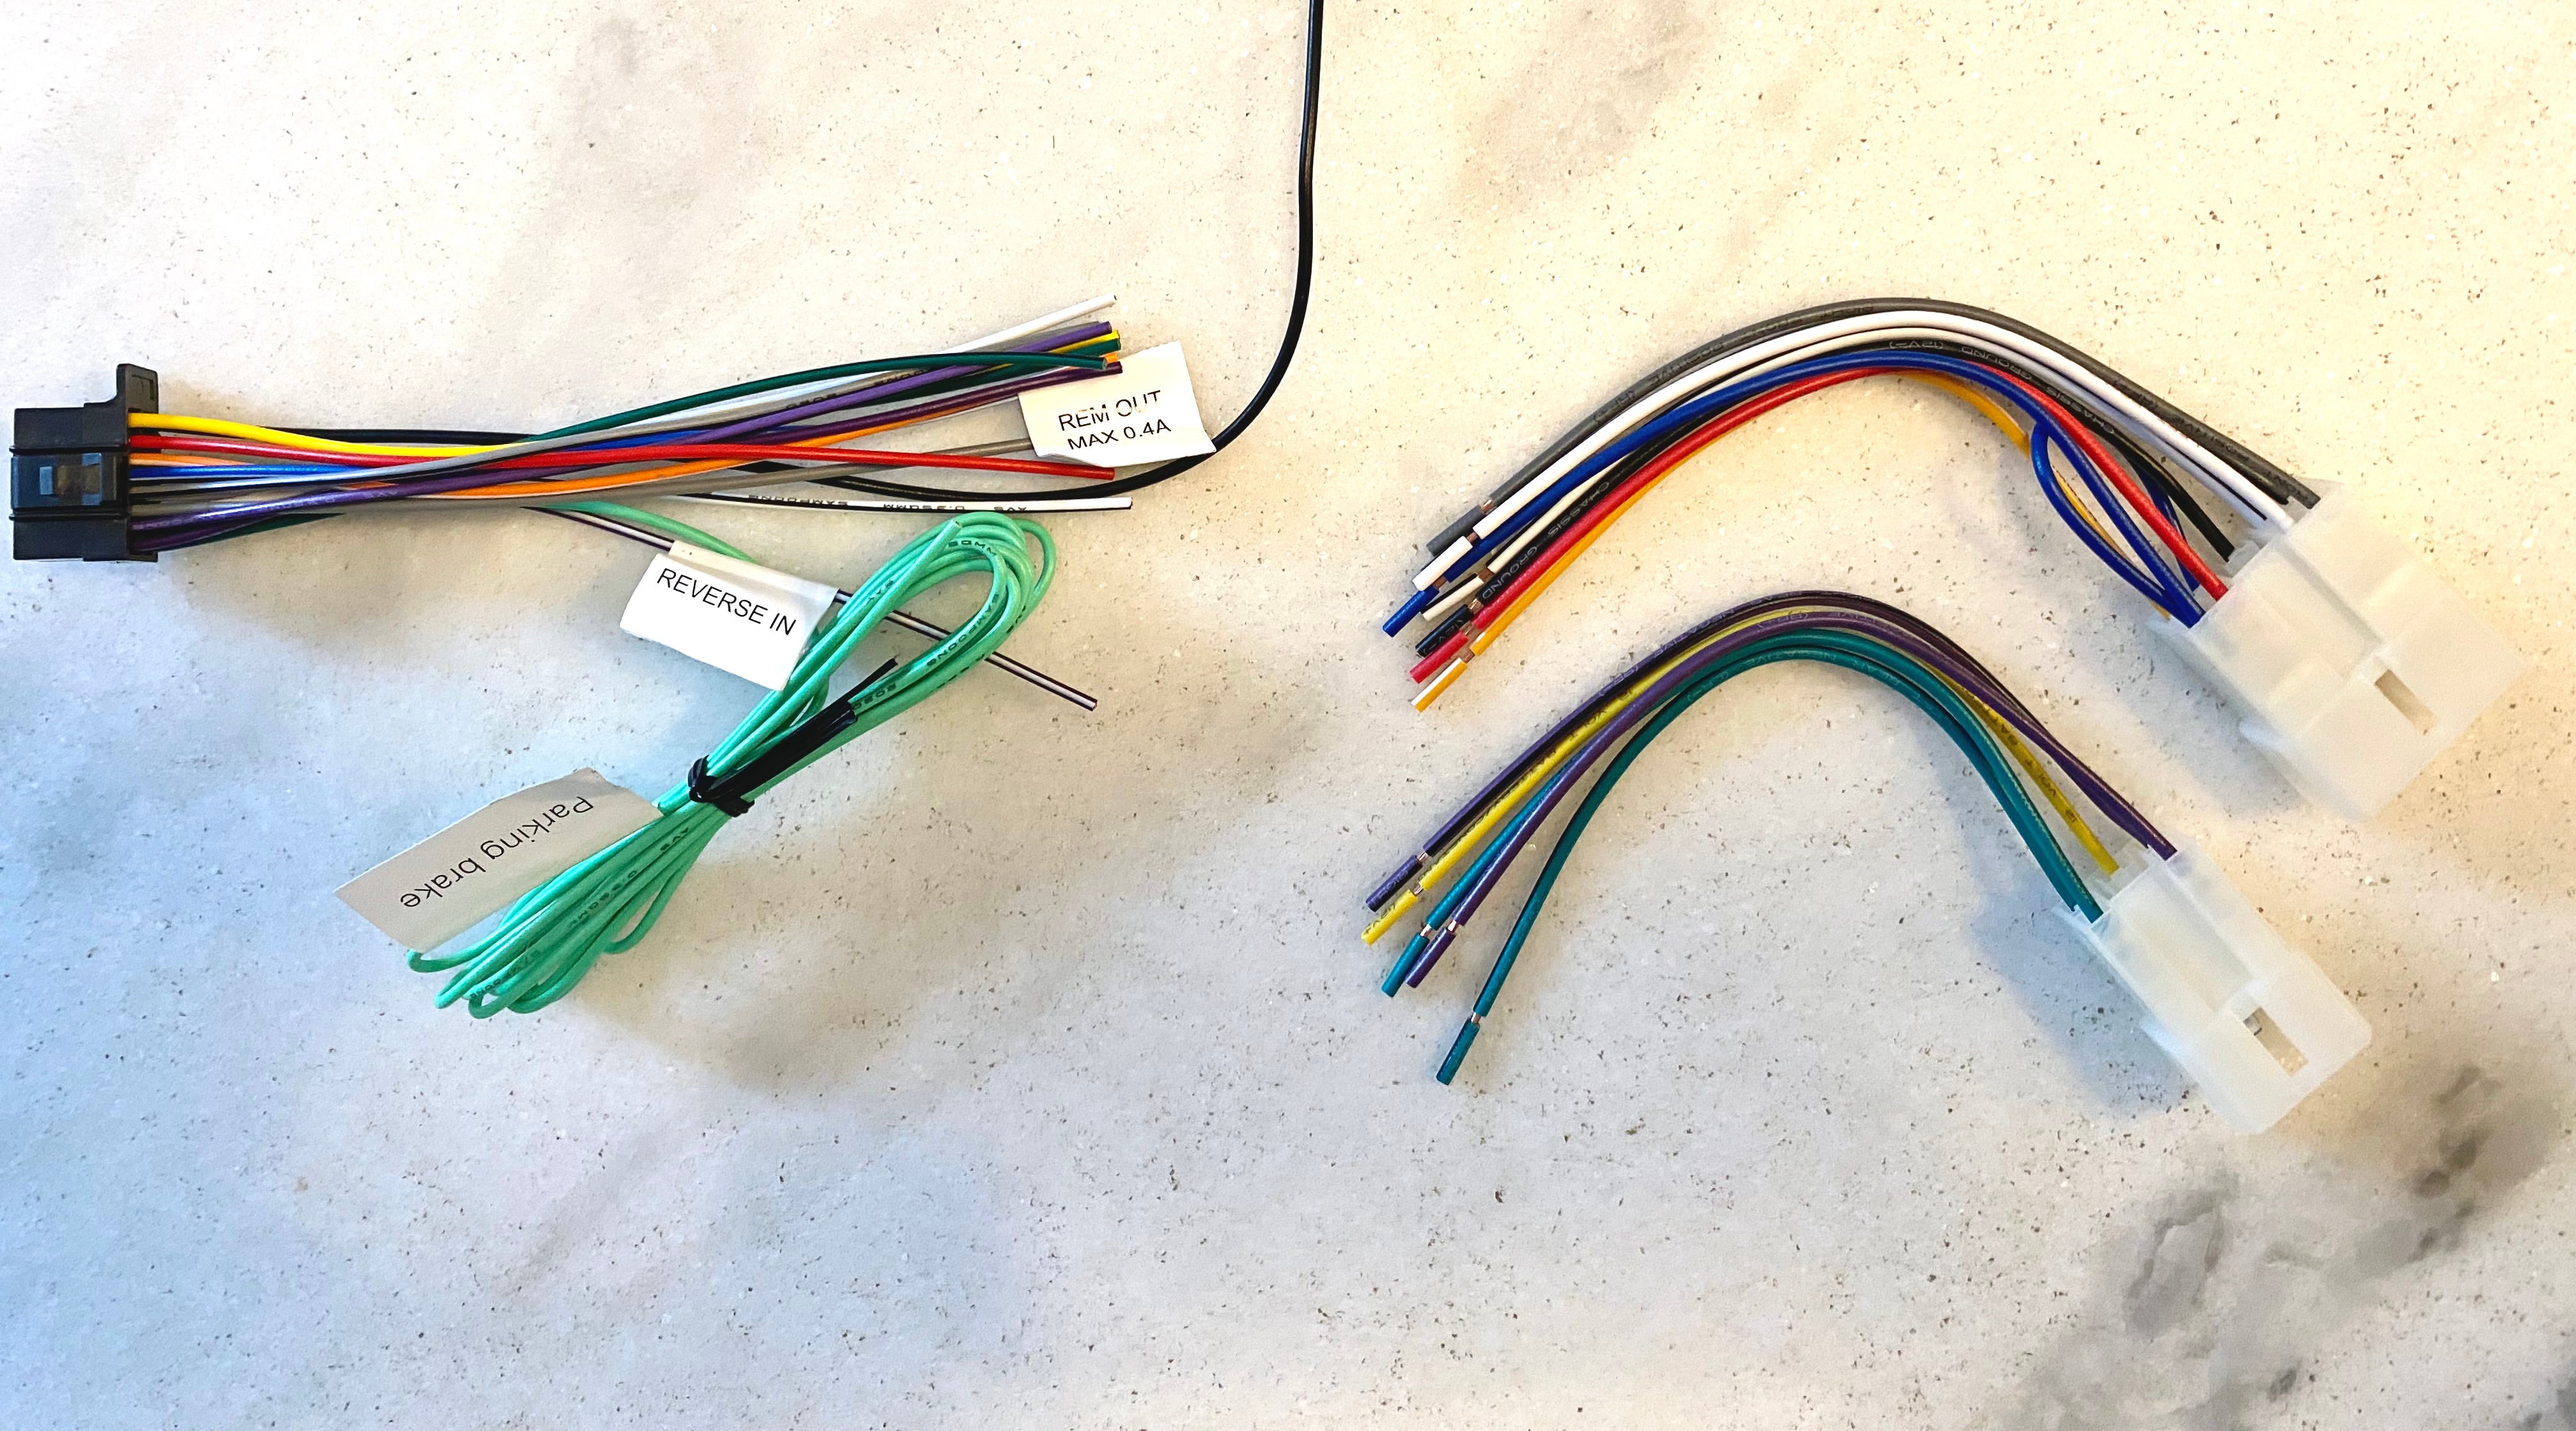
Understanding the Parking Brake Wire
First, let's understand what this wire is all about. The parking brake wire from your new stereo is typically a light green wire (though always consult your head unit's manual). This wire is designed to connect to the parking brake circuit in your vehicle. When the parking brake is engaged, it sends a ground signal to the head unit, allowing access to restricted features. When the parking brake is disengaged, the signal is cut off, and those features become inaccessible. This is a legal requirement designed to minimize driver distraction.
Common Problems and Troubleshooting
Here are some of the most common issues encountered with the parking brake wire:
- Installation Difficulties: The most frequent problem is simply not knowing where to connect the wire or how to properly ground it.
- Feature Lockout: You've installed everything correctly, but the head unit still acts as if the parking brake is disengaged, preventing you from accessing certain features even when parked.
- Ghost Signal: The head unit incorrectly thinks the parking brake is engaged, even when it's not, potentially causing unwanted behavior.
- Wiring Issues: A break in the wire, a loose connection, or a short circuit can disrupt the signal and cause problems.
Problem: Difficulty Finding the Correct Wire
Solution: This is often the first hurdle. The location of the parking brake wire varies depending on your vehicle's make and model. Don't just guess! The best approach is to consult your vehicle's wiring diagram, which you can often find in your car's repair manual or online through dedicated car forums and websites like AllData or Mitchell OnDemand. These resources provide detailed schematics showing the exact location and color code of the parking brake wire. Alternatively, a local car audio shop can usually pinpoint the wire for a small fee.
Once you've located the wire, you'll need to tap into it. The recommended method is to use a wire tap connector (also known as a Scotchlok connector) to avoid cutting the factory wire. This allows you to safely connect the head unit's parking brake wire to the vehicle's parking brake wire without damaging the original wiring. Make sure the connection is secure and properly insulated.
Tools Needed: Wire stripper, wire tap connector, multimeter (optional, for testing), wiring diagram (vehicle specific).
Problem: Feature Lockout Despite Parking Brake Engagement
Solution: If you've connected the wire correctly but still can't access the locked features, there are several potential causes:
- Poor Ground Connection: The parking brake wire needs a solid ground signal to function correctly. Ensure the ground connection is secure and connected to a clean, unpainted metal surface. Try using a different ground point if necessary.
- Defective Parking Brake Switch: The parking brake switch itself might be faulty. Use a multimeter to test the switch's continuity when the parking brake is engaged and disengaged. If the switch doesn't close (complete the circuit) when engaged, it needs to be replaced.
- Head Unit Settings: Some head units have settings that allow you to bypass the parking brake requirement (though this is generally not recommended for safety reasons and might be illegal in some jurisdictions). Check your head unit's manual for instructions on accessing and modifying these settings. Be aware that tampering with these settings can void your warranty.
- Double-DIN Bypass Modules: These modules, readily available online, are designed to simulate the parking brake signal, tricking the head unit into thinking the parking brake is always engaged. While these modules provide a quick fix, consider the ethical and legal implications before using them. Using bypass modules may allow features that distract the driver.
Tools Needed: Multimeter, screwdriver, wire crimper, replacement parking brake switch (if needed).
Problem: Head Unit Thinks Parking Brake is Always Engaged (Ghost Signal)
Solution: This issue suggests a short circuit or incorrect wiring. Here's how to troubleshoot:
- Check for Shorts: Carefully inspect the wiring along the entire length of the parking brake wire, looking for any points where the wire might be touching metal or another wire. Repair any damaged insulation with electrical tape or heat shrink tubing.
- Verify Wiring: Double-check that the parking brake wire is connected to the correct wire in your vehicle. A wiring diagram is essential for this step.
- Isolate the Problem: Disconnect the parking brake wire from the vehicle's wiring harness. If the problem persists (the head unit still thinks the parking brake is engaged), the issue might be internal to the head unit itself, potentially requiring repair or replacement. If the problem disappears when disconnected, the issue lies within the vehicle's wiring.
Tools Needed: Multimeter, electrical tape, heat shrink tubing, wiring diagram.
Problem: Broken or Damaged Parking Brake Wire
Solution: A broken wire can obviously interrupt the signal. Inspect the wire for any visible damage, cuts, or fraying. If you find a break, you can repair it using a wire stripper, wire crimper, and butt connectors. Alternatively, you can solder the wires together and insulate them with heat shrink tubing. Ensure the connection is strong and well-insulated to prevent future problems.
Tools Needed: Wire stripper, wire crimper, butt connectors, soldering iron (optional), solder, heat shrink tubing, heat gun (if using heat shrink).
The Bypass Module Debate
As mentioned earlier, bypass modules offer a tempting solution. However, they also present ethical and legal concerns. While convenient, bypassing the parking brake safety feature defeats its intended purpose and can create a dangerous situation. Consider carefully the risks and responsibilities before opting for a bypass module.
If you decide to use a bypass module, choose a reputable brand and follow the installation instructions carefully.
Estimated Repair Costs
Here's a rough estimate of potential repair costs:
- Wiring Repair (DIY): $5-$20 for connectors, tape, and heat shrink tubing.
- Parking Brake Switch Replacement (DIY): $20-$50 for a new switch.
- Professional Installation (Car Audio Shop): $50-$150, depending on the complexity of the installation and the shop's labor rates. This typically includes locating the correct wire and making the necessary connections.
- Bypass Module: $10-$30 online.
Note: These are just estimates. Actual costs may vary depending on your location, vehicle model, and the specific problem.
Seeking Professional Help
If you're uncomfortable working with electrical wiring or if you've tried the troubleshooting steps above and are still facing problems, it's always best to consult a professional car audio installer or a qualified mechanic. They have the expertise and tools to diagnose and repair the issue safely and efficiently. A small investment in professional help can save you a lot of time, frustration, and potential damage to your vehicle's electrical system.
Remember, safety is paramount when working with electrical systems. Always disconnect the car battery before working on any wiring to avoid electrical shock. And always consult your vehicle's repair manual and your head unit's owner's manual for specific instructions and safety precautions. Good luck, and happy listening!