Dr Colorchip Before And After
The quest for pristine paint is a never-ending battle for car enthusiasts. Scratches and stone chips, those irritating blemishes that mar the otherwise perfect finish, are almost unavoidable, especially on frequently driven vehicles. While professional resprays offer a definitive solution, they can be costly and time-consuming. Enter Dr. Colorchip, a paint repair system marketed as a DIY-friendly and effective method for tackling minor paint imperfections. But how well does it really work, and what's the science behind its seemingly magical transformations? This guide delves into the Dr. Colorchip system, dissecting its process, examining its strengths and weaknesses, and ultimately, exploring the before-and-after results through a technical lens.
Understanding the Dr. Colorchip System: A Deep Dive
The Dr. Colorchip system distinguishes itself from traditional touch-up paints through its unique application and blending process. It’s not just about filling a chip with paint; it's about seamlessly integrating the new paint with the surrounding original finish. The core components of the system are:
- Matched Paint: This is the heart of the system. Dr. Colorchip boasts an extensive database of OEM (Original Equipment Manufacturer) paint codes, ensuring a precise color match. The paint itself is a proprietary formula, designed to flow easily and blend effectively.
- Smear Dauber/Brush: This applicator is designed for controlled application of the paint into the chip. The dauber allows for precise placement without oversaturating the area.
- Blending Solution (SealAct Blending Solution): This is the secret sauce. This solvent is formulated to soften and remove excess paint without damaging the surrounding clear coat. Its careful balance of solvents ensures that it levels the applied paint and feather the edges, creating a smooth transition.
- Microfiber Towels: Clean, lint-free microfiber towels are essential for the blending process. They are used to gently wipe away the excess paint and blending solution.
The Application Process: A Step-by-Step Breakdown
The effectiveness of Dr. Colorchip hinges on following the correct procedure. Here's a detailed breakdown of each step:
- Preparation: Thoroughly clean the area around the chip. Remove any dirt, wax, or contaminants. Using a dedicated wax and grease remover is highly recommended. The goal is to create a clean, grease-free surface for optimal adhesion.
- Applying the Paint: Using the smear dauber or brush, carefully apply the matched paint directly into the chip. The aim is to overfill the chip slightly, allowing for some shrinkage during the blending process. Don't be afraid to apply a generous amount; the blending solution is designed to remove the excess. Multiple thin coats, allowing each coat to dry for a few minutes, is often preferable to a single thick coat, especially for deeper chips.
- Drying Time: Allow the paint to dry according to the manufacturer's instructions. This typically ranges from a few minutes to an hour, depending on the ambient temperature and humidity. The paint needs to be sufficiently dry to resist smearing during the blending phase, but not so dry that it becomes difficult to remove with the blending solution.
- Blending: This is the critical step. Apply a small amount of the SealAct Blending Solution to a clean microfiber towel. Gently wipe across the painted area, using light pressure. The blending solution will dissolve the excess paint, leaving the filled chip flush with the surrounding paint. Use a clean section of the microfiber towel for each wipe to avoid re-depositing the dissolved paint. This process might require multiple passes. The key is to be patient and observe how the blending solution is interacting with the paint.
- Polishing (Optional): After the blending process, you may notice a slight haze or residue. This can be removed with a mild polishing compound and a microfiber towel. This step further refines the finish and enhances the clarity.
- Waxing (Optional): Applying a coat of wax or sealant to the repaired area protects the paint and helps to blend the repair even further.
The Science Behind the Blend: How Does It Work?
The magic of Dr. Colorchip lies in the SealAct Blending Solution and the properties of the matched paint. Here's a closer look at the science involved:
- Solvent Action: The SealAct Blending Solution contains a carefully selected blend of solvents. These solvents are designed to dissolve the excess Dr. Colorchip paint without significantly affecting the surrounding clear coat. The solvent blend is crucial; too aggressive a solvent will damage the clear coat, while too weak a solvent will be ineffective at removing the excess paint.
- Leveling and Feathering: As the blending solution dissolves the excess paint, it also helps to level the filled chip and feather the edges. This creates a smooth transition between the repaired area and the original paint, minimizing the appearance of the chip. The paint itself is formulated with flow modifiers to aid in this leveling process.
- Paint Compatibility: The Dr. Colorchip paint is formulated to be compatible with the SealAct Blending Solution. This ensures that the blending solution effectively dissolves the excess paint without causing it to smear or discolor. The paint's chemical composition is designed to work synergistically with the blending solution.
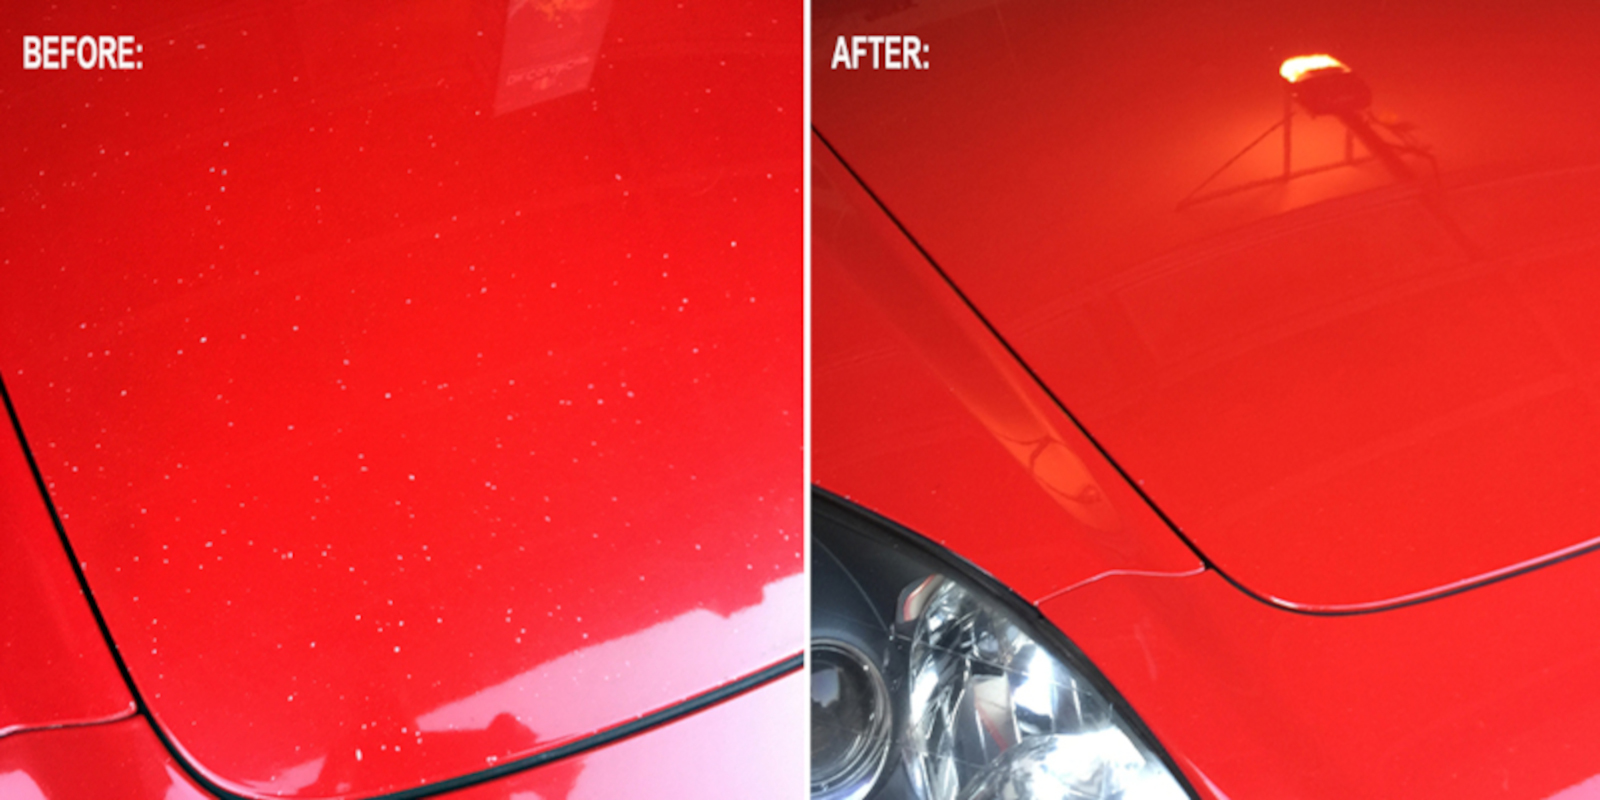
Before and After: Analyzing the Results
The "before and after" comparison is where the rubber meets the road. Dr. Colorchip can produce impressive results, but its effectiveness depends on several factors:
- Severity of the Chip: Dr. Colorchip excels at repairing small, shallow chips. Deeper chips that penetrate multiple layers of paint or expose the metal substrate may require multiple applications or even professional repair.
- Color Matching Accuracy: A precise color match is paramount. While Dr. Colorchip boasts an extensive database, slight variations in paint formulas over time can occur. It's always recommended to test the paint on an inconspicuous area before applying it to a visible area.
- Application Technique: The blending process requires a delicate touch and patience. Applying too much pressure or using too much blending solution can damage the surrounding paint.
When Dr. Colorchip Works Well:
Scenario: Small stone chips on the hood or front bumper. The chips are relatively shallow and haven't penetrated to bare metal.
Expected Result: Dr. Colorchip can effectively fill the chips and blend them with the surrounding paint, significantly reducing their visibility. The repaired areas may still be slightly noticeable upon close inspection, but the overall appearance will be dramatically improved.
When Dr. Colorchip Might Struggle:
Scenario: Deep scratches or chips that have penetrated to bare metal. Large areas of paint damage or peeling clear coat.
Expected Result: Dr. Colorchip may fill the chip, but it won't address the underlying damage. The repair may be visible and may not hold up well over time. In these cases, professional repair is usually the better option.
Limitations and Considerations
Despite its effectiveness, Dr. Colorchip is not a panacea for all paint imperfections. Here are some limitations to keep in mind:
- Color Matching Issues: While Dr. Colorchip strives for accuracy, slight variations in paint formulas and fading over time can affect the color match.
- Clear Coat Damage: Dr. Colorchip doesn't repair clear coat damage. If the clear coat is peeling or delaminating, Dr. Colorchip will only address the underlying paint chip.
- Durability: While the repaired areas are generally durable, they may not be as resistant to chipping as the original factory paint. Applying a good quality wax or sealant can help to protect the repair.
- Learning Curve: Mastering the blending technique requires practice. It's recommended to practice on an inconspicuous area before tackling visible repairs.
Conclusion: Is Dr. Colorchip Worth It?
Dr. Colorchip offers a viable and cost-effective solution for repairing minor paint imperfections. Its unique blending process allows for a seamless integration of the new paint with the surrounding original finish, resulting in a significant improvement in appearance. However, it's essential to understand its limitations and to follow the correct application procedure. For small stone chips and scratches, Dr. Colorchip can be an excellent alternative to expensive professional repairs. But for more severe damage, professional intervention is still the best course of action. The key to success lies in realistic expectations, careful preparation, and a patient approach to the blending process. And as with any DIY project, a little research and practice can go a long way in achieving professional-looking results.