Fix Scratches On Plastic Bumper
Scratches on your car's plastic bumper are an unavoidable part of vehicle ownership. Whether it's a minor scrape from a shopping cart or a more noticeable mark from a parking mishap, these blemishes can detract from your car's appearance. The good news is that many scratches on plastic bumpers can be repaired at home with the right tools and a bit of patience. This guide will walk you through the process of assessing the damage and employing effective techniques to fix scratches on your plastic bumper, saving you the cost of professional repairs.
Assessing the Damage: Is it a DIY Job?
Before you start gathering supplies, it's crucial to determine the severity of the scratch. Not all scratches are created equal, and some may require professional attention. Here's a breakdown of common scratch types and whether they're suitable for a DIY fix:
Types of Scratches
- Clear Coat Scratches: These are the most superficial scratches, affecting only the clear protective layer over the paint. They often appear as light, hazy lines and can usually be buffed out relatively easily.
- Paint Scratches: These scratches penetrate the clear coat and reach the paint layer. They'll be more noticeable than clear coat scratches and may require a bit more work to repair.
- Deep Scratches: These are the most severe, reaching the plastic of the bumper itself. They may even leave a visible groove or indentation. Deep scratches often require filling before painting.
When to Call a Professional
While many scratches can be fixed at home, there are situations where professional help is necessary:
- Extensive Damage: If the bumper is cracked, dented, or has large areas of deep scratching, a professional repair is recommended. Trying to fix significant damage yourself could worsen the problem.
- Paint Matching Issues: Achieving a perfect paint match can be challenging, especially for metallic or custom colors. A professional auto body shop has the tools and expertise to ensure a seamless color match.
- Lack of Confidence: If you're uncomfortable with any step of the repair process, or you're worried about making the damage worse, it's best to leave it to the professionals.
If you've assessed the damage and determined that it's a minor to moderate scratch, you can proceed with the DIY repair.
Gathering Your Supplies
Having the right tools and materials is essential for a successful repair. Here's a list of what you'll need:
- Car Wash Soap and Water: For cleaning the bumper before and after repairs.
- Microfiber Cloths: Soft cloths for cleaning, drying, and applying compounds. Avoid using abrasive materials that could cause further scratching.
- Automotive Masking Tape: To protect surrounding areas from accidental damage.
- Rubbing Alcohol (Isopropyl Alcohol): For degreasing the surface.
- Fine-Grit Sandpaper (2000-3000 grit): For smoothing out scratches.
- Wet/Dry Sandpaper: For wet sanding, which helps reduce scratching.
- Rubbing Compound: An abrasive compound used to remove scratches and imperfections.
- Polishing Compound: A less abrasive compound used to refine the finish after rubbing compound.
- Scratch Remover: A product specifically designed to remove light scratches.
- Touch-Up Paint (Matching Your Car's Color): For filling in deep scratches. You can find your car's paint code on a sticker in the driver's side doorjamb or under the hood.
- Clear Coat Spray: To protect the touch-up paint.
- Applicator Pads (Foam or Microfiber): For applying compounds and polishes.
- Safety Glasses and Gloves: To protect your eyes and skin.
- Optional: Heat Gun (for drying paint faster)
Step-by-Step Guide to Fixing Scratches
Now that you have your supplies, let's get started. Follow these steps carefully for the best results:
Step 1: Cleaning the Area
Thoroughly clean the area around the scratch with car wash soap and water. Remove any dirt, grime, or wax that could interfere with the repair. Rinse well and dry with a clean microfiber cloth. Next, use rubbing alcohol to degrease the surface and ensure proper adhesion of the repair materials.
Step 2: Masking the Surrounding Area
Use automotive masking tape to protect the surrounding paint from accidental damage. Carefully tape around the scratched area, leaving only the scratch exposed. This will prevent you from inadvertently sanding or polishing unaffected areas.
Step 3: Sanding the Scratch (If Necessary)
If the scratch is deep enough to feel with your fingernail, you'll need to sand it down slightly to create a smooth surface. Start with 2000-grit sandpaper and wet sand the area. Wet sanding involves using water as a lubricant to reduce scratching and keep the sandpaper from clogging. Dip the sandpaper in water or use a spray bottle to keep the surface wet. Gently sand the scratch in a back-and-forth motion, being careful not to apply too much pressure. Check your progress frequently and stop sanding when the scratch is barely visible.
If the scratch is very light, you might be able to skip this step and go directly to applying rubbing compound.
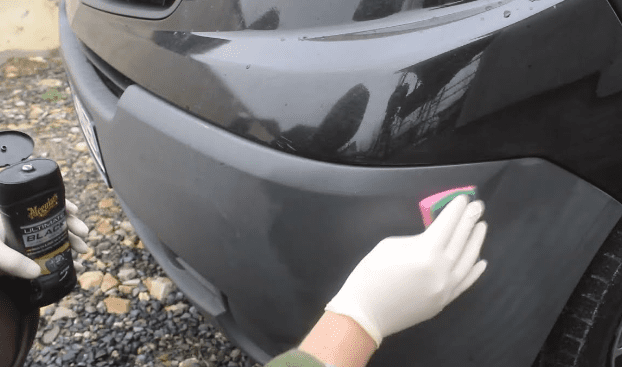
Step 4: Applying Rubbing Compound
Apply a small amount of rubbing compound to an applicator pad. Gently rub the compound onto the scratched area using a circular motion. Apply moderate pressure and work the compound into the scratch for several minutes. The rubbing compound will remove a thin layer of the clear coat or paint, effectively leveling the scratch with the surrounding surface.
Step 5: Polishing the Area
After using rubbing compound, the area may appear slightly hazy or swirled. This is normal. To restore the shine, apply polishing compound to a clean applicator pad. Use the same circular motion as with the rubbing compound, but apply less pressure. The polishing compound will refine the finish and remove any remaining imperfections. Wipe away any residue with a clean microfiber cloth.
Step 6: Applying Scratch Remover (Optional)
For light scratches or after polishing, you can use a scratch remover product to further enhance the finish. Apply the scratch remover according to the manufacturer's instructions.
Step 7: Applying Touch-Up Paint (For Deep Scratches)
If the scratch is deep and penetrates the plastic, you'll need to fill it with touch-up paint. Before applying the paint, ensure the area is clean and dry. Apply thin, even coats of touch-up paint to the scratch using a fine brush or applicator. Allow each coat to dry completely before applying the next. It may take several coats to fill the scratch completely. Be patient and avoid applying too much paint at once, as this can lead to runs and drips.
Use a heat gun on a low setting to help speed up the drying process between coats if desired. Hold the heat gun a few inches away from the surface and move it back and forth to avoid overheating the paint.
Step 8: Sanding the Touch-Up Paint (If Necessary)
Once the touch-up paint is completely dry, you may need to sand it down slightly to level it with the surrounding paint. Use 3000-grit wet/dry sandpaper and wet sand the area gently. Be careful not to sand through the surrounding paint. Stop sanding when the touch-up paint is flush with the surrounding surface.
Step 9: Applying Clear Coat (If Using Touch-Up Paint)
After applying touch-up paint, you'll need to protect it with a layer of clear coat. Apply a thin, even coat of clear coat spray to the repaired area. Allow it to dry completely according to the manufacturer's instructions. You may need to apply multiple coats for adequate protection.
Step 10: Final Polishing
After the clear coat is dry, you can polish the area again with polishing compound to blend the repair seamlessly with the surrounding paint. This will help to remove any imperfections and restore the shine to the repaired area.
Step 11: Removing the Masking Tape and Cleaning
Carefully remove the masking tape and clean the area with a clean microfiber cloth. Inspect the repair to ensure that it's satisfactory. If necessary, you can repeat any of the steps above to further improve the results.
Preventing Future Scratches
While you can't completely eliminate the risk of scratches, there are steps you can take to minimize them:
- Park carefully: Avoid parking too close to other cars or in areas where there's a high risk of scratches.
- Use a car cover: A car cover can protect your car from scratches, dust, and other environmental hazards.
- Wash your car regularly: Regular washing helps to remove dirt and grime that can scratch the paint.
- Wax your car: Waxing your car creates a protective layer that can help to prevent scratches.
Conclusion
Fixing scratches on a plastic bumper can be a straightforward DIY project, saving you money on professional repairs. By carefully assessing the damage, gathering the right supplies, and following these step-by-step instructions, you can restore your car's appearance and prevent further damage. Remember to take your time, be patient, and don't hesitate to consult a professional if you're unsure about any step of the process. With a little effort, you can keep your car looking its best for years to come.
Disclaimer: While this guide provides general instructions for fixing scratches on plastic bumpers, results may vary depending on the severity of the scratch, the type of paint, and your skill level. Always follow the manufacturer's instructions for any products you use and take appropriate safety precautions.