Hose From Coolant Reservoir To Radiator
Alright, let's talk about the hose that connects your coolant reservoir (also known as the coolant overflow tank or expansion tank) to your radiator. It's a seemingly simple component, but it plays a vital role in your vehicle's cooling system's overall health and efficiency. Understanding its function and how to troubleshoot issues is crucial for any serious DIY mechanic or car enthusiast.
Functionality: More Than Just a Connection
This hose isn't just a passive connector; it's an integral part of a closed-loop cooling system. The key to understanding its function lies in grasping how the entire cooling system operates:
- Coolant Expansion and Contraction: As your engine heats up, the coolant absorbs heat. This causes the coolant to expand in volume.
- Pressure Build-up: This expansion increases the pressure within the entire cooling system, including the radiator.
- Radiator Cap's Role: The radiator cap isn't just a lid; it's a calibrated pressure relief valve. It's designed to maintain a specific pressure within the system (e.g., 16 PSI). When the pressure exceeds this limit, the radiator cap opens.
- Coolant Overflow: When the radiator cap opens, excess coolant is vented out through a small outlet, which is connected to the hose in question. This hose leads directly to the coolant reservoir.
- Reservoir Storage: The coolant reservoir acts as a temporary storage tank for this expelled coolant. It prevents the coolant from simply being dumped onto the ground.
- Coolant Recovery: As the engine cools down, the coolant contracts. This creates a vacuum within the cooling system. The radiator cap, which now acts as a one-way valve, allows coolant to be drawn back from the reservoir, through the same hose, and back into the radiator. This process is critical for maintaining a full and efficient cooling system.
In essence, the hose and reservoir work together to create a self-regulating system that accommodates coolant expansion and contraction, prevents coolant loss, and ensures the radiator remains properly filled. This avoids air pockets, which can lead to localized overheating and potential engine damage. A poorly functioning system reduces the efficiency and effectiveness of cooling, increasing the risk of engine failure.
Construction and Materials
While seemingly simple, the hose's construction is important for its reliability. Here's what to look for:
- Material: Typically made from a specialized type of rubber or silicone, designed to withstand high temperatures, pressure fluctuations, and constant exposure to coolant chemicals. Standard rubber hoses will deteriorate quickly in this environment. Ethylene Propylene Diene Monomer (EPDM) rubber is commonly used due to its excellent resistance to heat, ozone, and chemicals.
- Reinforcement: Some hoses may have internal reinforcement, such as a braided nylon or fabric layer, to prevent kinking and collapse, especially when subjected to vacuum pressure during the coolant recovery phase.
- Diameter: The inside diameter of the hose is critical. It must be the correct size to fit snugly onto the radiator cap outlet and the reservoir inlet/outlet without being excessively tight or loose.
- Bend Radius: The hose needs to be flexible enough to accommodate the routing between the radiator and reservoir without kinking or collapsing. Sharp bends can restrict coolant flow.
Choosing a quality replacement hose is crucial for long-term reliability. Opt for hoses specifically designed for coolant reservoir applications, and avoid using generic fuel or vacuum lines.
Troubleshooting Common Issues
Problems with this hose can manifest in various ways, often mimicking other cooling system issues. Here are some common problems and how to diagnose them:
Hose Leaks
Leaks are the most common problem. They can occur at the hose ends, along the hose body, or where the hose connects to the radiator or reservoir.
- Visual Inspection: Carefully inspect the hose for cracks, swelling, or signs of coolant residue. Look for telltale green, orange, or pink stains (depending on the coolant type) around the connections.
- Pressure Test: A cooling system pressure tester can help identify leaks that are not immediately obvious. Attach the tester to the radiator cap opening and pressurize the system. Watch for pressure drops and coolant leaks. Always follow the manufacturer's instructions for the pressure tester and never exceed the maximum pressure specified for your cooling system.
- Hose Clamps: Ensure the hose clamps are properly tightened and in good condition. Replace corroded or damaged clamps. Over-tightening clamps can damage the hose, so use appropriate torque.
Hose Collapse or Kinking
A collapsed or kinked hose can restrict or completely block coolant flow, preventing the system from functioning correctly.
- Visual Inspection: Check the hose for any signs of collapse or kinking, especially when the engine is cold.
- Vacuum Test (Indirect): If the hose collapses only when the engine cools down, it may indicate a problem with the radiator cap's vacuum relief valve. If the cap isn't allowing air back into the system as the coolant contracts, a strong vacuum can develop, causing the hose to collapse. Replacing the radiator cap is often the solution.
- Hose Condition: Old or degraded hoses are more prone to collapsing. If the hose feels soft or spongy, it's likely time for a replacement.
Clogged Hose
Although less common, the hose can become clogged with debris, such as rust particles or degraded coolant.
- Visual Inspection (Difficult): It's difficult to visually inspect the inside of the hose without removing it.
- Flow Test: Disconnect the hose from both the radiator and the reservoir. Try to flush it out with water. If the water flow is restricted, the hose is likely clogged.
- Replacement: Clogged hoses are generally best replaced rather than trying to clean them, as cleaning may not completely remove the blockage.
Replacement Procedure
Replacing the coolant reservoir hose is a relatively straightforward task. However, it's crucial to follow proper safety precautions.
- Safety First: Ensure the engine is completely cool before starting. Hot coolant can cause severe burns. Wear eye protection and gloves.
- Drain Coolant (Partial): To minimize coolant spillage, drain a small amount of coolant from the radiator drain cock (petcock) or by carefully removing the radiator cap (if the engine is cold).
- Remove Old Hose: Loosen the hose clamps at both ends of the hose. Carefully twist and pull the hose to remove it from the radiator and reservoir. Be prepared for some coolant spillage.
- Inspect Connections: Inspect the radiator cap outlet and reservoir inlet/outlet for any damage or corrosion. Clean them thoroughly.
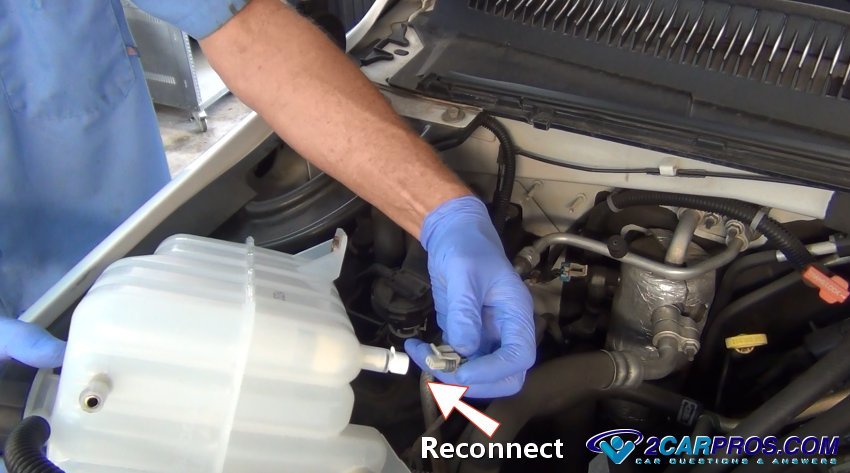
- Install New Hose: Slide the new hose onto the radiator cap outlet and reservoir inlet/outlet. Ensure it's fully seated.
- Secure Hose Clamps: Position the hose clamps correctly and tighten them securely. Avoid over-tightening.
- Refill Coolant: Refill the cooling system with the correct type and amount of coolant. Refer to your vehicle's owner's manual for specifications.
- Bleed Air: Bleed the cooling system to remove any trapped air. Air pockets can cause overheating. Most vehicles have a bleeder valve on the thermostat housing or radiator. Follow the vehicle's specific bleeding procedure.
- Check for Leaks: Start the engine and let it warm up to operating temperature. Carefully inspect the hose connections for leaks.
- Monitor Coolant Level: Monitor the coolant level in the reservoir over the next few days and add coolant as needed.
Pro Tip: When installing the new hose, a small amount of silicone grease or coolant on the fittings can make it easier to slide the hose on and off.
Upgrades and Modifications
While the standard coolant reservoir hose is usually adequate for most vehicles, some enthusiasts choose to upgrade it for improved performance or aesthetics.
- Silicone Hoses: Silicone hoses offer superior heat resistance, durability, and lifespan compared to rubber hoses. They are a popular upgrade for performance vehicles or those subjected to harsh conditions.
- Braided Hoses: Braided stainless steel hoses offer enhanced protection against abrasion and kinking, and they can also add a visual upgrade to the engine bay. However, they are typically more expensive.
- Custom Routing: In some modified vehicles, the coolant reservoir may be relocated, requiring a custom hose routing. Ensure the hose is properly supported and protected from heat sources.
When making modifications, it's essential to consider the overall impact on the cooling system's performance and reliability. Always use high-quality components and follow proper installation procedures.
By understanding the function, construction, and potential issues of the coolant reservoir hose, you can effectively maintain your vehicle's cooling system and prevent costly engine repairs. Remember to prioritize safety and use quality replacement parts for long-lasting reliability.