How Do You Use A Coil Spring Compressor
So, you're thinking about tackling a suspension job involving coil springs? That's great! Replacing struts or shocks can significantly improve your vehicle's ride and handling. However, dealing with coil springs requires a special tool: the coil spring compressor. These springs store a *tremendous* amount of energy, and releasing that energy uncontrolled can be extremely dangerous, even fatal. This article will guide you through the process of safely and effectively using a coil spring compressor.
Understanding the Need for a Coil Spring Compressor
Before we dive into the "how," let's quickly review *why* you need a coil spring compressor. When a coil spring is installed on your vehicle, it's compressed to a length much shorter than its natural state. This compression is what provides the necessary tension to support the vehicle's weight and absorb bumps and shocks. When you disassemble a strut or shock assembly, you need to relieve this pressure in a controlled manner. Without a spring compressor, releasing the retaining nut at the top of the strut can result in the spring violently launching off, causing serious injury or damage.
Safety First: Essential Precautions
I can't stress this enough: safety is paramount when working with coil springs. Here are some crucial precautions to take:
- Wear Safety Glasses: Always protect your eyes from flying debris.
- Wear Gloves: Protect your hands from sharp edges and potential pinches.
- Choose a Safe Workspace: Work in a well-lit, uncluttered area away from children and pets.
- Inspect the Compressor: Before each use, thoroughly inspect the spring compressor for any signs of damage, such as bent threads, cracks, or wear. Do not use a damaged compressor.
- Read the Instructions: Carefully read and understand the manufacturer's instructions for your specific coil spring compressor. Different models may have slightly different procedures.
- Secure the Assembly: Once the spring is compressed, ensure the entire assembly is stable and cannot tip over.
- Take Your Time: Rushing can lead to mistakes and accidents. Work deliberately and methodically.
- Never Compress More Than Necessary: Only compress the spring enough to safely remove the strut or shock. Over-compression puts unnecessary stress on the compressor and the spring.
Tools You'll Need
Here's a list of tools you'll likely need for this job:
- Coil Spring Compressor: The most common type is the Macpherson strut spring compressor, which uses two threaded rods with hooks to compress the spring. Internal compressors are also available, but they are generally for more specialized applications.
- Sockets and Wrenches: You'll need the appropriate sizes to remove the strut assembly from the vehicle and disassemble the strut.
- Torque Wrench: To properly tighten fasteners during reassembly.
- Penetrating Oil: To help loosen stubborn bolts and nuts.
- Hammer: For gentle persuasion.
- Pry Bar: For leverage if needed.
- Jack and Jack Stands: To safely lift and support the vehicle.
- Wheel Chocks: To prevent the vehicle from rolling.
- Impact Wrench (Optional): Can speed up the process, but use with caution.
Step-by-Step Guide to Using a Coil Spring Compressor
Now, let's get into the nitty-gritty of using the compressor. This is a general guide, and specific procedures may vary depending on your vehicle and the type of spring compressor you're using. Always refer to your vehicle's service manual and the compressor's instructions.
1. Prepare the Vehicle
Safely lift and support the vehicle using a jack and jack stands. Make sure the vehicle is stable and secure before proceeding. Use wheel chocks to prevent rolling.
2. Remove the Strut Assembly
Disconnect any brake lines, ABS sensors, or other components attached to the strut assembly. Carefully remove the bolts that secure the strut to the vehicle. You might need penetrating oil to loosen stubborn bolts. Once all attachments are removed, carefully remove the strut assembly from the vehicle.
3. Position the Spring Compressor
This is the most important step. Carefully position the spring compressor hooks on the coil spring. Ensure the hooks are fully seated and securely gripping the spring coils. The hooks should be positioned opposite each other on the spring, and spaced evenly apart. Ideally, place the compressor jaws in the area of the spring that is least likely to bend/kink when compressed. Avoid placing them too close to the ends of the spring.
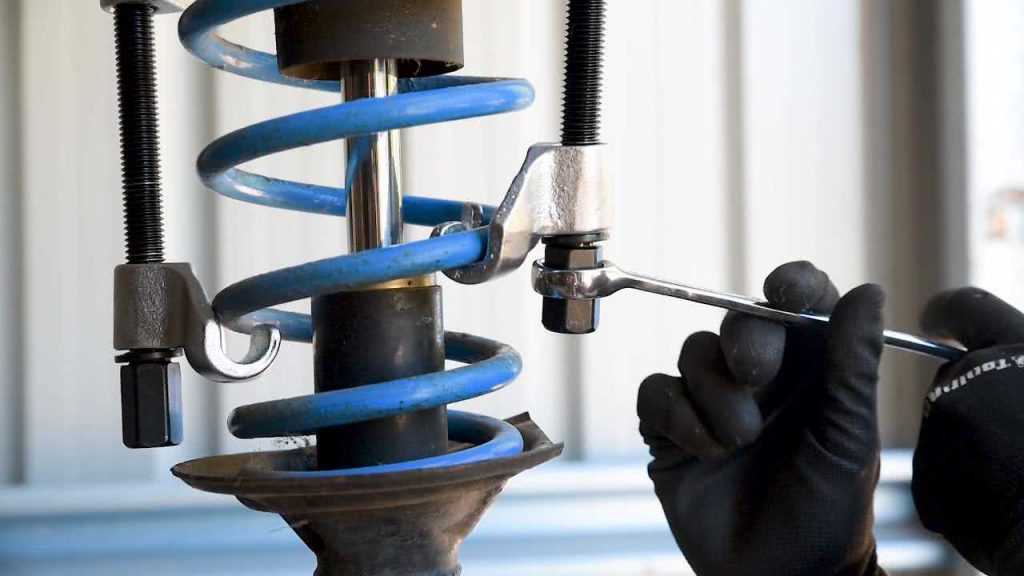
4. Compress the Spring
Slowly and evenly tighten the compressor bolts or use an impact wrench to gradually compress the spring. Pay close attention to the spring as you compress it. Make sure the hooks remain securely seated and that the spring is compressing evenly. If the spring starts to bend or buckle in an unusual way, stop immediately and reposition the compressor. Only compress the spring enough to relieve the tension on the strut top nut.
5. Remove the Strut Top Nut
Once the spring is compressed enough, carefully remove the strut top nut. Be prepared for the strut assembly to separate slightly as the pressure is relieved. Some struts use a special tool to hold the strut shaft while you loosen the nut. Use the appropriate tool to prevent the shaft from spinning.
6. Disassemble the Strut Assembly
Carefully remove the strut top mount, spring seat, and other components from the strut. Note the order in which these parts are assembled, as you'll need to reassemble them in the same way.
7. Reassemble the Strut with New Components
Install the new strut (or shock) and other components in the reverse order of disassembly. Make sure all parts are properly seated and aligned.
8. Slowly Decompress the Spring
Gradually loosen the spring compressor bolts or screws to slowly decompress the spring. Again, pay close attention to the spring as you decompress it. Ensure the spring seats correctly in the spring seat and that all components remain aligned.
9. Remove the Spring Compressor
Once the spring is fully decompressed and properly seated, carefully remove the spring compressor.
10. Reinstall the Strut Assembly
Reinstall the strut assembly onto the vehicle, following the reverse of the removal procedure. Torque all fasteners to the manufacturer's specifications.
Common Mistakes to Avoid
Here are some common mistakes that can lead to accidents or damage when using a coil spring compressor:
- Using a Damaged Compressor: This is the most common and most dangerous mistake. A damaged compressor can fail under pressure, causing the spring to release violently.
- Improper Hook Placement: If the hooks are not securely seated on the spring coils, they can slip off, leading to an uncontrolled release.
- Over-Compressing the Spring: Over-compression puts unnecessary stress on the compressor and the spring, increasing the risk of failure.
- Rushing the Process: Rushing can lead to mistakes and oversights. Take your time and work carefully.
- Ignoring Warning Signs: If you notice any unusual bending, cracking, or slipping, stop immediately and reassess the situation.
Estimated Repair Costs
If you're not comfortable tackling this job yourself, you can take your vehicle to a professional mechanic. The cost of replacing struts or shocks can vary depending on the vehicle make and model, the brand of parts used, and the labor rates in your area. Here's a rough estimate:
- Parts: $100-$500 per strut assembly (depending on quality and brand)
- Labor: $150-$300 per strut (depending on complexity and shop rates)
Therefore, you can expect to pay anywhere from $250 to $800 per strut for a professional replacement. While using a coil spring compressor yourself can save you money, it's crucial to weigh the cost savings against the potential risks. If you're unsure about your abilities, it's always best to consult a qualified mechanic.
Alternative: Pre-Assembled Strut Assemblies
One way to avoid using a coil spring compressor altogether is to purchase pre-assembled strut assemblies. These assemblies include the strut, spring, and top mount, all pre-assembled and ready to install. While they are generally more expensive than purchasing individual components, they can save you time and effort, and eliminate the need for a spring compressor.
In conclusion, while using a coil spring compressor can be a cost-effective way to repair your vehicle's suspension, it's crucial to prioritize safety and follow the proper procedures. If you have any doubts, don't hesitate to seek professional assistance. Good luck, and stay safe!