How To Add Differential Fluid
Maintaining your vehicle's differential is crucial for smooth operation and longevity. The differential allows your wheels to rotate at different speeds when turning, preventing damage and ensuring optimal performance. One of the most important maintenance tasks is checking and changing the differential fluid. This article provides a step-by-step guide on how to add differential fluid, ensuring you can confidently perform this task yourself. While this guide aims to be comprehensive, always consult your vehicle's owner's manual for specific recommendations and torque specifications.
Understanding Your Vehicle's Differential
Before we dive into the process, let's quickly understand what the differential does and why maintaining its fluid level is so important. The differential, located in the axle housing, transfers power from the engine to the wheels. It allows each wheel to rotate independently, which is vital when cornering. Without a differential, the wheels would be forced to spin at the same speed, causing tire wear, strain on the drivetrain, and potentially dangerous handling issues.
The differential fluid, often referred to as gear oil, lubricates the gears and bearings within the differential. This lubrication reduces friction, dissipates heat, and prevents wear and tear. Over time, the fluid can become contaminated with metal particles, moisture, and other debris, reducing its effectiveness. Low fluid levels can also lead to increased friction and heat, potentially causing significant damage to the differential. Therefore, regularly checking and replacing the differential fluid is essential for maintaining your vehicle's performance and preventing costly repairs.
Gathering Your Tools and Supplies
Before you begin, gather all the necessary tools and supplies. This will streamline the process and prevent you from having to stop mid-way to search for something. Here's a list of what you'll need:
- New Differential Fluid: Consult your owner's manual to determine the correct type and quantity of fluid required for your vehicle. Using the wrong fluid can damage the differential.
- Socket Wrench and Sockets: You'll need the correct socket size to remove the fill and drain plugs (if applicable).
- Wrench Set: Some differentials may use wrenches instead of sockets for the plugs.
- Torque Wrench: Essential for tightening the plugs to the manufacturer's specifications. Overtightening can damage the threads, while undertightening can lead to leaks.
- Drain Pan: To catch the old differential fluid. Choose a pan that's large enough to hold the entire volume of fluid.
- Fluid Transfer Pump: This makes filling the differential much easier. It's essentially a small pump that attaches to the fluid bottle and allows you to inject the fluid into the fill hole.
- Funnel (optional): If you don't have a fluid transfer pump, a funnel with a flexible hose can be used, although it's more cumbersome.
- Jack and Jack Stands: To safely lift the vehicle and provide access to the differential. Never work under a vehicle supported only by a jack.
- Wheel Chocks: To prevent the vehicle from rolling.
- Gloves: To protect your hands from the fluid.
- Rags or Shop Towels: For cleaning up spills.
- Safety Glasses: To protect your eyes from splashes.
- Breaker Bar (optional): If the plugs are difficult to remove.
- Wire Brush: To clean the fill and drain plugs.
- Penetrating Oil (optional): If the plugs are seized.
Step-by-Step Guide: Adding Differential Fluid
Follow these steps carefully to ensure you properly add differential fluid to your vehicle.
1. Safety First
Park your vehicle on a level surface and engage the parking brake. Place wheel chocks behind the rear wheels if you're working on the front differential, or in front of the front wheels if you're working on the rear differential. This will prevent the vehicle from rolling.
2. Lift the Vehicle (if necessary)
In many cases, you'll need to lift the vehicle to gain access to the differential. Consult your owner's manual for the proper jacking points. Use a jack to lift the vehicle and then securely support it with jack stands. Never work under a vehicle supported only by a jack. Make sure the jack stands are placed on a solid, level surface.
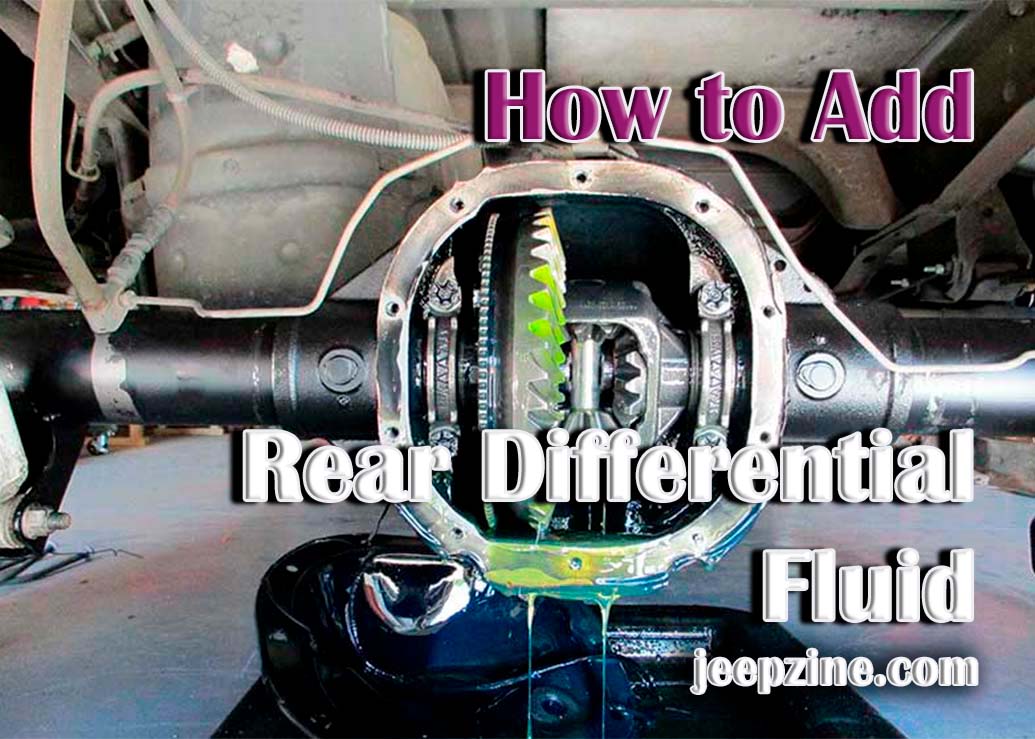
3. Locate the Differential and Plugs
The differential is typically located in the center of the axle housing. Locate the fill plug, which is usually on the side or back of the differential. Some differentials also have a drain plug, usually located at the bottom. Refer to your vehicle's service manual for the exact location of the plugs.
4. Clean Around the Plugs
Use a wire brush to clean the area around the fill and drain plugs (if applicable). This will prevent dirt and debris from falling into the differential when you remove the plugs.
5. Remove the Fill Plug
Using the appropriate socket or wrench, carefully remove the fill plug. If the plug is difficult to remove, apply penetrating oil and let it sit for a few minutes before trying again. Avoid stripping the threads on the plug. If you're removing a fill plug with a magnetic tip, inspect it for metal shavings. A small amount of shavings is normal, but excessive amounts could indicate a problem with the differential.
6. Check the Fluid Level (and Drain if Applicable)
Once the fill plug is removed, you can check the fluid level. The fluid should be level with or just below the bottom of the fill hole. If the fluid is low, you'll need to add more. If your differential has a drain plug, and you are performing a full fluid change, position the drain pan under the drain plug and remove it. Allow all the old fluid to drain completely. Once drained, clean the drain plug (especially if it's magnetic) and reinstall it, torquing it to the manufacturer's specifications.
7. Add New Differential Fluid
Attach the fluid transfer pump to the bottle of new differential fluid. Insert the pump's hose into the fill hole of the differential. Slowly pump the fluid into the differential until it reaches the bottom of the fill hole. If you're using a funnel, carefully pour the fluid into the fill hole until it reaches the correct level. Be careful not to overfill the differential.
8. Reinstall the Fill Plug
Once the differential is full, carefully reinstall the fill plug. Tighten the plug to the manufacturer's specified torque using a torque wrench. Overtightening can damage the threads, while undertightening can lead to leaks.
9. Clean Up
Clean up any spilled fluid with rags or shop towels. Properly dispose of the old differential fluid according to local regulations. Do not pour it down the drain.
10. Lower the Vehicle
If you lifted the vehicle, carefully lower it back to the ground. Remove the jack stands and wheel chocks.
11. Test Drive
Take the vehicle for a short test drive to ensure the differential is functioning properly. Listen for any unusual noises or vibrations. Check for leaks around the fill and drain plugs.
Troubleshooting Common Issues
While adding differential fluid is a relatively straightforward process, you may encounter some common issues. Here are a few troubleshooting tips:
- Stuck Plugs: If the fill or drain plugs are difficult to remove, try applying penetrating oil and letting it sit for a few minutes. You can also try using a breaker bar for added leverage. Be careful not to strip the threads.
- Stripped Threads: If you accidentally strip the threads on the fill or drain plug, you may need to use a thread repair kit or replace the differential cover.
- Leaks: If you notice leaks around the fill or drain plugs after adding fluid, make sure the plugs are properly tightened to the manufacturer's specifications. You may also need to replace the sealing washers.
- Wrong Fluid Type: Using the wrong type of differential fluid can damage the differential. Always consult your owner's manual to determine the correct fluid type.
- Unusual Noises: If you hear unusual noises or vibrations after adding fluid, it could indicate a problem with the differential. Have the vehicle inspected by a qualified mechanic.
When to Consult a Professional
While many DIYers can successfully add differential fluid, there are times when it's best to consult a professional mechanic. If you're not comfortable working on your vehicle, or if you encounter any of the following situations, seek professional help:
- You're unsure about the correct type of differential fluid to use.
- You're unable to remove the fill or drain plugs.
- You strip the threads on the fill or drain plugs.
- You notice excessive metal shavings on the magnetic drain plug.
- You hear unusual noises or vibrations after adding fluid.
By following these steps and taking the necessary precautions, you can confidently add differential fluid to your vehicle and help ensure its continued performance and longevity. Remember to always consult your owner's manual for specific recommendations and torque specifications. Regular maintenance is key to keeping your vehicle running smoothly and avoiding costly repairs down the road. Adding differential fluid is just one aspect of that maintenance, but it's an important one!