How To Change Headlight Cover
Over time, headlight covers, also known as headlight lenses, can become cloudy, yellowed, or cracked. This not only diminishes the aesthetic appeal of your vehicle but, more importantly, significantly reduces headlight brightness, compromising your safety, especially during nighttime driving or in inclement weather. This article provides a practical guide for car owners and mechanics on how to change headlight covers, addressing common maintenance needs, troubleshooting typical problems, and offering solutions applicable across various car models.
Why Headlight Covers Need Replacing
Headlight covers are typically made of polycarbonate plastic, chosen for its durability and impact resistance. However, this material is susceptible to degradation from prolonged exposure to UV radiation from the sun, road debris, and harsh weather conditions. Here are some of the primary reasons why you might need to replace your headlight covers:
- Yellowing or Clouding: UV radiation causes the plastic to oxidize, leading to a yellowish or cloudy appearance. This significantly reduces light output.
- Scratches and Pitting: Road debris, such as small stones and sand, can cause scratches and pitting on the surface of the cover.
- Cracks: Impacts from larger objects, or even stress fractures over time, can lead to cracks in the headlight cover.
Symptoms of Damaged Headlight Covers
Recognizing the symptoms of failing headlight covers is the first step toward addressing the problem. Common indicators include:
- Dim Headlights: This is the most obvious symptom. If your headlights seem less bright than they used to be, even with functioning bulbs, the cover is likely the culprit.
- Hazy or Yellowish Appearance: A visual inspection will reveal if the cover is cloudy, yellowed, or discolored.
- Visible Scratches or Cracks: Any visible damage on the surface of the cover warrants attention.
- Failed Vehicle Inspection: Many vehicle inspections include a check of headlight functionality and clarity. Cloudy or damaged covers can cause your vehicle to fail inspection.
Troubleshooting Common Headlight Cover Problems
Before replacing the entire headlight assembly (which can be costly), try to diagnose the specific issue. Here are some troubleshooting steps:
Problem 1: Minor Clouding or Yellowing
Cause: Oxidation of the polycarbonate plastic due to UV exposure.
Solution: Headlight restoration kits are widely available and can often restore the clarity of the cover. These kits typically include abrasive compounds, polishing pads, and a UV protectant. Follow the instructions carefully, and consider using a power drill with a polishing attachment for best results. Example: 3M Headlight Restoration Kit.
Example: On a 2010 Honda Civic, minor yellowing can often be resolved with a good headlight restoration kit, saving the owner from replacing the entire headlight assembly.
Problem 2: Deep Scratches or Pitting
Cause: Impact from road debris or improper cleaning techniques.
Solution: For deeper scratches, a more aggressive approach may be needed. Start with wet sanding using progressively finer grits of sandpaper (e.g., 400 grit, then 800 grit, then 1000 grit, then 2000 grit). After sanding, use a polishing compound and a polishing pad to restore clarity. Always keep the surface wet while sanding to prevent scratching. Apply a UV protectant after polishing.
Example: A 2015 Toyota Camry driven frequently on gravel roads might develop significant pitting. Wet sanding followed by polishing can often restore the lens.
Problem 3: Cracks or Severe Damage
Cause: Significant impact, stress fractures, or severe UV degradation.
Solution: If the headlight cover has cracks or is severely damaged, replacement is usually the only viable option. While some specialized adhesives can temporarily mend cracks, they rarely restore the original structural integrity or optical clarity. Consider if you only need to replace the lens cover or the entire headlight assembly. If the housing unit is in good condition, you might be able to source a replacement lens cover online. Replacing the entire assembly can be easier but more expensive.
Example: A 2018 Ford F-150 involved in a minor fender bender might sustain a cracked headlight cover, requiring replacement of the entire headlight assembly.
Step-by-Step Guide to Replacing a Headlight Cover (or Assembly)
Safety First: Disconnect the negative terminal of the battery before starting any electrical work on your car. Wear safety glasses and gloves.
Step 1: Gather Your Tools and Materials
- New Headlight Cover (or Assembly)
- Socket set and wrenches
- Screwdrivers (Phillips and flathead)
- Trim removal tools (optional)
- Work light
- Clean rags
- Masking tape (optional, to protect surrounding paint)
Step 2: Access the Headlight Assembly
The method for accessing the headlight assembly varies depending on the car model. Consult your vehicle's repair manual or search online for specific instructions for your car. Common access points include:
- Behind the Headlight: Some vehicles have access panels behind the headlight assembly in the engine bay.
- Through the Wheel Well: Removing the inner fender liner may provide access.
- From the Front: Some headlights are accessible by removing the grille or bumper. This is common for newer models.
Example: On a 2012 Chevrolet Cruze, accessing the headlights typically involves removing several screws securing the front bumper fascia.
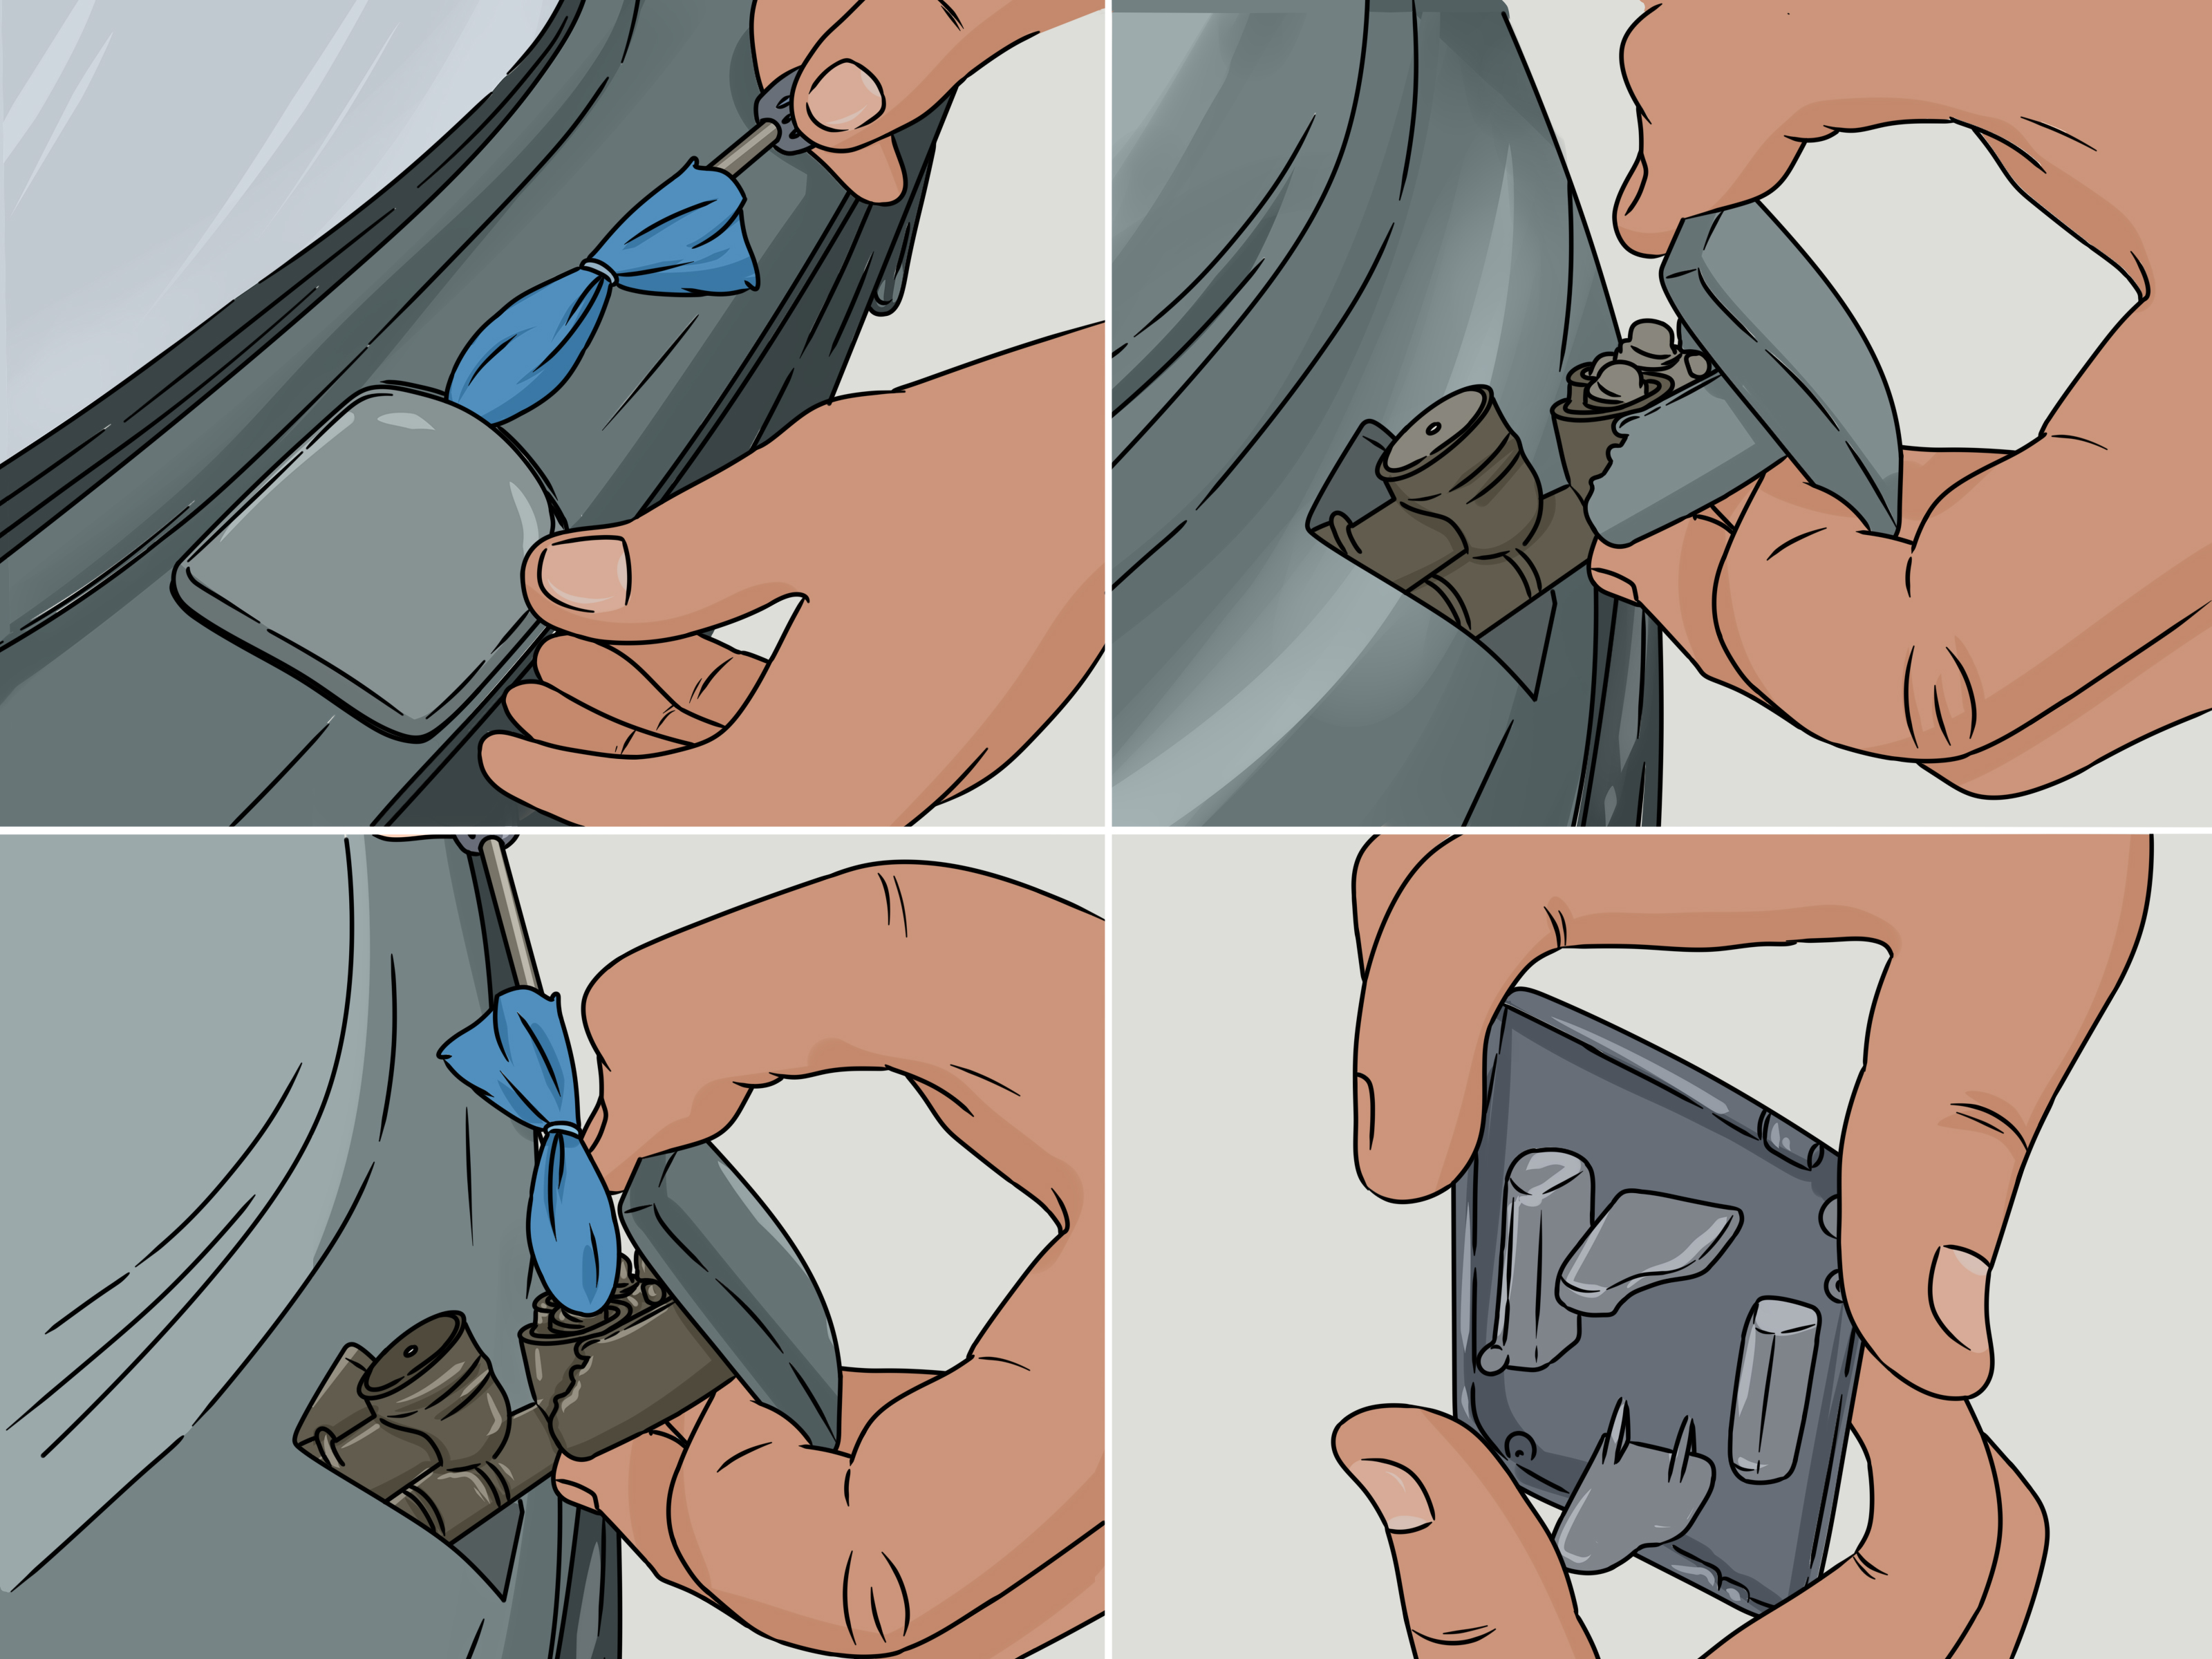
Step 3: Remove the Old Headlight Assembly
Once you have access to the headlight assembly, carefully disconnect any electrical connectors attached to it. Then, remove the bolts or screws that hold the assembly in place. Note the location of each fastener to make reassembly easier. Gently wiggle the assembly free and remove it from the vehicle.
Pay close attention to how the assembly is oriented to the vehicle. Taking pictures can be helpful.
Step 4: Replacing the Headlight Cover (If Applicable)
If you are only replacing the cover, and not the entire assembly, you'll need to separate the old cover from the housing unit. This often involves heating the sealant that holds the cover in place. A heat gun or oven (set to a low temperature) can be used. Be careful not to overheat the plastic. Once the sealant is softened, carefully pry the old cover off the housing. Clean the housing of any remaining sealant. Apply new sealant (headlight sealant) and attach the new cover. Use clamps to hold the cover in place while the sealant cures.
Step 5: Install the New Headlight Assembly (or Reassembled Unit)
Carefully install the new headlight assembly (or the reassembled unit with the new cover) in the reverse order of removal. Reconnect the electrical connectors and tighten the bolts or screws securely. Ensure the headlight assembly is properly aligned.
Step 6: Test the Headlights
Reconnect the negative terminal of the battery and test the headlights (low beam, high beam, turn signals, and parking lights) to ensure they are functioning correctly. Adjust the headlight alignment if necessary.
Real-World Issues and Solutions
Issue: Stripped screws during removal.
Solution: Use a screw extractor or try using a rubber band or steel wool between the screwdriver and the screw head to provide more grip.
Issue: Difficulty removing the old headlight cover due to stubborn sealant.
Solution: Apply more heat evenly around the perimeter of the cover. Use a heat gun on low and move it constantly to avoid melting the plastic. You can also use specialized sealant removal tools.
Issue: Condensation inside the headlight assembly after replacement.
Solution: Ensure the headlight assembly is properly sealed. Check the vent caps or breathers and make sure they are not clogged. Small desiccant packets can also be placed inside the assembly to absorb moisture. You can often find these at hardware stores or online.
Maintenance Tips for Keeping Your Headlights in Top Condition
- Regular Cleaning: Clean your headlight covers regularly with soap and water to remove dirt and grime.
- UV Protection: Apply a UV protectant spray or wax to the headlight covers after cleaning or restoration. This will help prevent oxidation and yellowing.
- Avoid Harsh Chemicals: Do not use abrasive cleaners or solvents on your headlight covers, as they can damage the plastic.
- Park in the Shade: When possible, park your car in a shaded area or use a car cover to protect the headlight covers from UV radiation.
By understanding the causes of headlight cover damage, recognizing the symptoms, and following the steps outlined in this guide, car owners and mechanics can effectively replace headlight covers, ensuring optimal visibility and safety on the road. Remember, regular maintenance and preventative measures can significantly extend the life of your headlights and keep your vehicle in top condition.