How To Install Throttle Position Sensor
The Throttle Position Sensor (TPS) is a critical component in your vehicle's engine management system. It provides the Engine Control Unit (ECU) with information about the throttle plate's angle, allowing the ECU to accurately control fuel delivery and ignition timing. A faulty TPS can lead to various driveability issues, including poor acceleration, erratic idling, stalling, and even Check Engine Light illumination. Replacing a TPS is a relatively straightforward task for the experienced DIYer or professional mechanic. This guide provides a comprehensive walkthrough of the installation process.
Tools and Materials Required
Before you begin, ensure you have the necessary tools and materials readily available. This will streamline the process and minimize potential delays. The essential items include:
- New Throttle Position Sensor (TPS) - Ensure it's the correct part for your vehicle's make, model, and engine.
- Socket set and wrench set - Metric sizes are most common.
- Screwdrivers - Both flathead and Phillips head may be required.
- Multimeter - For testing voltage and resistance.
- Scan tool (OBD2 scanner) - To clear diagnostic trouble codes (DTCs).
- Penetrating oil - To loosen any corroded bolts or screws.
- Throttle body cleaner - To clean the throttle body while the TPS is removed.
- Torque wrench - To ensure proper tightening of fasteners.
- Gloves - To protect your hands.
- Safety glasses - To protect your eyes.
Preparation
Safety should always be your top priority. Disconnect the negative battery terminal before starting any work on the electrical system. This prevents accidental shorts and potential damage to the ECU. Allow the engine to cool down completely. Working on a hot engine can cause burns. Park the vehicle on a level surface and engage the parking brake. Consult your vehicle's repair manual for specific instructions and torque specifications.
Step-by-Step Installation Guide
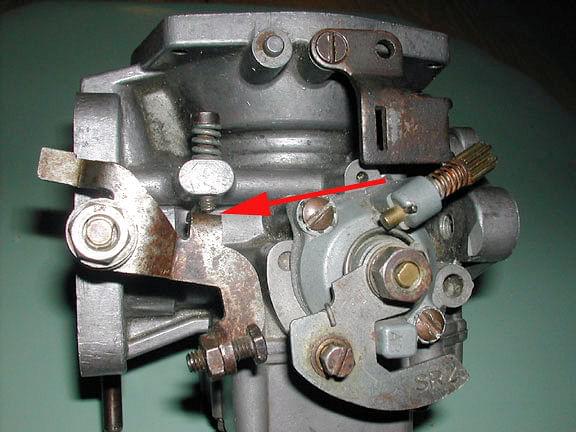
Step 1: Locate the TPS
The TPS is typically mounted on the throttle body, which is usually located near the intake manifold. Its location can vary slightly depending on the vehicle's make and model. Consult your vehicle's repair manual for the exact location. The TPS is usually a small, rectangular sensor with an electrical connector attached.
Step 2: Disconnect the Electrical Connector
Carefully disconnect the electrical connector from the TPS. Most connectors have a locking tab that needs to be depressed before the connector can be pulled off. Avoid pulling directly on the wires, as this can damage the connector or wiring harness. Inspect the connector for any signs of corrosion or damage. If necessary, clean the connector with electrical contact cleaner.
Step 3: Remove the Old TPS
The TPS is usually held in place by two or three screws or bolts. Use the appropriate socket or screwdriver to remove these fasteners. If the fasteners are corroded, apply penetrating oil and allow it to soak for a few minutes before attempting to remove them. Once the fasteners are removed, carefully detach the old TPS from the throttle body. Note the orientation of the TPS as you remove it. This will help you install the new TPS correctly.
Step 4: Clean the Throttle Body
With the TPS removed, now is an opportune time to clean the throttle body. Use throttle body cleaner and a clean rag to remove any carbon buildup or dirt from the throttle bore and throttle plate. Be careful not to spray cleaner into any electrical components. A clean throttle body will ensure smooth throttle operation and optimal engine performance.
Step 5: Install the New TPS
Align the new TPS with the mounting holes on the throttle body. Ensure that the TPS is oriented correctly, matching the orientation of the old TPS. Install the mounting screws or bolts and tighten them to the specified torque using a torque wrench. Over-tightening can damage the TPS or the throttle body. Refer to your vehicle's repair manual for the correct torque specification. Some TPS units require a specific alignment or adjustment procedure, which is covered in later steps.
Step 6: Reconnect the Electrical Connector
Reconnect the electrical connector to the new TPS. Ensure that the connector clicks into place and the locking tab is engaged. Gently tug on the connector to ensure that it is securely attached.
Step 7: TPS Adjustment (If Required)
Some vehicles require TPS adjustment to ensure proper idle and performance. This adjustment typically involves setting the output voltage of the TPS to a specific value at idle. Use a multimeter to measure the voltage between the appropriate terminals on the TPS connector. Loosen the mounting screws slightly and rotate the TPS until the desired voltage is achieved. Tighten the mounting screws to the specified torque once the voltage is set. Refer to your vehicle's repair manual for the specific adjustment procedure and voltage specifications.
Step 8: Verify TPS Operation with a Scan Tool
Connect a scan tool to the vehicle's OBD2 port and monitor the TPS data. The scan tool should display the throttle position as a percentage, ranging from 0% at closed throttle to 100% at wide-open throttle. Verify that the TPS reading changes smoothly and linearly as the throttle is opened and closed. Check for any error codes related to the TPS.
Step 9: Clear Diagnostic Trouble Codes (DTCs)
If there are any diagnostic trouble codes (DTCs) related to the TPS, clear them using the scan tool. This will reset the ECU and allow it to learn the new TPS signal. After clearing the codes, start the engine and allow it to idle for a few minutes. Monitor the engine for any signs of problems, such as rough idling or stalling.
Step 10: Road Test
Take the vehicle for a road test to verify that the TPS is functioning correctly. Pay attention to acceleration, throttle response, and overall engine performance. If you experience any problems, such as hesitation or surging, recheck the TPS installation and adjustment.
Common Issues and Troubleshooting
Even with careful installation, you may encounter issues after replacing the TPS. Here are some common problems and troubleshooting tips:
- Rough Idle or Stalling: This can be caused by an improperly adjusted TPS or a vacuum leak in the throttle body.
- Poor Acceleration: This may indicate a faulty TPS signal or a problem with the fuel delivery system.
- Check Engine Light: A Check Engine Light can be triggered by various TPS-related issues. Use a scan tool to read the DTCs and diagnose the problem.
- Incorrect Voltage Reading: This may indicate a faulty TPS or a wiring problem. Use a multimeter to check the voltage and resistance of the TPS.
- TPS Not Responding to Throttle Changes: Check the connection. The wiring can also be damaged.
Real-World Example
Consider a 2008 Honda Civic experiencing intermittent stalling and poor fuel economy. After scanning the vehicle, a code P0122 (Throttle Position Sensor Circuit Low Input) was found. Following the steps outlined above, the TPS was replaced. However, after the installation, the idle was erratic. Using a multimeter, the voltage was measured and found to be outside the specification listed in the service manual. After slight adjustment of the TPS mounting, the correct voltage was achieved, and the idle returned to normal. The error codes were cleared, and a subsequent road test confirmed the issue was resolved.
Advanced Tips
Here are some advanced tips for installing a TPS:
- Use an Oscilloscope: An oscilloscope can provide a more detailed view of the TPS signal, allowing you to identify subtle problems that may not be apparent with a multimeter.
- Check for Wiring Problems: Inspect the wiring harness and connector for any signs of damage or corrosion. Repair or replace any damaged wiring.
- Use a Professional Scan Tool: Professional-grade scan tools offer advanced diagnostic features, such as data logging and bi-directional controls, which can be helpful for troubleshooting TPS-related issues.
- Keep Records: Always record the voltage readings and adjustment settings for the TPS. This information can be helpful for future troubleshooting.
Conclusion
Replacing a Throttle Position Sensor is a task that can be successfully accomplished with the right tools, knowledge, and a methodical approach. By following the steps outlined in this guide, you can restore your vehicle's engine performance and resolve many common driveability issues. Remember to always prioritize safety and consult your vehicle's repair manual for specific instructions and torque specifications. Whether you're an experienced DIYer or a professional mechanic, this comprehensive guide should provide you with the information you need to install a TPS with confidence.