How To Pull Harmonic Balancer
The harmonic balancer, also known as a crankshaft pulley damper, plays a crucial role in engine operation by damping torsional vibrations from the crankshaft. Over time, these balancers can degrade, necessitating replacement. This detailed guide outlines the process of removing a harmonic balancer, covering essential tools, techniques, and potential pitfalls for automotive enthusiasts, mechanics, and car owners alike.
Preparation and Safety Precautions
Before initiating any work, ensure the vehicle is safely secured. Engage the parking brake, chock the rear wheels, and disconnect the negative battery cable to prevent accidental electrical shorts. Allow the engine to cool completely to avoid burns from hot components. Always wear safety glasses and gloves during this procedure.
Gather the necessary tools and materials. These typically include:
- A harmonic balancer puller: The most crucial tool. Ensure it's compatible with the specific engine. Different engines require different puller designs.
- Sockets and wrenches: Metric or SAE, depending on the vehicle.
- Breaker bar: For loosening stubborn bolts.
- Penetrating oil: To help loosen corroded parts.
- Torque wrench: For proper reinstallation.
- Shop rags: For cleaning.
- Service manual or reliable online resource: Crucial for torque specifications and specific instructions for your vehicle.
Consult the vehicle's service manual to identify the specific type of harmonic balancer and any engine-specific instructions or warnings. This is particularly important for newer vehicles with complex engine designs.
Step-by-Step Removal Process
1. Accessing the Harmonic Balancer
The harmonic balancer is typically located at the front of the engine, attached to the crankshaft. In most cases, you will need to remove the drive belts (serpentine belt or V-belts) to access it. This usually involves using a wrench or socket to relieve tension on the belt tensioner. Note the belt routing for correct reinstallation later; a quick photo can be helpful.
You may also need to remove other components, such as the cooling fan shroud or radiator components, to gain adequate access to the balancer. Refer to your vehicle's service manual for specific instructions.
2. Removing the Crankshaft Bolt
The crankshaft bolt secures the harmonic balancer to the crankshaft. This bolt is often torqued to a very high specification and can be extremely difficult to remove. Apply penetrating oil to the bolt and let it soak for at least 15-20 minutes.
To prevent the engine from turning over while loosening the bolt, you'll need to immobilize the crankshaft. Several methods can be used:
- Using a specialized crankshaft holding tool: These tools typically bolt onto the engine block or transmission bellhousing and engage with the flywheel or flexplate.
- Jamming the flywheel or flexplate: This method involves carefully inserting a screwdriver or pry bar into the teeth of the flywheel or flexplate to prevent rotation. *This method should be used with caution to avoid damaging the flywheel/flexplate teeth.*
- Impact wrench: An impact wrench can often break the bolt loose without needing to immobilize the crankshaft.
Once the crankshaft is immobilized, use a breaker bar and socket to loosen the crankshaft bolt. If the bolt is extremely stubborn, consider using a longer breaker bar or a pipe extension for increased leverage. A sharp, controlled application of force is generally more effective than gradual pressure.
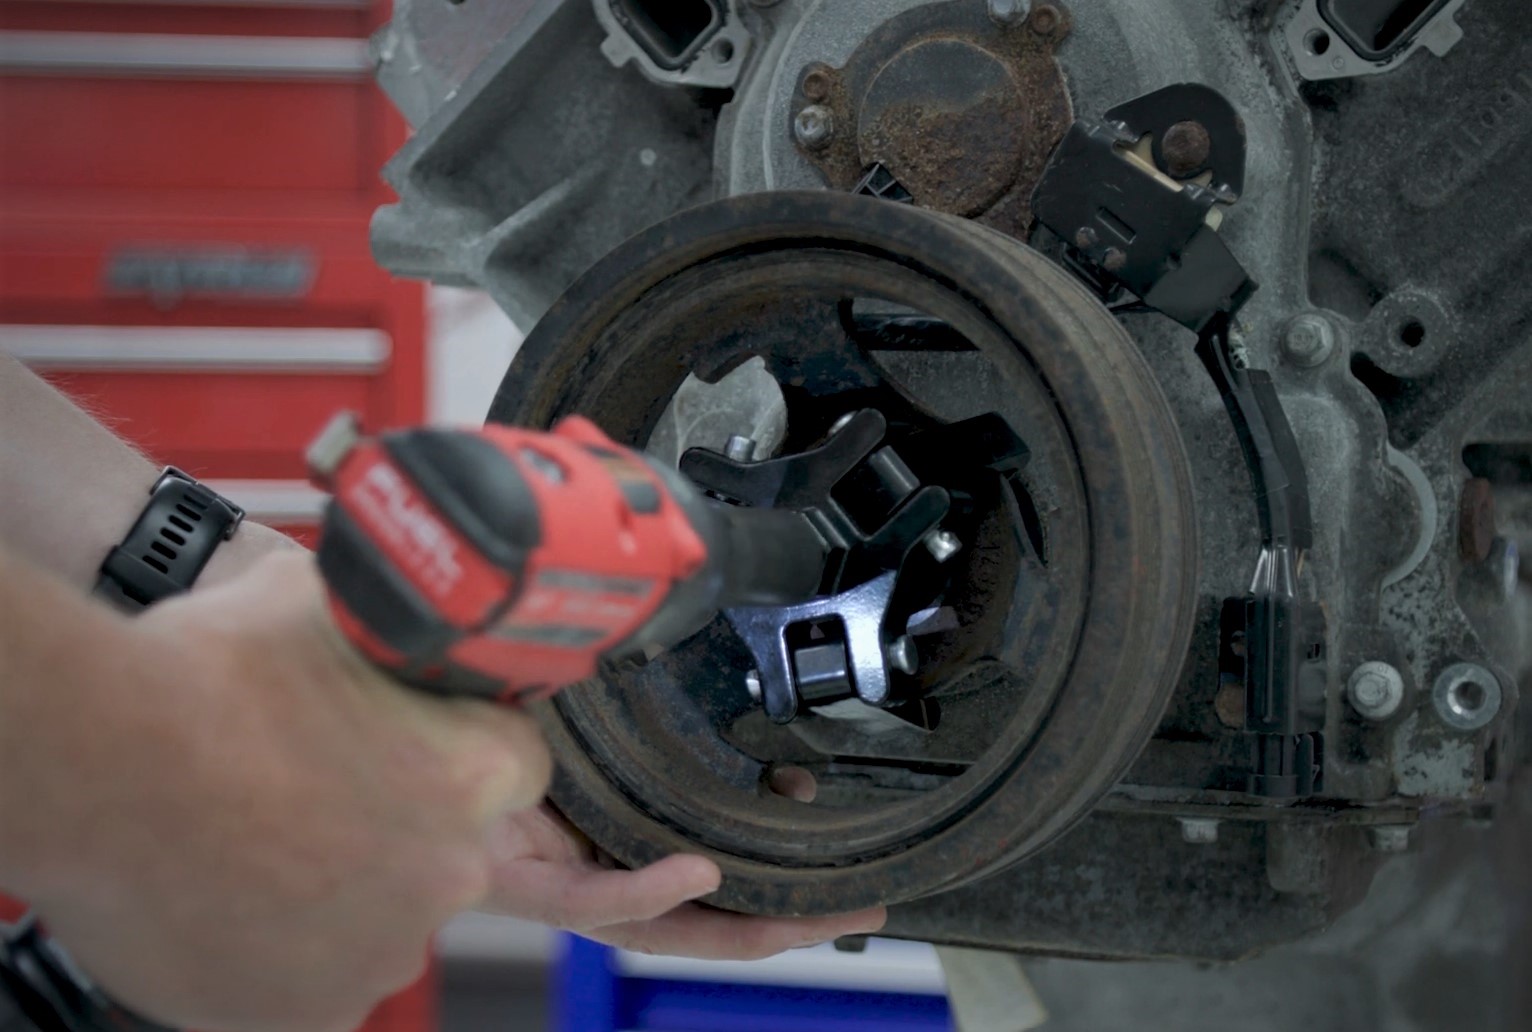
3. Using the Harmonic Balancer Puller
With the crankshaft bolt removed, it's time to use the harmonic balancer puller. Select the appropriate adapter for your harmonic balancer. Many kits come with different sized adapters and bolts.
Thread the center bolt of the puller into the crankshaft, ensuring it is properly aligned. Attach the puller arms or jaws to the harmonic balancer. Many balancers have pre-drilled holes specifically for this purpose.
Gradually tighten the center bolt of the puller. As you tighten, the puller will exert force on the harmonic balancer, pulling it off the crankshaft. Ensure the puller arms remain securely attached to the balancer and that the puller is aligned correctly. If the balancer is particularly stubborn, apply more penetrating oil and allow it to soak for a few more minutes. A light tap with a rubber mallet on the balancer face, while applying pressure with the puller, can also help break it free.
Continue tightening the puller until the harmonic balancer is completely removed from the crankshaft. Do not force the puller if it meets excessive resistance. Re-check alignment and ensure the correct puller adapter is being used. Inspect the puller threads and ensure they aren't damaged.
4. Inspection and Cleaning
Once the harmonic balancer is removed, carefully inspect the crankshaft snout for any signs of damage, such as scoring, corrosion, or burrs. Clean the crankshaft snout thoroughly with a wire brush and solvent. It's also good practice to inspect the front crankshaft seal for leaks and replace it if necessary. This is much easier to do with the harmonic balancer removed.
Inspect the removed harmonic balancer itself. Check for cracks, rubber deterioration, or separation of the outer ring from the inner hub. If any of these issues are present, the balancer should be replaced. Even if no obvious damage is visible, it's often recommended to replace the harmonic balancer as a preventative measure, especially on older vehicles.
Potential Challenges and Solutions
- Seized Crankshaft Bolt: Apply penetrating oil repeatedly and allow it to soak. Use heat (carefully!) from a propane torch to expand the bolt, or try an impact wrench with a high torque rating.
- Damaged Harmonic Balancer Puller Threads: Replace the puller or use a thread repair kit to restore the threads.
- Damaged Crankshaft Snout: Minor damage can be cleaned up with emery cloth. More severe damage may require professional machining or crankshaft replacement.
- Balancer Stuck on Crankshaft: Apply penetrating oil, use a rubber mallet to tap the balancer, and ensure the puller is properly aligned.
Reinstallation
Reinstallation is essentially the reverse of removal. Before installing the new harmonic balancer, lightly lubricate the crankshaft snout and the inside of the balancer with anti-seize compound. This will make future removal easier.
Carefully align the harmonic balancer with the crankshaft and gently push it onto the snout. You may need to use a special installer tool to press the balancer fully onto the crankshaft. *Never hammer the balancer onto the crankshaft, as this can damage the balancer and the crankshaft.*
Install the crankshaft bolt and tighten it to the torque specification listed in your vehicle's service manual. Use a torque wrench to ensure accurate tightening. It is crucial to properly torque this bolt to prevent the balancer from coming loose and causing engine damage. Some manufacturers specify a torque-to-yield (TTY) bolt, which must be replaced with a new bolt each time it's removed.
Reinstall all components that were removed during the access phase, such as the drive belts, cooling fan shroud, and any other necessary items. Double-check all connections and ensure everything is properly secured.
Final Checks and Startup
After reinstallation, double-check all connections and ensure all tools and materials have been removed from the engine bay. Reconnect the negative battery cable.
Start the engine and listen for any unusual noises. Inspect the harmonic balancer for wobble or vibration. If any issues are detected, shut off the engine immediately and investigate the cause. A properly installed harmonic balancer should run smoothly and quietly.
By following these steps and taking appropriate precautions, you can successfully remove and reinstall a harmonic balancer, ensuring the longevity and performance of your engine. Remember to always consult your vehicle's service manual for specific instructions and torque specifications.