How To Repair Scratches On Plastic Bumper
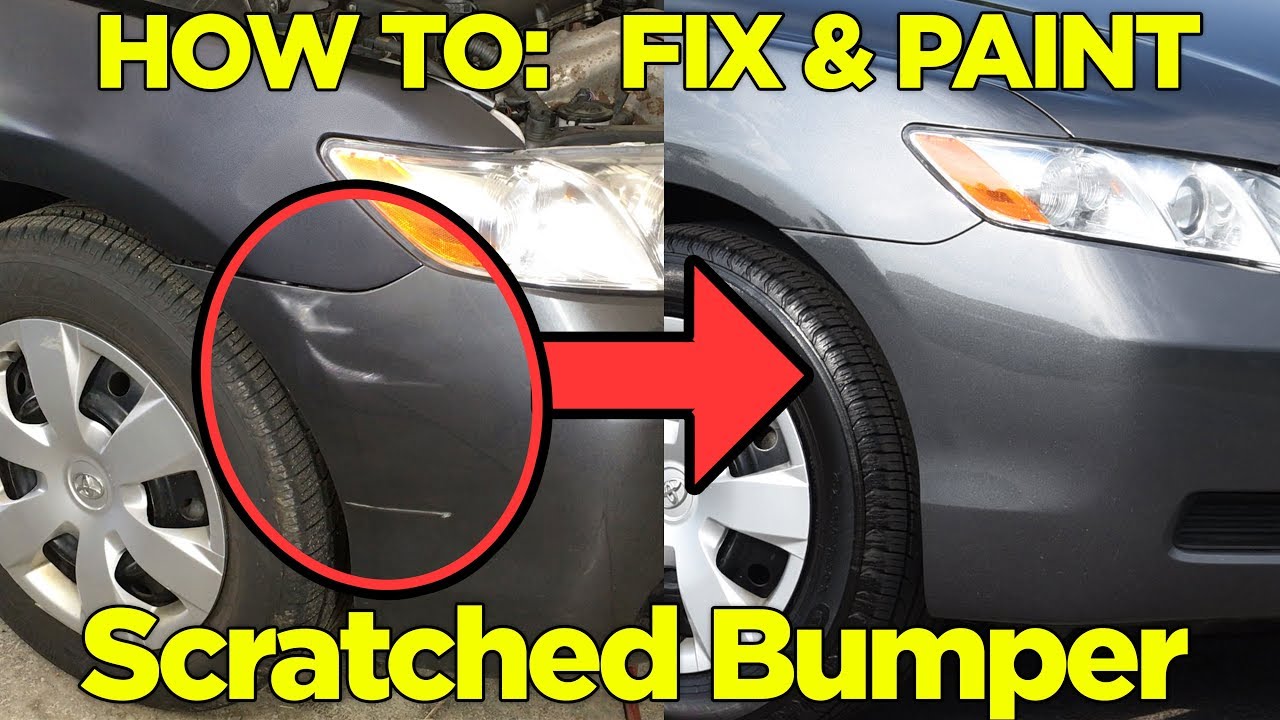
So, you’ve got a scratch on your plastic bumper. It happens. Whether it's a rogue shopping cart, an overly enthusiastic parallel parker, or just plain bad luck, that pristine plastic sheen is now marred. But don't despair! Before you shell out for a professional repair or even a whole new bumper, let's explore the DIY route. We’re diving deep into the world of plastic bumper scratch repair, covering everything from minor scuffs to more significant gouges.
Assessing the Damage: Knowing Your Enemy
First, we need to accurately diagnose the severity of the scratch. This dictates the tools and techniques you'll need. There are generally three levels:
- Surface Scratches: These are light blemishes that only affect the clear coat or the very top layer of the plastic. They often appear as hazy swirls and can sometimes be buffed out easily.
- Mid-Depth Scratches: These penetrate a bit deeper, going through the clear coat and into the colored plastic underneath. You can usually feel these with your fingernail, but they aren't deep enough to expose bare plastic.
- Deep Scratches and Gouges: These are the big boys. They cut through the clear coat, colored plastic, and sometimes even leave visible scoring on the underlying plastic structure. You'll definitely feel these, and they might even have raised edges.
The type of car you drive can also subtly influence the repair process. For example:
Bumper Material & Texture: Implications for Repair
Modern cars often use different types of plastic for their bumpers. Some are more flexible and forgiving, while others are more rigid and prone to cracking. The texture also matters. Smooth, glossy bumpers are easier to buff, while textured bumpers require more finesse to avoid creating shiny spots.
| Bumper Type | Typical Car Examples | Repair Considerations |
|---|---|---|
| Polypropylene (PP) | Most economy cars, SUVs | Flexible, resists cracking. Easier to sand and manipulate. |
| Thermoplastic Olefin (TPO) | Many modern sedans and coupes | Good impact resistance, can be textured. Requires careful heat application for repairs. |
| Fiberglass Reinforced Plastic (FRP) | Performance cars, some older models | Strong but brittle. More prone to cracking and shattering. Requires specialized repair techniques. |
The Arsenal: Gathering Your Supplies
No matter the scratch severity, you'll need some basic supplies. Think of this as your detailing surgical kit:
- Cleaning Supplies: Soap and water, degreaser, microfiber cloths. Cleanliness is paramount!
- Sandpaper: A range of grits, from 400 (for aggressive leveling) to 3000 (for fine polishing). Wet/dry sandpaper is preferred.
- Rubbing Compound: For removing sanding marks and smoothing the surface.
- Polishing Compound: For refining the finish and restoring shine.
- Plastic Filler (if needed): For deep scratches and gouges. Two-part epoxy fillers are generally recommended.
- Primer (if needed): To provide a smooth base for paint.
- Touch-Up Paint (if needed): Matching your car's color code is crucial.
- Clear Coat (if needed): To protect the paint and provide a glossy finish.
- Applicators: Foam pads, microfiber cloths, small brushes.
- Safety Gear: Gloves, mask, eye protection.
The Procedure: Step-by-Step Scratch Repair
Here's a general outline of the repair process, adapted to different levels of damage:
Minor Scratches (Surface Scratches)
- Clean the area: Thoroughly wash and degrease the bumper.
- Apply rubbing compound: Use a foam pad or microfiber cloth to work the compound into the scratch using circular motions.
- Apply polishing compound: Follow up with polishing compound to refine the finish.
- Wax or sealant: Protect the repaired area with a coat of wax or sealant.
Mid-Depth Scratches
- Clean the area: As above.
- Sand the scratch: Start with a higher grit sandpaper (around 1000) and gently sand the scratch, feathering the edges.
- Apply rubbing compound: As above.
- Apply polishing compound: As above.
- Wax or sealant: As above.
Deep Scratches and Gouges
- Clean the area: As above.
- Sand the area: Use a coarser grit sandpaper (400-600) to remove any raised edges and create a smooth surface.
- Apply plastic filler: Mix the two-part epoxy filler according to the manufacturer's instructions and apply it to the scratch, slightly overfilling it.
- Sand the filler: Once the filler has cured, sand it down to be level with the surrounding surface. Start with a coarser grit (400) and gradually work your way up to finer grits (800, 1000, 2000).
- Apply primer: Apply a thin, even coat of primer to the filled area.
- Sand the primer: Once the primer is dry, lightly sand it with fine grit sandpaper (2000-3000).
- Apply touch-up paint: Apply several thin coats of touch-up paint, allowing each coat to dry completely before applying the next.
- Apply clear coat: Apply a thin, even coat of clear coat to protect the paint and provide a glossy finish.
- Sand and polish: Once the clear coat is dry, wet sand with 3000 grit sandpaper to remove any imperfections, then polish to a high shine.
- Wax or sealant: As above.
Real-World Driving Impressions (of the Repair, not the Car!)
Okay, so you're not exactly *driving* the scratch repair, but the results certainly impact your driving experience. A successful DIY repair can be incredibly satisfying, restoring your car's aesthetics and preventing further damage. A botched job, however, can be a constant source of irritation. The key is patience, attention to detail, and a willingness to learn from your mistakes.
Here's a quick breakdown of the pros and cons of DIY bumper scratch repair:
- Pros:
- Significant cost savings compared to professional repair.
- Sense of accomplishment.
- Convenience of doing it yourself.
- Cons:
- Time-consuming.
- Requires some skill and patience.
- Potential for mistakes.
- Color matching can be tricky.
Ultimately, the decision to DIY or seek professional help depends on your comfort level, the severity of the damage, and the value of your time. If you're unsure, it's always best to consult with a professional. But for minor scratches and scuffs, a DIY repair can be a rewarding and cost-effective solution.
Remember, practice makes perfect. Consider practicing on an inconspicuous area or a scrap piece of plastic before tackling the main event. A little preparation can go a long way in achieving a flawless finish.
The Tech Angle: Heat Guns and Plastic Welding
For more advanced repairs, especially those involving warped or misshapen plastic, a heat gun can be your friend. Applying heat can help reshape the plastic and allow it to return to its original form. However, exercise extreme caution! Overheating can cause the plastic to melt or distort further. Always start with a low setting and gradually increase the heat as needed.
Plastic welding is another technique used for repairing cracks and breaks in plastic bumpers. This involves using a specialized tool to melt the plastic and fuse it back together. It's a more involved process that requires specialized equipment and training, but it can provide a very strong and durable repair.
The Grand Finale: A Spark for Debate
So, you’ve tackled your scratched bumper! Now comes the fun part: the debate. We've seen heated arguments erupt over this: Should you ALWAYS try to match the factory paint *exactly*, even if it means shelling out for expensive paint supplies? Or is "close enough" good enough, especially on a daily driver? Weigh in on our social media: What's *your* threshold for paint imperfection on a repaired bumper? And what's the most unconventional tool or technique you've ever used for a bumper repair (and did it work?!)