How To Replace Accelerator Pedal Sensor
Experiencing a sudden loss of power, jerky acceleration, or a check engine light related to your accelerator pedal? It might be time to consider replacing your accelerator pedal sensor, also known as the accelerator pedal position sensor (APPS). This component is crucial for relaying your foot's position on the pedal to the engine control unit (ECU), which then regulates fuel delivery and engine performance. A faulty APPS can severely impact your vehicle's drivability and even create safety concerns. While it's always best to consult with a qualified mechanic, understanding the process and potential solutions can empower you to make informed decisions about your vehicle's repair.
Understanding the Problem: Symptoms of a Failing Accelerator Pedal Sensor
Before diving into the replacement process, let's confirm that a faulty APPS is indeed the culprit. Here are some common symptoms:
- Lack of Acceleration: This is perhaps the most telling sign. You press the accelerator, but the engine doesn't respond or responds sluggishly.
- Jerky Acceleration: Instead of smooth acceleration, the car surges and hesitates unpredictably.
- Check Engine Light: The check engine light illuminates, and a diagnostic scan may reveal codes related to the APPS, such as P0120, P0121, P0122, or P0123.
- Idle Issues: The engine may idle erratically, too high, or even stall.
- Limp Mode: In severe cases, the ECU might activate "limp mode," restricting engine power to prevent further damage. This is usually accompanied by a check engine light.
- Cruise Control Problems: Issues engaging or maintaining cruise control can also point towards a faulty APPS.
It's crucial to note that these symptoms can also be caused by other issues, such as a faulty throttle body, wiring problems, or even a malfunctioning ECU. Therefore, a proper diagnostic scan is essential before proceeding with a replacement.
Gathering Your Tools and Supplies
If you've confirmed that the APPS is the likely problem and you're comfortable tackling the repair yourself, you'll need the following tools and supplies:
- New Accelerator Pedal Sensor: Ensure you purchase the correct sensor for your vehicle's make, model, and year. Cross-reference the part number on your old sensor or consult with an auto parts store.
- Socket Set: Metric sockets are typically required to remove the APPS mounting bolts.
- Wrench Set: You might need wrenches for accessing certain bolts or connectors.
- Screwdrivers: Both Phillips head and flathead screwdrivers can be helpful.
- Multimeter: For testing the new and old sensors (optional, but recommended).
- Diagnostic Scan Tool (OBD2 Scanner): To clear the check engine light after the repair.
- Penetrating Oil: For loosening any stubborn bolts.
- Shop Rags: For cleaning up any spills.
- Work Gloves: To protect your hands.
- Safety Glasses: To protect your eyes.
- Wheel Chocks: Always use wheel chocks to prevent the vehicle from rolling.
Estimated Repair Cost: The cost of a new accelerator pedal sensor typically ranges from $50 to $200, depending on the make and model of your vehicle and the brand of the sensor. Labor costs at a repair shop can add another $100 to $300, bringing the total cost to $150 to $500. Doing it yourself can save you a significant amount of money.
Step-by-Step Replacement Guide
Disclaimer: This guide provides general instructions. Specific steps may vary depending on your vehicle's make and model. Always consult your vehicle's repair manual for detailed instructions and safety precautions.
Step 1: Disconnect the Negative Battery Cable
Before working on any electrical components, disconnect the negative battery cable to prevent electrical shocks or damage to the vehicle's electrical system. Use a wrench to loosen the nut on the negative terminal and carefully remove the cable. Secure the cable away from the terminal to prevent accidental contact.
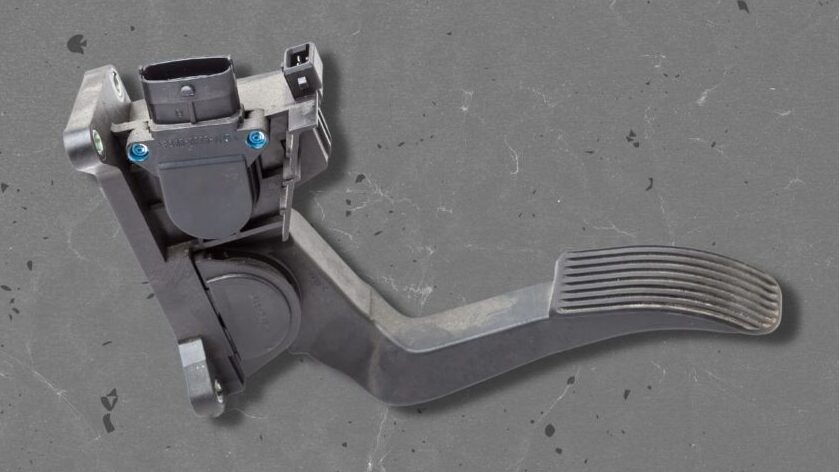
Step 2: Locate the Accelerator Pedal Sensor
The APPS is usually located near the accelerator pedal, either directly on the pedal assembly or mounted to the firewall. Refer to your vehicle's repair manual for the exact location. You might need to remove some trim panels to access the sensor.
Step 3: Disconnect the Electrical Connector
Carefully disconnect the electrical connector from the APPS. There's usually a locking clip or tab that needs to be depressed before you can pull the connector off. Avoid pulling on the wires themselves, as this can damage the connector.
Step 4: Remove the Old Sensor
Using the appropriate socket or wrench, remove the bolts or screws that secure the APPS to the pedal assembly or firewall. You might need to use penetrating oil if the bolts are rusted or corroded. Carefully remove the old sensor.
Step 5: Install the New Sensor
Install the new APPS in the reverse order of removal. Make sure the sensor is properly aligned and that the mounting bolts are tightened to the manufacturer's specified torque (refer to your repair manual). Over-tightening can damage the sensor.
Step 6: Reconnect the Electrical Connector
Reconnect the electrical connector to the new APPS. Make sure the connector clicks into place and that the locking clip (if applicable) is properly engaged.
Step 7: Reconnect the Negative Battery Cable
Reconnect the negative battery cable to the battery terminal. Tighten the nut securely.
Step 8: Clear the Diagnostic Codes
Use your OBD2 scanner to clear any diagnostic codes related to the APPS. This will turn off the check engine light.
Step 9: Test Drive the Vehicle
Take the vehicle for a test drive to ensure that the new APPS is working correctly. Pay attention to acceleration, idle, and overall engine performance. If you still experience any problems, double-check your connections and consider having the vehicle diagnosed by a professional mechanic.
Testing the Sensor (Optional but Recommended)
Before and after installation, you can use a multimeter to test the APPS. Here's a basic procedure:
- Identify the Signal, Ground, and Power Wires: Refer to your vehicle's wiring diagram to identify the correct wires on the APPS connector.
- Set the Multimeter: Set your multimeter to measure DC voltage.
- Test the Power Wire: With the ignition key in the "on" position (but engine not running), connect the multimeter's positive lead to the power wire and the negative lead to a good ground. You should see a voltage reading close to your vehicle's battery voltage (typically around 12 volts).
- Test the Ground Wire: Set your multimeter to measure resistance (Ohms). Connect one lead to the ground wire and the other lead to a good ground on the vehicle's chassis. You should see a very low resistance reading (close to zero Ohms).
- Test the Signal Wire: With the ignition key in the "on" position, connect the multimeter's positive lead to the signal wire and the negative lead to a good ground. Slowly depress the accelerator pedal. The voltage reading should increase smoothly as you press the pedal. A jumpy or inconsistent voltage reading indicates a faulty sensor.
Important Considerations and Troubleshooting Tips
- Proper Diagnosis is Key: Don't assume the APPS is the problem without proper diagnosis. A diagnostic scan is crucial.
- Buy Quality Parts: Invest in a reputable brand of APPS to ensure reliability and longevity.
- Check for Wiring Problems: Inspect the wiring and connectors leading to the APPS for any signs of damage, corrosion, or loose connections. Repair or replace any damaged wiring.
- Throttle Body Cleaning: Sometimes, a dirty throttle body can mimic the symptoms of a faulty APPS. Consider cleaning the throttle body before replacing the sensor.
- ECU Issues: In rare cases, a faulty ECU can cause APPS-related problems. If you've replaced the sensor and checked the wiring but are still experiencing issues, the ECU might be the culprit.
Replacing your accelerator pedal sensor can be a manageable DIY project if you have the right tools and knowledge. However, if you're unsure about any part of the process, it's always best to consult with a qualified mechanic. Addressing these symptoms promptly will help maintain your vehicle's performance and ensure your safety on the road.