How To Replace Shocks On Car
Replacing worn shocks is a crucial maintenance task that significantly impacts a vehicle's handling, stability, and ride comfort. While seemingly daunting, with the right tools, a systematic approach, and a dash of patience, it's a job many enthusiasts and skilled DIYers can tackle. This guide provides a comprehensive walkthrough, catering to a range of experience levels.
Preparation: Gathering Tools and Parts
Before diving in, ensure you have everything needed. This proactive step saves time and frustration later. Here's a checklist:
- New Shocks: Purchase shocks specifically designed for your vehicle's make, model, and year. Consider your driving style and load requirements when choosing between different types (e.g., gas-charged, heavy-duty).
- Jack and Jack Stands: Essential for safely lifting and supporting the vehicle. Use quality jack stands rated for the vehicle's weight.
- Wheel Chocks: Place these behind the wheels that remain on the ground to prevent rolling.
- Socket Set and Wrenches: A comprehensive set, including metric sizes, is crucial. Look for both standard and deep sockets.
- Torque Wrench: Absolutely necessary for tightening fasteners to the manufacturer's specified torque values. Over-tightening or under-tightening can lead to component failure.
- Penetrating Oil: Apply liberally to corroded bolts and nuts well in advance to aid removal. PB Blaster or similar products work well.
- Hammer: Useful for gently persuading stubborn components.
- Punch or Drift Pin: For aligning bolt holes.
- Spring Compressor (if applicable): Required for vehicles with coil-over shocks or separate coil springs. This is a potentially dangerous tool; use extreme caution and follow the manufacturer's instructions precisely.
- Eye Protection: Safety glasses are a must.
- Gloves: Protect your hands.
- Work Light: Good lighting is essential.
- Service Manual: Consult the vehicle's service manual for specific instructions and torque specifications.
Step-by-Step Shock Replacement Procedure
1. Safety First: Secure the Vehicle
Park the vehicle on a level surface. Engage the parking brake. Place wheel chocks behind the rear wheels (if working on the front shocks) or in front of the front wheels (if working on the rear shocks). Loosen the lug nuts on the wheel(s) of the shock(s) you're replacing. Don't remove them completely; just break them loose.
2. Lifting the Vehicle
Consult your vehicle's service manual to identify the correct jacking points. Place the jack under the designated jacking point. Raise the vehicle high enough to provide ample working space. Carefully position jack stands under the vehicle's frame rails or other designated support points. Lower the vehicle onto the jack stands, ensuring they are securely supporting the weight. Remove the jack.
3. Removing the Wheel
Now that the vehicle is safely supported, completely remove the lug nuts and carefully remove the wheel. Set it aside.
4. Accessing the Shock
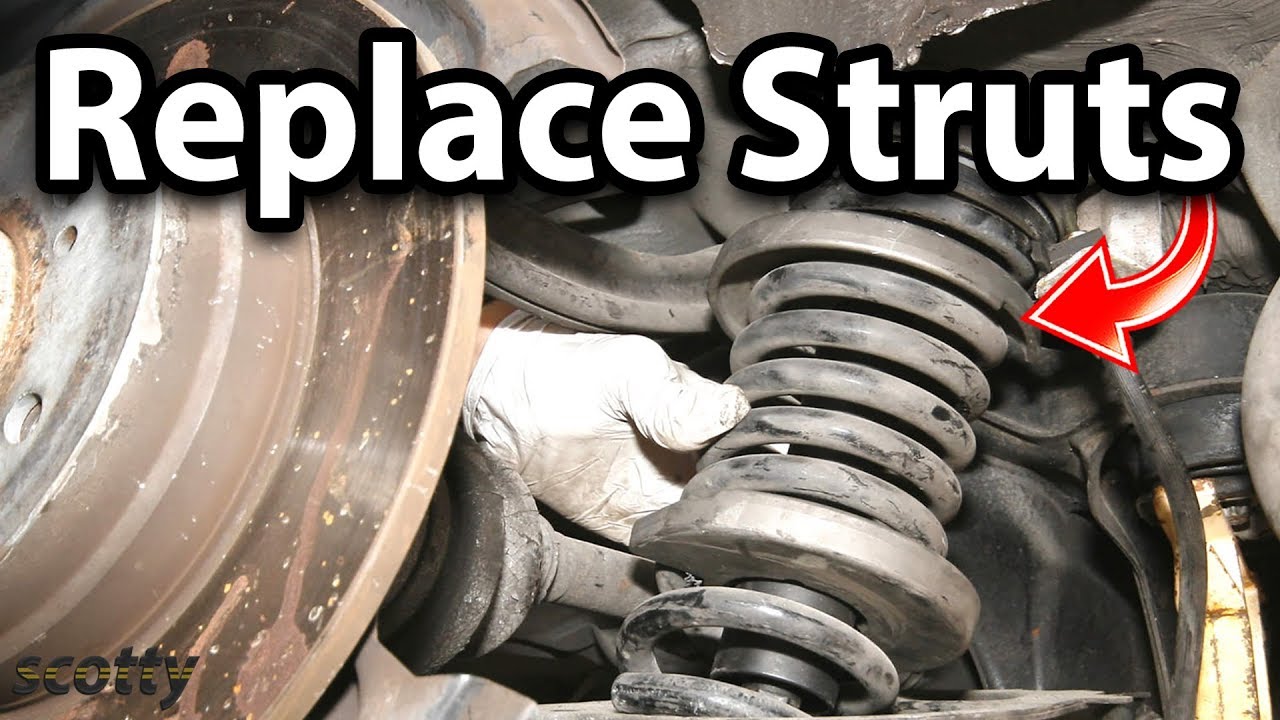
Locate the shock absorber. Depending on the vehicle's design, it might be easily accessible or partially hidden behind other components. Take note of how the shock is mounted: typically, it's secured by bolts at the top and bottom.
5. Disconnecting the Old Shock
Apply penetrating oil to the shock mounting bolts and nuts. Let it soak for a few minutes. Using the appropriate socket or wrench, loosen and remove the lower mounting bolt(s) first. Be prepared for the shock to potentially extend as you loosen the bolt. Support the shock with one hand to prevent it from dropping unexpectedly. Next, remove the upper mounting bolt(s). If the shock has a dust cover or other attachments, remove them as well.
Note: On some vehicles, the upper shock mount might be accessed from inside the trunk or under the rear seat.
6. Preparing Coil-Over Shocks or Separate Coil Springs (if applicable)
If your vehicle has coil-over shocks (where the spring is mounted around the shock) or separate coil springs, you must use a spring compressor to safely remove the spring. Follow the spring compressor manufacturer's instructions precisely. Improper use of a spring compressor can be extremely dangerous, leading to serious injury or even death. Once the spring is compressed, you can safely disassemble the shock assembly. Carefully transfer the spring and any related components (bump stops, dust boots, etc.) to the new shock.
7. Installing the New Shock
Position the new shock in place, aligning the mounting holes. Install the upper mounting bolt(s) first, but don't tighten them completely yet. Install the lower mounting bolt(s). Again, leave them slightly loose for now. If you disassembled a coil-over shock, carefully release the spring compressor once the new shock is properly mounted.
8. Torqueing the Fasteners
Consult your vehicle's service manual for the correct torque specifications for the shock mounting bolts. Using a torque wrench, tighten the bolts to the specified torque values. Tighten the upper bolts first, then the lower bolts. This is a critical step; proper torque ensures the components are securely fastened without being over-stressed.
9. Reinstalling the Wheel
Carefully reinstall the wheel, aligning the lug holes with the studs. Hand-tighten the lug nuts in a star pattern. Lower the vehicle until the wheel just touches the ground. Using a torque wrench, tighten the lug nuts to the manufacturer's specified torque in the same star pattern. Finally, fully lower the vehicle and remove the jack stands.
10. Final Check and Road Test
Double-check that all bolts are properly tightened. Perform a visual inspection to ensure that all components are correctly installed. Take the vehicle for a short test drive on a quiet road. Listen for any unusual noises and feel for any changes in handling. If everything feels normal, you've successfully replaced your shocks.
Troubleshooting Common Issues
- Stuck Bolts: If bolts are heavily corroded, try applying more penetrating oil and using a breaker bar for increased leverage. If necessary, carefully apply heat with a propane torch (exercise extreme caution around fuel lines and other flammable materials). As a last resort, you might need to cut the bolt and replace it.
- Misaligned Mounting Holes: Use a punch or drift pin to align the mounting holes.
- Difficulty Compressing Springs: Ensure the spring compressor is properly installed and adjusted. If you're uncomfortable with this step, it's best to take the shocks to a professional mechanic.
- Noises After Installation: Check that all bolts are properly tightened and that the shocks are not rubbing against any other components.
Advanced Considerations
For performance enthusiasts, upgrading to aftermarket shocks can significantly improve handling. Options include adjustable shocks, which allow you to fine-tune the damping characteristics, and monotube shocks, which offer superior heat dissipation and performance. Consider the trade-offs between comfort and performance when choosing aftermarket shocks. When selecting components for different vehicle uses, consider researching specific parts for rally, drift or track racing applications. Bilstein and Koni are some popular brands in this segment. Always consult with a qualified suspension specialist for advice on choosing the right shocks for your needs. Also, when upgrading your suspension, replacing other components such as springs, control arms, and bushings alongside your shocks will lead to better ride quality and performance. Additionally, get your vehicle's alignment checked after replacing the shocks to ensure proper handling and tire wear.