How To Stop Leather Seats From Cracking
Leather seats, a hallmark of luxury and comfort in vehicles, are unfortunately susceptible to cracking over time. This isn't just an aesthetic issue; cracks degrade the leather, reducing its lifespan and potentially affecting the car's resale value. Understanding the causes of cracking and implementing preventative measures is crucial for maintaining your leather's pristine condition. This guide provides a detailed, technically-informed approach to preventing leather seat cracking, aimed at experienced DIYers.
Understanding the Enemy: Causes of Leather Cracking
Before diving into preventative measures, it's vital to understand what causes leather to crack in the first place. Cracking isn't a spontaneous event; it's a result of several interacting factors that degrade the leather's inherent properties.
1. Dehydration and Loss of Natural Oils
Leather is, essentially, skin. Like human skin, it contains natural oils that keep it supple and flexible. Over time, these oils are depleted due to several factors:
- Sun Exposure (UV Damage): Ultraviolet (UV) radiation from sunlight is a major culprit. UV rays break down the chemical bonds in the leather's collagen fibers, causing them to weaken and dry out. Think of it like prolonged sunburn – it leaves the leather brittle and prone to cracking.
- Heat: High temperatures, especially inside a closed car during summer, accelerate the evaporation of natural oils. This leads to a loss of moisture and a hardening of the leather.
- Harsh Cleaning Products: Many commercially available cleaning products contain harsh chemicals, such as alcohol or strong detergents, that strip away the leather's natural oils. Avoid using products not specifically designed for automotive leather.
- Age: Simply put, time takes its toll. Over the years, the leather's natural oils gradually deplete, regardless of other factors.
2. Lack of Proper Maintenance
Neglecting regular cleaning and conditioning is a guaranteed recipe for cracking. Here’s why:
- Dirt and Grime Accumulation: Dirt, dust, and body oils accumulate on the leather surface, acting as an abrasive agent. These particles grind against the leather fibers during use, causing microscopic scratches that eventually develop into visible cracks.
- Failure to Replenish Oils: As mentioned earlier, leather loses its natural oils over time. Failure to regularly replenish these oils with a leather conditioner allows the leather to dry out and become brittle.
3. Physical Stress and Abrasion
Everyday use contributes to the physical stress on your leather seats:
- Entry and Exit: Repeatedly sliding in and out of the car puts significant stress on the seat bolsters (the raised side supports). This constant friction wears away the leather's surface, leading to cracking.
- Weight and Pressure: Concentrated weight and pressure on certain areas of the seat can cause the leather fibers to stretch and weaken over time.
- Sharp Objects: Even minor scratches from keys, belt buckles, or other sharp objects can damage the leather's surface and create weak points where cracks can initiate.
The Arsenal: Preventing Leather Cracking - A Step-by-Step Guide
Preventing leather cracking is a multi-faceted approach involving regular cleaning, conditioning, protection from the elements, and mindful usage.
Step 1: Regular Cleaning – Removing the Grime
Cleaning is the foundation of leather care. It removes dirt, grime, and body oils that can damage the leather's surface. Here's how to do it properly:
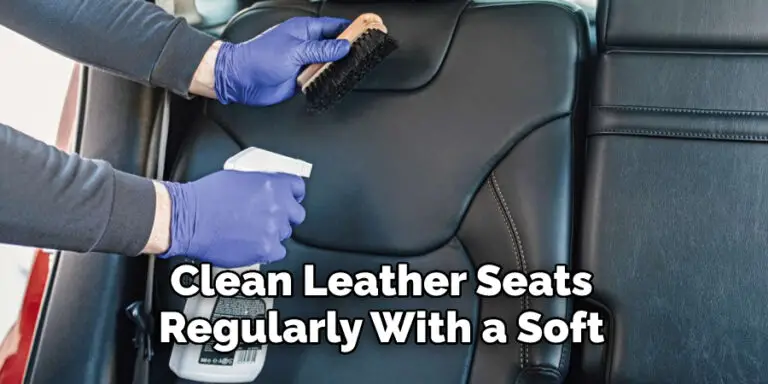
- Vacuuming: Begin by vacuuming the seats thoroughly, using a soft brush attachment to remove loose dirt and debris from the crevices and seams.
- Gentle Cleaning Solution: Use a pH-balanced leather cleaner specifically designed for automotive use. Never use household cleaners, as they can contain harsh chemicals that will damage the leather. Test the cleaner on an inconspicuous area first to ensure it doesn't cause discoloration or damage.
- Application: Apply the cleaner to a clean, soft microfiber cloth. Never apply the cleaner directly to the leather surface. Gently wipe the leather in circular motions, paying attention to areas with heavy soiling.
- Wipe Away Residue: Use a separate clean, damp microfiber cloth to wipe away any remaining cleaner residue.
- Drying: Allow the leather to air dry completely before proceeding to the next step. Avoid using heat to speed up the drying process, as this can dehydrate the leather.
Step 2: Conditioning – Replenishing Natural Oils
Conditioning is essential for keeping the leather supple and preventing it from drying out and cracking. A good leather conditioner will penetrate the leather's surface and replenish the natural oils that have been lost due to exposure to the elements and daily use.
- Choosing the Right Conditioner: Select a high-quality leather conditioner specifically formulated for automotive leather. Look for conditioners that contain natural oils, such as neatsfoot oil, lanolin, or mink oil. Avoid conditioners that contain silicone or petroleum-based ingredients, as these can clog the leather's pores and prevent it from breathing.
- Application: Apply a small amount of conditioner to a clean, soft applicator pad or microfiber cloth. Gently massage the conditioner into the leather in circular motions. Ensure that the conditioner is evenly distributed across the entire surface of the seat.
- Absorption: Allow the conditioner to absorb into the leather for at least 15-20 minutes. The leather should feel soft and supple to the touch.
- Buffing: Use a clean, dry microfiber cloth to buff away any excess conditioner. This will help to prevent the leather from feeling greasy or sticky.
Frequency: The frequency of conditioning depends on several factors, including the climate, the age of the leather, and how often the car is used. In general, it's recommended to condition your leather seats every 3-6 months. In hot, dry climates, you may need to condition them more frequently.
Step 3: Protection – Shielding from the Elements
Protecting your leather seats from the elements is crucial for preventing cracking. Here are some effective strategies:
- Parking in the Shade: Whenever possible, park your car in the shade to protect the leather seats from direct sunlight.
- Window Tinting: Installing window tinting can significantly reduce the amount of UV radiation that enters your car. Look for tinting films that block at least 99% of UV rays. Ceramic tints offer even greater heat rejection.
- Seat Covers: Using seat covers, especially during hot weather or when the car is parked for extended periods, can provide an extra layer of protection against UV rays and heat. Choose seat covers made from breathable materials to prevent moisture buildup.
- UV Protectant Sprays: Applying a UV protectant spray to the leather seats can help to shield them from the damaging effects of sunlight. Reapply the spray regularly, following the manufacturer's instructions.
Step 4: Mindful Usage – Minimizing Stress and Abrasion
Simple changes in your habits can significantly reduce the stress and abrasion on your leather seats:
- Entering and Exiting the Car: Avoid sliding in and out of the car, as this puts excessive stress on the seat bolsters. Lift yourself slightly as you enter and exit the vehicle.
- Protecting from Sharp Objects: Be mindful of sharp objects, such as keys, belt buckles, and tools, that can scratch or damage the leather. Avoid placing these items directly on the seats.
- Even Weight Distribution: Avoid placing heavy objects on the seats for extended periods, as this can cause localized stress and stretching.
Step 5: Addressing Existing Cracks – Early Intervention
If you notice small cracks starting to appear, address them immediately to prevent them from worsening. While you can't fully reverse existing damage without professional restoration, you can slow down the deterioration.
- Clean the Area: Thoroughly clean the affected area with a leather cleaner.
- Leather Filler (Optional): For deeper cracks, consider using a leather filler compound. This will fill in the crack and create a smooth surface. Follow the manufacturer's instructions carefully.
- Leather Dye or Color Restorer: Apply a leather dye or color restorer that matches the color of your seats. This will help to blend the repaired area with the surrounding leather.
- Conditioning: Apply a leather conditioner to the repaired area to keep it supple and prevent further cracking.
Professional Restoration: For significant cracking or damage, consider consulting a professional leather restoration specialist. They have the expertise and specialized tools to repair and restore leather seats to their original condition.
The Technical Considerations: Understanding Leather Types and Products
Understanding the type of leather used in your car seats is important for selecting the appropriate cleaning and conditioning products. There are several different types of leather used in automotive applications, each with its own unique characteristics.
- Full-Grain Leather: This is the highest quality leather, made from the entire hide. It's durable, breathable, and develops a rich patina over time. It requires specialized care with high-quality products.
- Top-Grain Leather: This leather has had the top layer of the hide sanded or buffed to remove imperfections. It's still a good quality leather but is less durable than full-grain.
- Split-Grain Leather: This is the lower layer of the hide that has been split off from the top layer. It's less durable and more prone to cracking than full-grain or top-grain leather. Often used in less visible areas.
- Bonded Leather: This is the lowest quality leather, made from scraps and fibers that have been bonded together. It's inexpensive but not very durable.
- Nappa Leather: A term often used to describe very soft and supple full-grain or top-grain leather, often dyed using water-soluble dyes. Requires gentle, specific care.
Product Selection: Choose cleaning and conditioning products that are specifically designed for the type of leather used in your car seats. Read the product labels carefully and follow the manufacturer's instructions.
Conclusion: Investing in Long-Term Leather Health
Preventing leather seat cracking is an ongoing process that requires regular maintenance, protection from the elements, and mindful usage. By following the steps outlined in this guide, you can significantly extend the lifespan of your leather seats and maintain their beauty and comfort for years to come. Remember, a proactive approach is far more effective and cost-effective than attempting to repair extensive damage. A little preventative maintenance goes a long way in preserving the value and enjoyment of your vehicle's interior. Don't neglect your leather!