How To Wire A 7 Blade Trailer Connector
Towing a trailer opens up a world of possibilities, from hauling equipment for work to embarking on exciting outdoor adventures. A crucial component of safe and reliable towing is a properly wired trailer connector. The 7-blade connector is the most common type, offering connections for essential functions like running lights, brake lights, turn signals, electric brakes, and auxiliary power. This comprehensive guide provides a step-by-step approach to wiring a 7-blade trailer connector, ensuring your trailer lights and brakes function correctly.
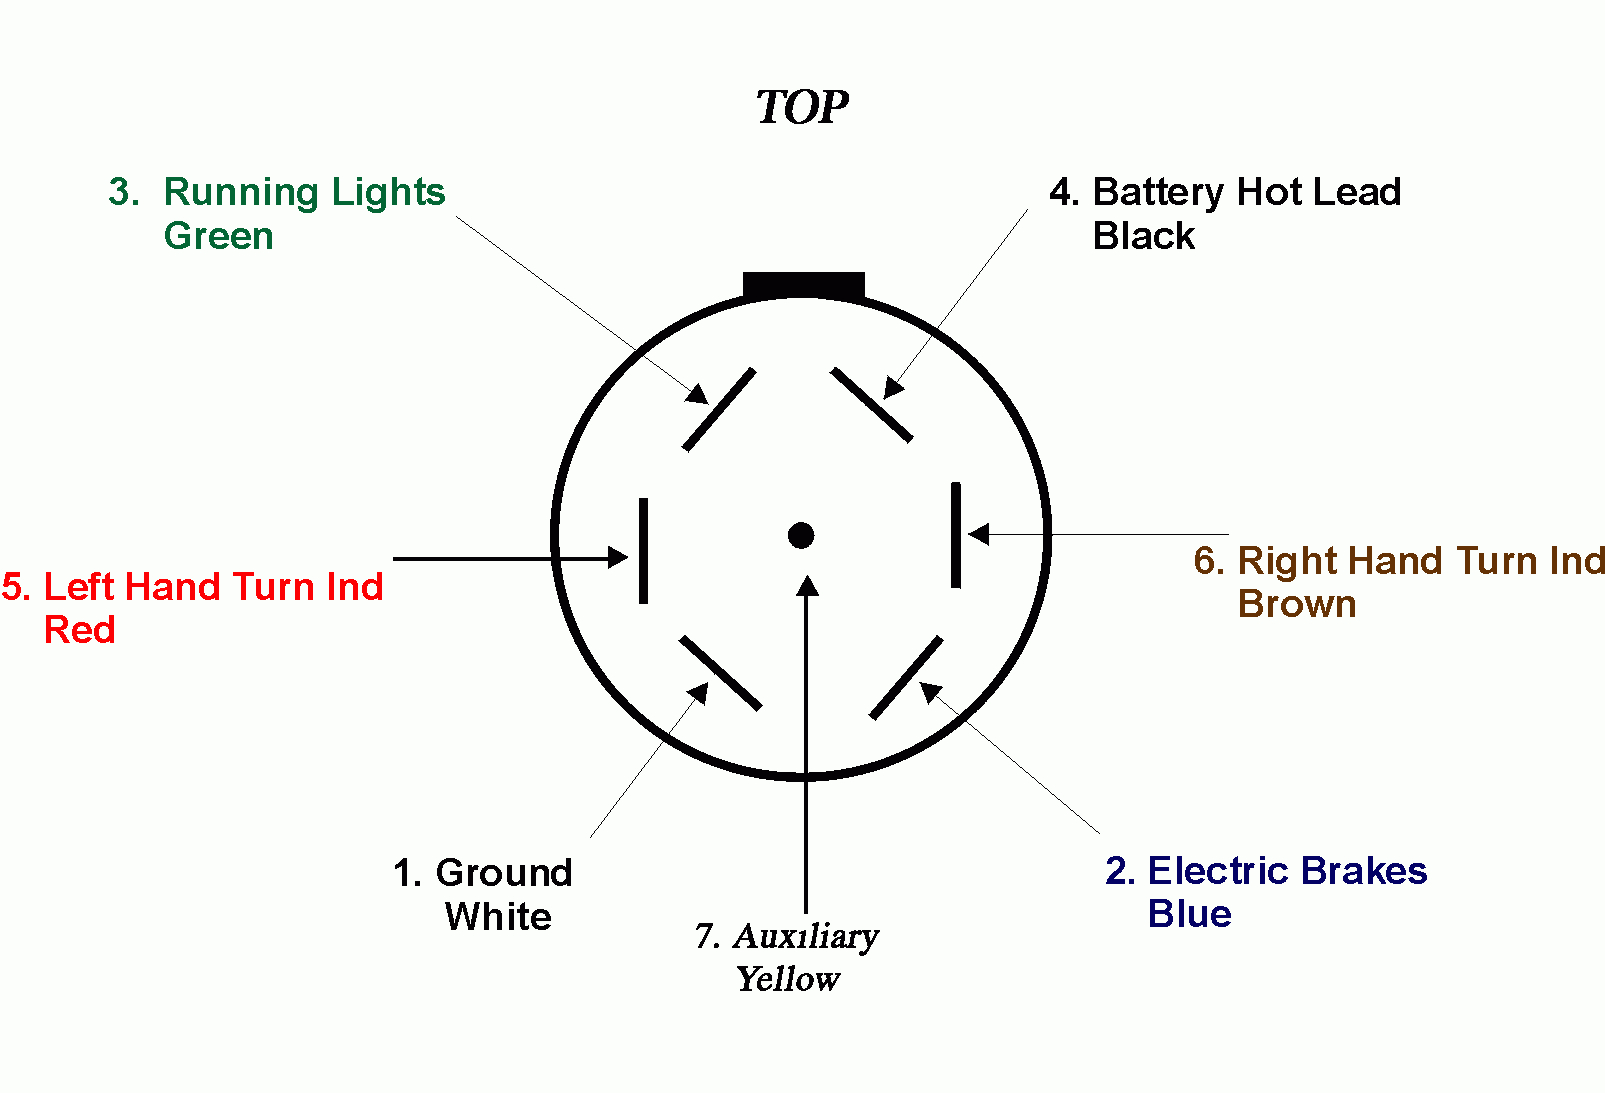
Understanding the 7-Blade Connector
Before diving into the wiring process, it's important to understand the purpose of each blade on the connector. While wiring standards are generally consistent, always double-check the specific configuration for your connector. A typical 7-blade connector will have the following connections:
- Ground (White): Provides a return path for the electrical current.
- Taillights (Brown): Powers the taillights of the trailer.
- Left Turn/Brake (Yellow): Activates the left turn signal and brake light on the trailer.
- Right Turn/Brake (Green): Activates the right turn signal and brake light on the trailer.
- Electric Brakes (Blue): Connects to the trailer's electric brake system.
- Auxiliary Power (Black): Provides a 12V power source for accessories like interior lights or a winch (ensure your vehicle's charging system can handle the load).
- Reverse Lights (Purple): Activates the reverse lights on the trailer (not always used, but highly recommended).
Tools and Materials Needed
Gather these tools and materials before you begin:
- 7-Blade Trailer Connector (Male and Female): Purchase high-quality connectors designed for outdoor use.
- Wire Strippers: Essential for safely removing insulation from wires.
- Crimping Tool: Used to securely attach terminals to the wires.
- Electrical Tape or Heat Shrink Tubing: For insulating and protecting connections.
- Wire Tester or Multimeter: To verify proper wiring and diagnose any issues.
- Wiring Diagram: A visual guide to the correct wiring configuration.
- Butt Connectors or Solder and Soldering Iron (Optional): For joining wires.
- Cable Ties or Electrical Tape: To organize and secure the wiring.
- Safety Glasses: Protect your eyes from debris.
- Work Gloves: Provide grip and protect your hands.
Step-by-Step Wiring Guide
Follow these steps carefully to ensure a safe and functional connection.
1. Disconnect the Vehicle's Battery
Safety first! Disconnect the negative terminal of your vehicle's battery to prevent electrical shocks or shorts during the wiring process. This is a crucial step that should never be skipped.
2. Identify the Vehicle's Wiring Harness
Locate the vehicle's trailer wiring harness. This is typically found near the trailer hitch. The wires will be color-coded, and you'll need to determine which wire corresponds to each function (taillights, turn signals, brakes, etc.). Consult your vehicle's owner's manual or a wiring diagram specific to your vehicle model for accurate information. A wire tester or multimeter can also be used to identify the function of each wire.
3. Prepare the Wires
Using wire strippers, carefully remove about ½ inch of insulation from the end of each wire on both the vehicle's wiring harness and the 7-blade connector. Avoid cutting or nicking the wire strands, as this can weaken the connection. Twist the exposed strands of each wire to ensure a solid connection.
4. Connect the Wires
This is the most important step. Connect the wires from the vehicle's wiring harness to the corresponding wires on the 7-blade connector, following the wiring diagram. Here's a general guide, but always verify with your specific diagram:
- White (Ground): Connect the white wire from the vehicle to the white wire on the connector. Ensure a solid ground connection to the vehicle's frame.
- Brown (Taillights): Connect the brown wire from the vehicle to the brown wire on the connector.
- Yellow (Left Turn/Brake): Connect the yellow wire from the vehicle to the yellow wire on the connector.
- Green (Right Turn/Brake): Connect the green wire from the vehicle to the green wire on the connector.
- Blue (Electric Brakes): Connect the blue wire from the vehicle to the blue wire on the connector.
- Black (Auxiliary Power): Connect the black wire from the vehicle to the black wire on the connector.
- Purple (Reverse Lights): Connect the purple wire from the vehicle to the purple wire on the connector.
There are several methods for connecting the wires:
- Butt Connectors: Slide a butt connector over each wire end and crimp securely using a crimping tool. Ensure the connection is tight and that the wires are securely held in place.
- Soldering: Slide heat shrink tubing over each wire. Solder the wires together, creating a strong and permanent connection. Allow the solder to cool, then slide the heat shrink tubing over the connection and heat it with a heat gun or lighter to shrink it, providing insulation and protection.
- Direct Connection with Terminals: Some connectors have screw terminals. Insert the stripped wire into the appropriate terminal and tighten the screw securely. Be careful not to overtighten and strip the screw.
5. Insulate and Protect the Connections
Once the wires are connected, it's crucial to insulate and protect the connections from moisture and corrosion. If you used butt connectors, wrap each connection tightly with electrical tape. If you used soldering, the heat shrink tubing provides excellent insulation. Properly sealing the connections extends the life of the wiring and prevents electrical problems.
6. Secure and Organize the Wiring
Use cable ties or electrical tape to bundle and secure the wiring, keeping it away from moving parts or sharp edges. This prevents the wires from being damaged or disconnected while towing. Secure the 7-blade connector to the trailer hitch or bumper using a suitable mounting bracket.
7. Test the Connections
Reconnect the vehicle's battery. Now it's time to test the connections. Have a helper activate each function (taillights, turn signals, brake lights, etc.) while you check the corresponding lights on the trailer. Use a wire tester or multimeter to verify that each function is working correctly. Pay close attention to the brake lights and turn signals, as these are critical for safety.
8. Troubleshooting
If any of the lights are not working, double-check the wiring connections. Ensure that all wires are securely connected and that the ground connection is solid. Use a wire tester or multimeter to trace the circuit and identify any breaks or shorts. Common problems include:
- Loose connections: Ensure all connections are tight and secure.
- Corroded connections: Clean any corroded connections with a wire brush or sandpaper.
- Blown fuses: Check the vehicle's fuse box and replace any blown fuses.
- Faulty ground connection: Ensure the ground wire is securely connected to the vehicle's frame.
- Incorrect wiring: Double-check the wiring diagram and verify that all wires are connected correctly.
Preventative Maintenance
To ensure reliable performance, perform regular maintenance on your trailer wiring:
- Inspect the wiring regularly: Check for any signs of damage, wear, or corrosion.
- Clean the connectors: Use a wire brush or electrical contact cleaner to remove dirt and corrosion from the connectors.
- Apply dielectric grease: Apply a thin layer of dielectric grease to the connectors to prevent corrosion.
- Store the connector properly: When not in use, store the connector in a dry place to prevent corrosion.
When to Seek Professional Help
If you are uncomfortable working with electrical wiring or if you are experiencing persistent problems with your trailer wiring, it's best to seek professional help from a qualified mechanic or trailer repair shop. They have the expertise and tools to diagnose and repair any electrical issues safely and effectively.
By following these steps and taking the necessary precautions, you can successfully wire a 7-blade trailer connector and ensure safe and reliable towing. Remember to prioritize safety and double-check your work to avoid potential hazards. Happy towing!