Ka24de Head Bolt Torque Specs
The KA24DE engine, a stalwart of Nissan's lineup from the late 1980s through the early 2000s, is known for its reliability and robust design. Found in vehicles like the 240SX, Altima, and Hardbody truck, it's a popular choice for enthusiasts and a familiar sight in many workshops. One of the most crucial aspects of reassembling a KA24DE is correctly torquing the cylinder head bolts. Improper torque can lead to head gasket failure, coolant leaks, oil leaks, and potentially catastrophic engine damage. This article will provide a comprehensive guide to KA24DE head bolt torque specs and the recommended procedures.
Understanding Torque and Torque Specs
Before diving into the specific numbers, it's important to understand what torque is and why it's so critical. Torque is a rotational force, and in the context of head bolts, it's the force used to clamp the cylinder head firmly against the engine block. This clamping force creates a tight seal, preventing combustion gases, coolant, and oil from mixing where they shouldn't. Torque specs are the manufacturer's recommended values for this clamping force, expressed in units like foot-pounds (ft-lbs) or Newton-meters (Nm).
Using a torque wrench is essential. Unlike a standard wrench, a torque wrench measures the amount of rotational force applied to the bolt. Using the correct tool ensures that the specified torque is achieved, preventing over-tightening or under-tightening. Over-tightening can stretch or break the bolts, while under-tightening won't provide sufficient clamping force.
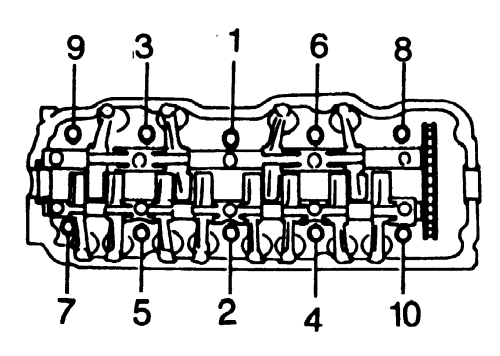
KA24DE Head Bolt Torque Specs and Procedure
The KA24DE utilizes a torque-to-yield (TTY) head bolt design. This means the bolts are designed to stretch slightly when tightened to the specified torque, providing a more consistent clamping force. Because of this stretching, TTY head bolts should always be replaced when the cylinder head is removed. Reusing them can lead to inaccurate torque readings and a compromised seal.
Here's the recommended procedure and torque specs for KA24DE head bolts:
Step 1: Preparation
Ensure the following before beginning the torquing process:
- New Head Bolts: As mentioned, use a new set of head bolts designed specifically for the KA24DE engine.
- Clean Threads: Clean all bolt holes in the engine block. Use a thread chaser if necessary to remove any debris or corrosion. Ensure the bolt holes are dry and free of oil.
- Lubrication: Lightly lubricate the threads and under the head of each new bolt with engine oil or a bolt lubricant recommended by the manufacturer. This ensures accurate torque readings.
- Head Gasket: Install a new head gasket, ensuring it's properly aligned with the block and head surfaces.
- Cylinder Head: Place the cylinder head onto the block, aligning it with the dowel pins.
Step 2: Torque Sequence and Stages
The correct torque sequence is crucial for even clamping force distribution. The KA24DE uses a specific tightening pattern, which is usually detailed in repair manuals. A common sequence involves starting from the center bolts and working outwards in a spiral pattern.
The tightening process is performed in stages to gradually achieve the final torque. The generally accepted torque sequence for the KA24DE is as follows:
Stage 1: Torque all head bolts to 22 ft-lbs (30 Nm) in the correct sequence.
Stage 2: Torque all head bolts to 51 ft-lbs (69 Nm) in the correct sequence.
Stage 3: Loosen all head bolts completely.
Stage 4: Torque all head bolts to 25 ft-lbs (34 Nm) in the correct sequence.
Stage 5: Tighten all head bolts an additional 85 to 90 degrees in the correct sequence, using an angle meter. (This is the torque-to-yield stage.)
Important Notes:
- Angle Meter: An angle meter is essential for the final tightening stage. It measures the angle of rotation, ensuring the bolts are stretched to the correct amount.
- Consistency: Maintain a smooth and consistent tightening motion throughout each stage. Avoid jerky movements that can affect the torque readings.
Step 3: Final Inspection
After completing the torquing procedure, double-check that all bolts have been tightened to the correct specification and sequence. It's also a good idea to re-inspect the torque after the engine has been run for a short period. After the initial heat cycle, the bolts and gasket may settle, requiring a minor adjustment. Consult your specific repair manual for guidance on post-installation re-torque procedures.
Common Mistakes to Avoid
Several common mistakes can compromise the integrity of the head gasket seal. Avoiding these will save you time, money, and potential engine damage:
- Reusing Head Bolts: As mentioned, reusing TTY head bolts is a significant risk. Always replace them with new ones.
- Incorrect Torque Sequence: Following the correct sequence is critical for even clamping pressure.
- Skipping Stages: Each stage of the torquing process is important. Skipping a stage can lead to inaccurate results.
- Dirty Threads: Dirty or damaged threads can affect torque readings. Clean and chase the threads before installation.
- Improper Lubrication: Using the wrong lubricant or applying it incorrectly can affect torque accuracy.
- Using an Inaccurate Torque Wrench: A poorly calibrated or faulty torque wrench can lead to over-tightening or under-tightening. Have your torque wrench calibrated regularly.
Troubleshooting Potential Issues
Even with meticulous attention to detail, issues can sometimes arise. Here are some potential problems and their possible solutions:
- Head Gasket Leakage: If you suspect a head gasket leak after installation, check for coolant leaks, oil leaks, or excessive white smoke from the exhaust. A compression test or leak-down test can help diagnose the issue. Retorquing the head bolts (if recommended by the repair manual) may help, but often requires removing the head and replacing the gasket.
- Broken Head Bolts: If a head bolt breaks during the torquing process, it's usually a sign of over-tightening or a faulty bolt. Remove the broken bolt carefully (using an extractor if necessary) and replace it with a new one. Ensure the threads in the block are undamaged.
- Inconsistent Torque Readings: If you're getting inconsistent torque readings, check for dirty threads, damaged bolts, or a faulty torque wrench. Ensure you're applying the torque smoothly and consistently.
Why Precision Matters
Torquing the cylinder head bolts on a KA24DE to the exact specifications is more than just a mechanical task; it's a precision operation that directly affects the longevity and performance of your engine. By understanding the importance of torque, following the correct procedure, and using the right tools, you can ensure a reliable and long-lasting engine rebuild.
Remember, consulting a reputable repair manual specific to your vehicle model and year is always recommended. While this article provides general guidance, specific instructions may vary. Good luck with your KA24DE project!