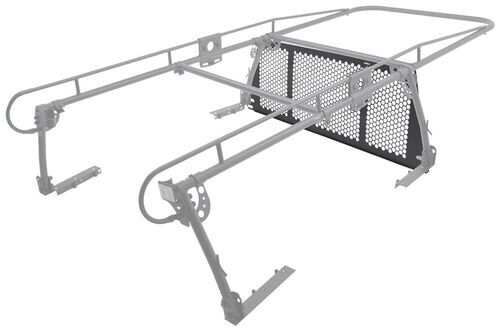
Ladder Rack With Window Guard
Ladder racks with window guards are indispensable for many tradespeople and adventurers. They offer secure transport for ladders, pipes, lumber, and other long materials while protecting the rear window from damage. However, like any automotive accessory, they require regular maintenance and are prone to specific problems. This article provides a practical guide for car owners and mechanics on maintaining, troubleshooting, and addressing real-world issues associated with ladder racks and window guards.
Maintenance: The Key to Longevity
Preventive maintenance is paramount for extending the life of your ladder rack. Neglecting maintenance can lead to rust, weakened connections, and potential safety hazards. Here's a breakdown of crucial maintenance tasks:
Regular Cleaning: Preventing Corrosion
Symptom: Visible rust, especially around joints and mounting points. Difficulty in adjusting or removing rack components.
Cause: Exposure to road salt, moisture, and debris accelerates corrosion. Lack of protective coating upkeep.
Solution: Wash the ladder rack regularly with mild soap and water. Pay close attention to hard-to-reach areas. After washing, apply a rust inhibitor or protectant. For older racks with existing rust, use a wire brush to remove loose rust before applying a rust converter. Consider applying a fresh coat of paint or a protective spray like bed liner coating after rust removal and treatment. This is especially important in regions with harsh winters.
Example: On a Ford Transit Connect, the ladder rack mounting points near the rear doors are susceptible to salt spray. Regular cleaning and rust prevention here are critical.
Hardware Inspection and Tightening: Ensuring Security
Symptom: Rattling noises while driving. Visible looseness in rack components. Difficulty in securing ladders or materials.
Cause: Vibrations from driving gradually loosen bolts and fasteners. Overloading the rack beyond its weight capacity.
Solution: Periodically inspect all bolts, nuts, and clamps on the ladder rack. Use the appropriate wrench or socket to tighten any loose hardware. Refer to the manufacturer's specifications for torque settings. Consider using thread-locking compound (e.g., Loctite) on critical fasteners to prevent loosening. Always double-check the torque settings after tightening to avoid over-tightening and damaging the threads.
Example: On a Chevrolet Colorado with a bed-mounted ladder rack, the clamps that attach the rack to the bed rails often loosen over time. Regular inspection and tightening are essential.
Window Guard Inspection: Protecting Your Glass
Symptom: Dents or scratches on the window guard. Cracks or fractures in the window guard material (plastic or metal mesh). Loose or missing mounting hardware.
Cause: Impact from shifted cargo. Vibration and stress from driving. UV degradation of plastic window guards.
Solution: Inspect the window guard for any signs of damage. Replace damaged window guards immediately. Tighten any loose mounting hardware. For plastic window guards, apply a UV protectant to prevent cracking and discoloration. A cracked window guard offers little to no protection and should be replaced promptly.
Example: Many Nissan NV200 vans use plastic window guards. These are particularly vulnerable to UV damage and impacts from shifting cargo. Regular inspection and protection are important.
Load Capacity Awareness: Preventing Overload
Symptom: Sagging of the ladder rack. Difficulty in controlling the vehicle, especially in turns or during braking. Damage to the vehicle's roof or mounting points.
Cause: Exceeding the ladder rack's maximum weight capacity. Uneven weight distribution.
Solution: Always adhere to the ladder rack's maximum weight capacity, as specified by the manufacturer. Distribute the load evenly across the rack. Secure cargo properly to prevent shifting. Consider using load straps or tie-downs to further secure materials. If carrying heavy loads, consider upgrading to a heavy-duty ladder rack. Overloading a ladder rack is a serious safety hazard and can lead to accidents.
Example: A RAM ProMaster City typically has a lower roof load capacity than a full-size van. Be mindful of the ladder rack's weight capacity and the vehicle's roof load capacity to avoid overloading.
Troubleshooting: Common Problems and Solutions
Even with regular maintenance, ladder racks can experience problems. Here's how to troubleshoot some common issues:
Rattling Noises: Identifying and Eliminating the Source
Symptom: Persistent rattling or clanging noises coming from the roof area while driving.
Cause: Loose hardware, vibrating components, or cargo shifting within the rack.
Solution: Systematically check all mounting hardware, bolts, and clamps for tightness. Use foam padding or rubber shims between metal components to dampen vibrations. Ensure cargo is properly secured and not able to shift. Consider using pipe insulation around ladder rungs to prevent rattling. A systematic approach is key to finding the source of the rattle.
Example: On a Toyota Tacoma with a bed-mounted ladder rack, rattling can often be traced to loose clamps or vibrations between the rack and the truck bed. Using rubber shims can help dampen these vibrations.
Difficulty in Adjusting or Removing Rack Components: Overcoming Corrosion and Binding
Symptom: Difficulty in sliding adjustable rack components. Inability to remove rack sections due to corrosion or binding.
Cause: Corrosion, rust, or debris buildup on sliding surfaces. Over-tightening of adjustment mechanisms.
Solution: Apply penetrating oil (e.g., WD-40) to the affected areas. Allow the oil to soak for several minutes before attempting to adjust or remove the component. Use a rubber mallet to gently tap the component loose. Clean the sliding surfaces with a wire brush or sandpaper to remove rust and debris. Apply grease or anti-seize compound to the sliding surfaces before reassembling. Avoid over-tightening adjustment mechanisms. Patience and lubrication are key to resolving this issue.
Example: Many adjustable ladder racks use telescoping sections. These sections can become seized due to corrosion, especially on vehicles that operate in coastal environments.
Damage to Vehicle Paint: Preventing Further Issues
Symptom: Scratches, dents, or paint chipping on the vehicle's roof or mounting points.
Cause: Improper installation of the ladder rack. Contact between the ladder rack and the vehicle's body. Loose mounting hardware allowing the rack to shift.
Solution: Ensure the ladder rack is properly installed according to the manufacturer's instructions. Use protective padding or rubber shims between the ladder rack and the vehicle's body. Regularly inspect and tighten mounting hardware. Repair any existing paint damage to prevent rust. Consider using touch-up paint to protect exposed metal. Preventing further damage is crucial.
Example: On vans with drip rails, improper installation of the ladder rack clamps can easily damage the paint on the drip rails. Ensure the clamps are properly positioned and tightened to prevent damage.
Wind Noise: Minimizing Aerodynamic Drag
Symptom: Increased wind noise at highway speeds after installing the ladder rack.
Cause: The ladder rack disrupting airflow and creating turbulence.
Solution: Consider installing a wind deflector or fairing on the front of the ladder rack. Adjust the position of the ladder rack to minimize its profile. Ensure all components are securely attached to minimize vibrations that contribute to noise. Aerodynamic improvements can significantly reduce wind noise.
Example: On a Sprinter van, adding a ladder rack can significantly increase wind noise. A wind deflector mounted to the front of the rack can help redirect airflow and reduce noise.
Real-World Issues and Considerations
Beyond maintenance and troubleshooting, there are several real-world considerations when owning a vehicle with a ladder rack:
- Fuel Economy: Ladder racks can increase aerodynamic drag, leading to a decrease in fuel economy.
- Vehicle Height: Be aware of the vehicle's increased height with the ladder rack installed, especially when entering garages, tunnels, or underpasses.
- Driving Dynamics: A loaded ladder rack can affect the vehicle's handling, particularly in windy conditions. Drive cautiously and adjust your speed accordingly.
- Theft Prevention: Secure ladders and other equipment with locks to prevent theft. Consider using locking ladder rack accessories.
- Local Regulations: Check local regulations regarding ladder rack overhang and securing loads.
Keeping Your Car in Top Condition: Beyond the Ladder Rack
Maintaining your ladder rack is only one aspect of keeping your vehicle in top condition. Here are some general tips:
- Follow the manufacturer's recommended maintenance schedule for oil changes, fluid checks, and other services.
- Regularly inspect tires for wear and tear and maintain proper tire pressure.
- Keep the vehicle clean, both inside and out.
- Address any mechanical issues promptly to prevent them from escalating.
- Drive safely and defensively.
By following these maintenance tips, troubleshooting guides, and real-world considerations, you can ensure that your ladder rack provides years of reliable service while keeping your vehicle in excellent condition. Remember, a well-maintained vehicle is a safe and reliable vehicle.