Light Bar For Under Tailgate
So, you're thinking about adding a light bar under your tailgate? Excellent choice! These additions aren't just for aesthetics; they significantly boost visibility, enhancing safety, especially when towing, off-roading, or just dealing with poor weather. This guide dives deep into the installation and function of these handy accessories, offering the kind of detailed insight you’d expect from a seasoned mechanic. We'll cover everything from choosing the right light bar to wiring it up correctly, so you can tackle this project with confidence.
Understanding Under-Tailgate Light Bars
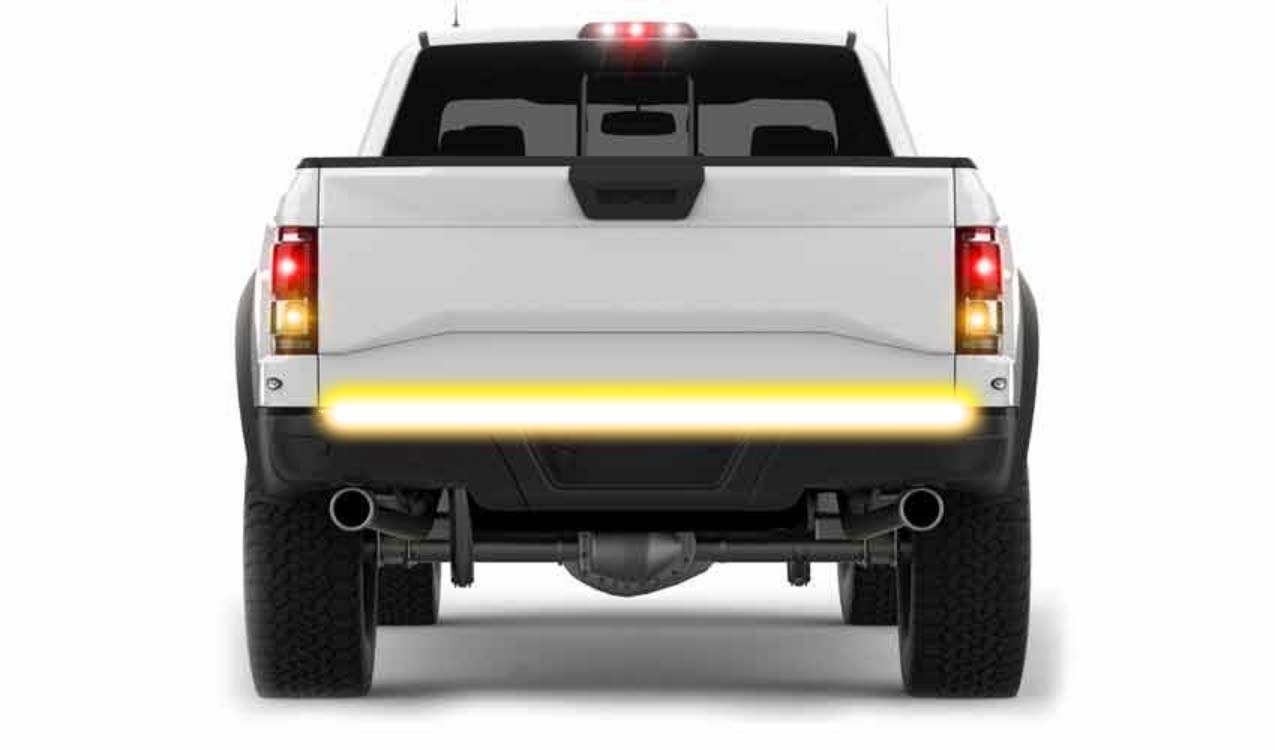
Before we get our hands dirty, let's clarify what we're dealing with. An under-tailgate light bar, typically 48 to 60 inches in length, mounts inconspicuously beneath your truck's tailgate. Its primary function is to provide enhanced visibility to other drivers, especially at night or in adverse conditions. These bars integrate multiple lighting functions, usually including:
- Running Lights: These are the dim, constantly illuminated lights that increase your vehicle's visibility during normal driving. Typically red.
- Brake Lights: These illuminate brighter than running lights when you depress the brake pedal, signaling your intention to slow down or stop. Also red.
- Turn Signals: Flashing amber (yellowish-orange) lights that indicate which direction you plan to turn.
- Reverse Lights: White lights that activate when you shift your vehicle into reverse, illuminating the area behind you and alerting others. Some advanced bars also have a reverse light function.
The illumination source is almost always LEDs (Light Emitting Diodes). LEDs are popular due to their efficiency, brightness, long lifespan, and relatively small size. They consume less power than traditional incandescent bulbs, which reduces the strain on your vehicle's electrical system and extends the life of your battery.
Choosing the Right Light Bar
Selecting the right light bar involves more than just picking one that looks good. Consider these factors:
- Length: Measure the available space under your tailgate. You want a light bar that fits snugly without protruding excessively. Too short, and it looks odd and doesn't maximize visibility. Too long, and it might interfere with the tailgate operation.
- Functionality: Ensure the light bar offers all the functions you need (running, brake, turn, reverse). Some models offer additional features like strobe effects or integrated cargo lights.
- Brightness: Look for light bars with high lumen output. Lumens are a measure of the total amount of visible light emitted by a source. Higher lumens translate to brighter lights. Pay attention to the lumen rating for each individual function (brake, turn, etc.).
- Weather Resistance: Opt for a light bar with a high IP (Ingress Protection) rating. This rating indicates the level of protection against dust and water intrusion. Look for at least IP67 or IP68 for reliable performance in all weather conditions.
- Wiring Harness: Most light bars come with a wiring harness. Check its quality. A well-made harness with properly insulated wires and secure connectors will make installation easier and more reliable.
- DOT Compliance: Ensure the light bar is DOT (Department of Transportation) compliant. This ensures it meets minimum safety standards for visibility and brightness. While enforcement varies, using DOT-compliant lights helps avoid potential issues.
Installation: A Step-by-Step Guide
Installing an under-tailgate light bar typically involves these steps. Always disconnect the negative terminal of your battery before starting any electrical work. Safety first!
- Preparation: Gather your tools. You'll need wire strippers, wire crimpers, a multimeter, electrical tape or heat shrink tubing, a drill with appropriate drill bits (if required), and zip ties. Also, have your vehicle's wiring diagram handy – you can usually find this online or in your owner's manual.
- Mounting the Light Bar: Most light bars come with mounting brackets or adhesive strips. Clean the area under your tailgate thoroughly with isopropyl alcohol to ensure proper adhesion. Some models require drilling holes for mounting. If so, carefully mark the hole locations and use a drill bit appropriate for the material of your tailgate. Secure the light bar according to the manufacturer's instructions.
- Wiring the Light Bar: This is the most crucial part. Identify the wires for each function on both the light bar and your vehicle's trailer wiring harness or taillight assembly. The color coding can vary, so always double-check with your wiring diagram and a multimeter.
- Connecting the Wires: There are several ways to connect the wires:
- Wire Taps: These are quick and easy, but they can damage the insulation of the existing wires and are prone to corrosion. I don't recommend them for a long-lasting, reliable connection.
- Solder and Heat Shrink: This is the most reliable method. Solder the wires together, then cover the connection with heat shrink tubing to insulate and protect it from the elements.
- Crimp Connectors: Use high-quality crimp connectors and a proper crimping tool for a secure and reliable connection. Ensure the connectors are properly sized for the wire gauge.
- Securing the Wiring: Route the wiring harness carefully along the frame or inside the tailgate, away from moving parts and sharp edges. Use zip ties to secure the harness at regular intervals. This prevents the wires from dangling and potentially getting damaged.
- Testing: Reconnect the negative terminal of your battery. Test all the functions of the light bar: running lights, brake lights, turn signals, and reverse lights. If any function doesn't work, double-check your wiring connections.
- Final Inspection: Once everything is working correctly, perform a final inspection. Ensure all wires are securely connected and properly insulated. Make sure the light bar is securely mounted and doesn't interfere with the tailgate operation.
Pro Tip: Use a multimeter to verify the function of each wire on your vehicle. Set the multimeter to DC voltage and test each wire with the turn signals, brakes, and running lights activated. This ensures you connect the light bar wires to the correct circuits.
Troubleshooting Common Issues
Even with careful planning, you might encounter some problems during installation. Here are a few common issues and their solutions:
- Light Bar Doesn't Light Up: Check the fuse. A blown fuse is a common cause. Also, verify that the light bar is properly grounded. Ensure the ground wire is securely connected to a clean, unpainted metal surface.
- Flickering Lights: This could be caused by a loose connection or a faulty ground. Double-check all wiring connections and ensure the ground is secure.
- Turn Signals Flash Too Fast (Hyperflashing): LEDs draw less power than traditional bulbs, which can cause the vehicle's flasher relay to think a bulb is burned out, resulting in hyperflashing. You may need to install a resistor in-line with the turn signal wires to simulate the load of a traditional bulb. Alternatively, you can replace the flasher relay with an LED-compatible relay.
- Reverse Lights Don't Activate: Some vehicles require you to tap into the reverse light wire in the taillight assembly rather than the trailer wiring harness. Consult your vehicle's wiring diagram.
Advanced Considerations
For the truly dedicated DIYer, here are a few advanced considerations:
- CAN Bus Systems: Modern vehicles often use a CAN (Controller Area Network) bus system for controlling lighting and other functions. These systems are sensitive to changes in electrical load and may require special LED drivers or decoders to prevent errors. Consult with a professional if you are unsure about working with a CAN bus system.
- Custom Wiring Harness: Instead of tapping into existing wiring, you can create a custom wiring harness that plugs directly into your vehicle's taillight connectors. This provides a cleaner and more professional installation.
- Programmable Light Bars: Some advanced light bars offer programmable features, such as custom light patterns or integrated security systems. These require more complex wiring and programming, but can add a unique touch to your vehicle.
Adding an under-tailgate light bar is a relatively straightforward project that can significantly improve your vehicle's safety and visibility. By following these steps and taking the necessary precautions, you can achieve a professional-looking installation that will last for years to come. Remember to always prioritize safety and consult with a professional if you are unsure about any aspect of the installation.