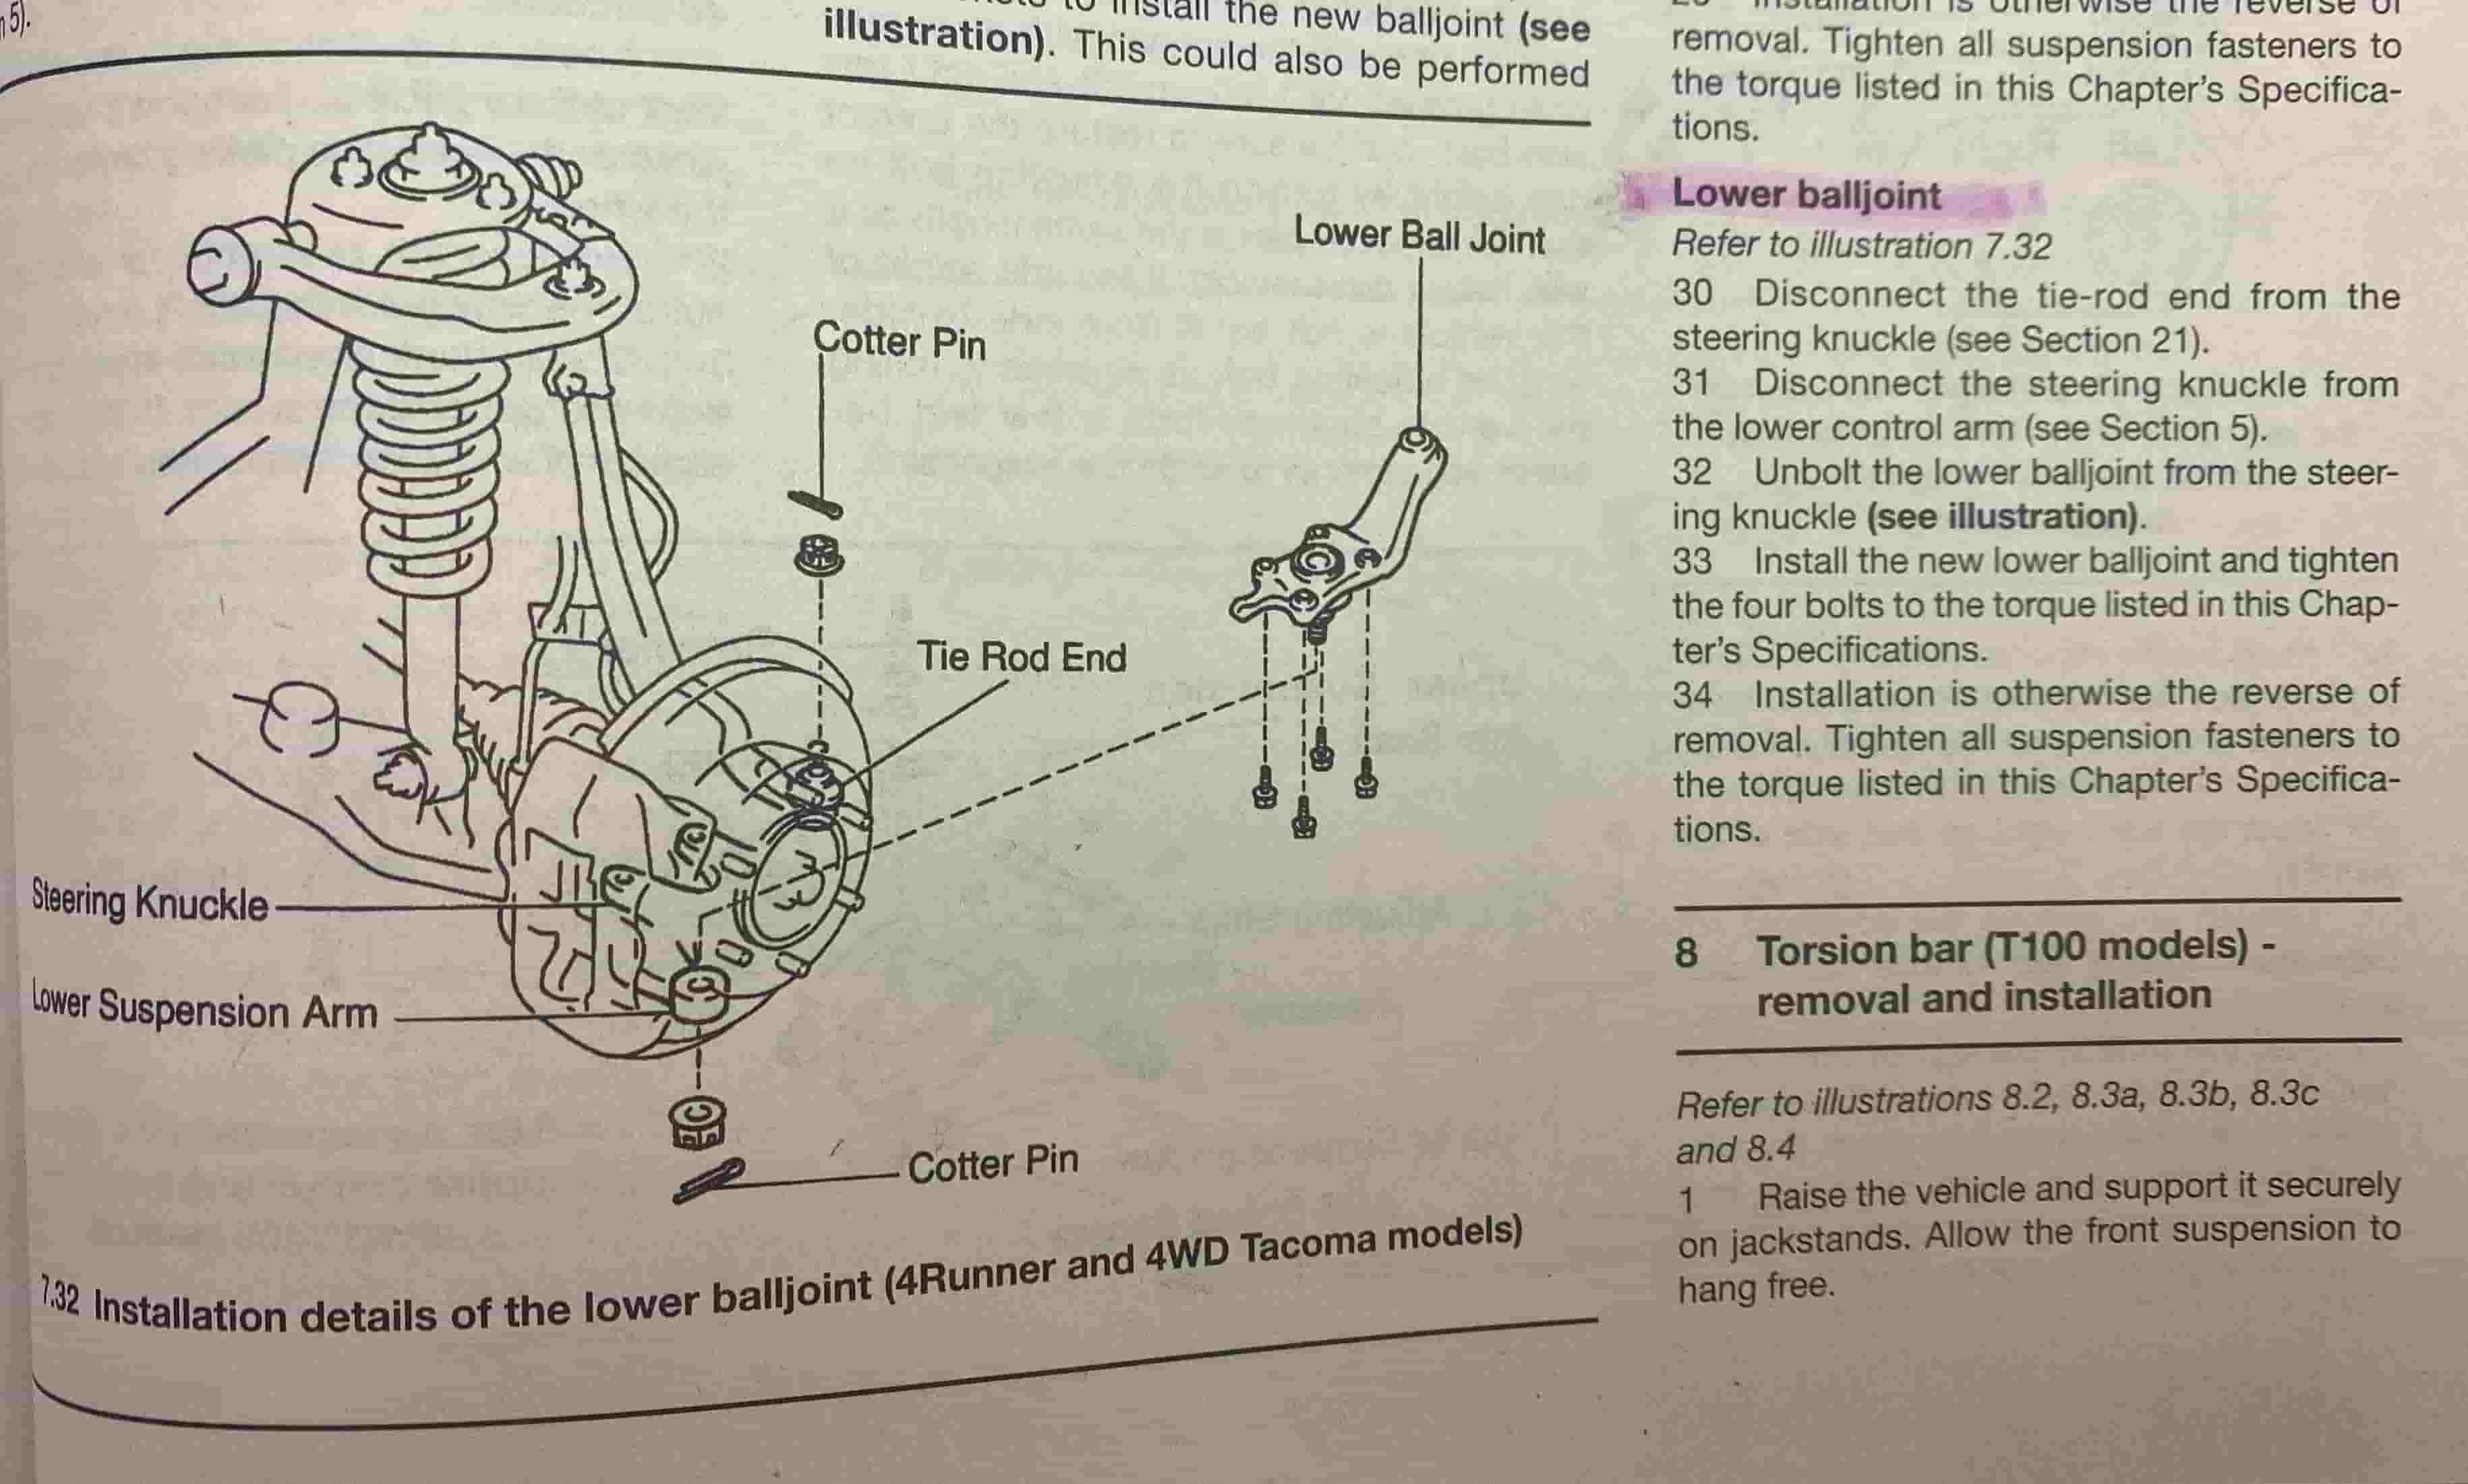
Lower Ball Joint Torque Specs

The humble lower ball joint. Often overlooked, yet utterly critical for safe and predictable handling. It's the unsung hero connecting your suspension to the wheel, allowing for articulation and absorbing the brunt of road imperfections. But like any hero, it needs proper care and attention, starting with correct installation – and that hinges on getting the torque specs just right.
Torque: The Goldilocks of Fasteners
Torque, the rotational force applied when tightening a fastener, is more than just "tight is good." Under-torquing leaves the joint loose, prone to premature wear, and potentially catastrophic failure. Imagine that ball joint separating mid-corner… not pretty. Over-torquing, on the other hand, stretches the bolt beyond its yield strength, weakening it and potentially leading to thread damage or even snapping. Again, disaster awaits. So, how do we find that Goldilocks "just right" torque?
Diving into the Specs: It's Not One-Size-Fits-All
This is where things get interesting. Lower ball joint torque specs aren't universal. They vary wildly based on the vehicle model, the type of ball joint (pressed-in vs. bolted), and even the engine configuration. Let's break down some examples:
Example 1: The Classic Honda Civic (EK/EG)
The mid-90s Honda Civic, a tuner's darling, utilizes a pressed-in lower ball joint. While seemingly simple, getting the torque right is crucial, especially if you're tracking your Civic.
| Model | Year | Torque Spec (Lower Ball Joint to Knuckle) | Notes |
|---|---|---|---|
| Civic (EK/EG) | 1992-2000 | 47 lb-ft (64 Nm) | Always use new cotter pin. |
Driving Impressions: Many enthusiasts swap out the factory ball joints for upgraded, high-performance versions. If doing so, always consult the aftermarket ball joint manufacturer's recommended torque specs, as they may differ from the OEM specifications. Running slightly higher spring rates and stickier tires means higher loads on the ball joint, so meticulous torqueing is a must to prevent premature failure.
Example 2: The Modern Ford Mustang (S550)
Moving to a more modern muscle car, the Ford Mustang S550 features a different suspension design and, consequently, different torque requirements.
| Model | Year | Torque Spec (Lower Ball Joint to Knuckle) | Notes |
|---|---|---|---|
| Mustang (S550) | 2015-Present | 111 lb-ft (150 Nm) + 90 degrees | Torque-to-Yield bolt, replace with new bolt every time. |
Driving Impressions: Notice the difference? Not only is the torque significantly higher, but it also incorporates a torque-to-yield (TTY) specification. This means the bolt is designed to stretch slightly upon tightening, providing a more consistent clamping force. However, TTY bolts are single-use only! Reusing them is a recipe for disaster.
Example 3: The Rugged Toyota Tacoma (3rd Gen)
Let's shift gears to an off-road workhorse, the Toyota Tacoma. Here, durability and reliability are paramount.
| Model | Year | Torque Spec (Lower Ball Joint to Lower Control Arm) | Notes |
|---|---|---|---|
| Tacoma (3rd Gen) | 2016-Present | 81 lb-ft (110 Nm) | Inspect ball joint boot regularly. |
Driving Impressions: Tacomas often see rough terrain, placing immense stress on suspension components. Proper torque ensures the ball joint can withstand the abuse. Pay close attention to the ball joint boot; damage can lead to contamination and premature failure.
Pros and Cons of Different Ball Joint Types
Beyond the torque specs themselves, the type of ball joint used also plays a role.
Pressed-In Ball Joints
- Pros:
- Generally less expensive than bolted versions.
- Can offer a slightly more compact design.
- Cons:
- Requires specialized tools (ball joint press) for removal and installation.
- Can be more challenging to replace.
Bolted Ball Joints
- Pros:
- Easier to replace with basic hand tools.
- Often found on heavier-duty vehicles.
- Cons:
- Can be more expensive.
- May require more clearance for installation.
Tools of the Trade: Setting Yourself Up for Success
Accurate torque is impossible without the right tools. Here's what you'll need:
- Torque Wrench: A must-have. Invest in a quality torque wrench with an accurate range that covers the required torque specs. Digital torque wrenches offer greater precision, but a reliable click-type wrench will suffice.
- Sockets and Wrenches: Ensure you have the correct sizes for the ball joint fasteners.
- Breaker Bar: For loosening stubborn bolts.
- Ball Joint Press (for pressed-in joints): Rent or buy a quality ball joint press to avoid damaging the suspension components.
- Penetrating Oil: To help loosen corroded fasteners.
- Service Manual: The bible. Always refer to the factory service manual for the correct torque specs and procedures specific to your vehicle.
Beyond the Numbers: Real-World Considerations
While torque specs provide a guideline, real-world conditions can influence the final outcome.
- Thread Condition: Clean, lubricated threads ensure accurate torque readings. Dirty or corroded threads can skew the results.
- Fastener Material: Different materials require different torque specifications. Using the wrong bolt can lead to failure.
- Temperature: Extreme temperatures can affect the accuracy of torque wrenches.
"A little dab of anti-seize on the threads never hurt anyone…except maybe your torque reading if you don't account for it!" - Some seasoned mechanic, probably.
Final Thoughts: The Importance of Precision
Lower ball joints are a critical safety component. Skimping on proper installation, especially neglecting correct torque, is a gamble with potentially disastrous consequences. Take your time, use the right tools, consult the service manual, and double-check your work. Your safety, and the safety of those around you, depends on it.
So, here's the controversial question to get the comments section buzzing: Dry torque vs. wet torque – which is the superior method for lower ball joint installation, and what percentage do you adjust the torque value when using anti-seize? Let the debate begin!
