Nissan Altima 2013 Cabin Air Filter Location
Alright folks, let's talk cabin air filters in the 2013 Nissan Altima. Replacing this little guy is a straightforward maintenance task that can significantly improve your in-cabin air quality and the performance of your HVAC (Heating, Ventilation, and Air Conditioning) system. It's something you can definitely tackle yourself, saving you some money and gaining valuable experience.
Locating the Cabin Air Filter: Glove Compartment Disassembly
Unlike some vehicles where the cabin air filter is tucked away under the hood or behind the dashboard, the 2013 Altima conveniently places it behind the glove compartment. This makes access relatively simple, but requires a few specific steps to avoid damaging any components. Patience and a gentle touch are key.
Here's the breakdown:
Step 1: Empty the Glove Compartment
This might seem obvious, but it's crucial. Clear out everything from your glove compartment. You want to have ample space to work and avoid anything falling out and potentially getting damaged during the process. Trust me, fishing around for a lost registration paper while contorted in the passenger seat is no fun.
Step 2: Disconnecting the Damper Arm (if equipped)
Many 2013 Altimas come equipped with a damper arm, also sometimes called a glove box strut. This small hydraulic or friction-based arm controls the speed at which the glove compartment door opens. Disconnecting it is essential to fully drop the glove compartment down.
To disconnect the damper arm:
Carefully locate the damper arm on the right-hand side of the glove compartment (when facing it). It's usually a small cylinder attached to the glove compartment door and the dashboard frame.
Examine the connection point. There will typically be a small clip or a ball-and-socket type connection. Depending on the design, you may need to:
- Clip Type: Use a small flathead screwdriver or your fingers to gently release the retaining clip. Be careful not to break the clip – they can be brittle. Once the clip is released, the arm should detach.
- Ball-and-Socket: Gently pry the socket (the part attached to the glove compartment door) away from the ball (the part attached to the arm). A trim removal tool can be helpful here to avoid scratching the plastic.
Note: Some models might have a slightly different attachment mechanism. If you're unsure, consult your owner's manual or a repair guide specific to your Altima.
Step 3: Releasing the Glove Compartment Stops
Now, look at the sides of the glove compartment. You'll notice tabs or stops that prevent the glove compartment from swinging down completely. These need to be disengaged. This often involves pressing inward on the sides of the glove compartment while simultaneously pulling it downwards.
Important: This step often requires a bit of finesse. Applying too much force can damage the plastic. Use your fingers to gently squeeze the sides of the glove compartment inward, towards the center. While squeezing, gently pull the glove compartment downwards.
You should feel the tabs disengage. If they're stubborn, try applying a little more pressure, but always prioritize gentle manipulation over brute force.
Step 4: Lowering the Glove Compartment
With the damper arm disconnected and the stops released, the glove compartment should now swing down completely, revealing the cabin air filter housing behind it. The glove compartment might feel a little loose once it's fully lowered; this is normal.
Accessing and Replacing the Cabin Air Filter
Now that you have access to the cabin air filter housing, the replacement process is relatively straightforward.
Step 5: Locating and Opening the Filter Housing
The cabin air filter housing is a rectangular plastic box, usually black or white, located directly behind where the glove compartment used to be. It will have a cover that needs to be removed.
Observe the cover closely. It will likely have a clip or two that you need to release. These clips can be located on the top, bottom, or sides of the cover. Gently depress the clips to release them and remove the cover.
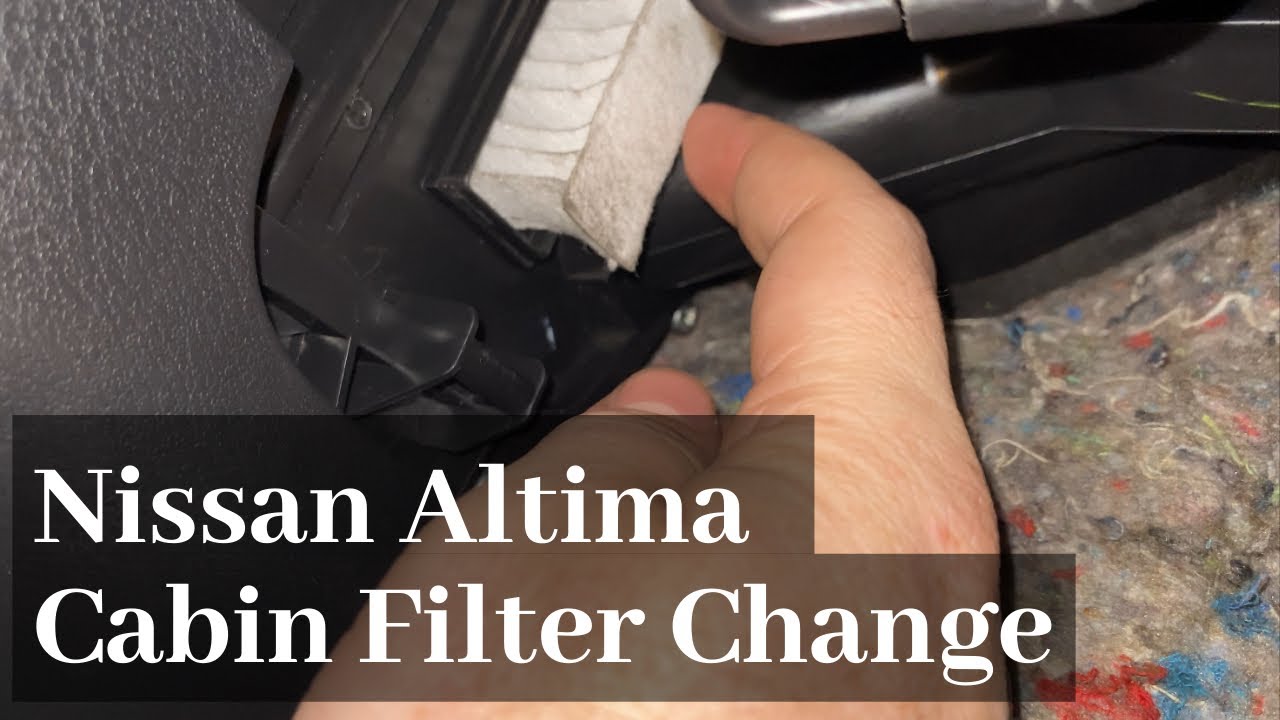
Step 6: Removing the Old Cabin Air Filter
With the cover removed, you'll see the old cabin air filter. Pay close attention to the orientation of the filter as you remove it. Notice which way the air flow arrow is pointing (if there is one). This is crucial for installing the new filter correctly.
Carefully pull the old filter out. It may be dirty and clogged with debris. Try to avoid shaking it inside the vehicle, as this will release all the trapped dust and pollen back into your cabin.
Take a look at the inside of the housing. If it's dusty or dirty, use a vacuum cleaner with a brush attachment to clean it out before installing the new filter.
Step 7: Installing the New Cabin Air Filter
Now, take your new cabin air filter and install it into the housing. Make sure you install it with the same orientation as the old filter. The airflow arrow (if present) should point in the same direction.
Ensure the filter is seated properly within the housing. It should fit snugly without being forced. If it's difficult to insert, double-check the orientation and make sure you have the correct filter size for your 2013 Altima.
Step 8: Reassembling the Filter Housing
Once the new filter is in place, reattach the filter housing cover. Make sure the clips are securely fastened to hold the cover in place.
Reassembling the Glove Compartment
Now it's time to put everything back together in reverse order.
Step 9: Reattaching the Glove Compartment Stops
Raise the glove compartment back into position. You'll need to push the sides of the glove compartment inward again to allow the tabs to re-engage with their slots. Listen for a click to confirm they're securely in place.
Step 10: Reconnecting the Damper Arm (if equipped)
Reattach the damper arm to the glove compartment door and the dashboard frame. This might involve snapping the ball-and-socket joint back together or re-securing the retaining clip. Make sure the arm is securely connected to ensure smooth operation of the glove compartment door.
Step 11: Testing the Glove Compartment
Finally, test the glove compartment to make sure it opens and closes smoothly. The damper arm should control the opening speed, preventing it from slamming open. If anything seems off, double-check all the connections and ensure everything is properly aligned.
Choosing the Right Cabin Air Filter
Selecting the right cabin air filter is important for optimal performance. There are several types available:
- Standard Particulate Filter: These filters capture dust, pollen, and other airborne particles. They're the most basic and affordable option.
- Activated Carbon Filter: These filters contain activated carbon, which absorbs odors and pollutants like exhaust fumes and smog. They provide better air quality than standard particulate filters.
- HEPA (High-Efficiency Particulate Air) Filter: These filters are designed to capture a higher percentage of particles, including very small ones like bacteria and mold spores. They offer the best air filtration performance, but are also the most expensive.
Consider your specific needs and budget when choosing a cabin air filter. If you live in an area with high levels of pollution or have allergies, an activated carbon or HEPA filter might be worth the investment. Be sure to check the manufacturer's specifications to ensure the filter you choose is compatible with your 2013 Nissan Altima.
Maintenance Schedule
It's generally recommended to replace your cabin air filter every 12,000 to 15,000 miles, or once a year, whichever comes first. However, if you drive in dusty or polluted conditions, you may need to replace it more frequently. A clogged cabin air filter can reduce airflow to your HVAC system, making it less efficient and potentially causing damage. It can also contribute to unpleasant odors inside your vehicle.
Regularly checking your cabin air filter is a good habit. You can visually inspect it for dirt and debris. If it looks dirty, even before the recommended replacement interval, it's a good idea to replace it. A clean cabin air filter contributes to a healthier and more comfortable driving experience.
So there you have it! Changing your cabin air filter on a 2013 Nissan Altima is a simple, cost-effective way to improve your car's air quality and maintain your HVAC system's performance. Good luck, and happy wrenching!