Nissan Murano Headlight Bulb Replacement
Nissan Murano Headlight Bulb Replacement: A Comprehensive Guide
Replacing a headlight bulb in your Nissan Murano is a common maintenance task that can often be performed at home, saving you time and money compared to a visit to a mechanic. This guide provides a step-by-step walkthrough of the process, along with essential tips and considerations to ensure a safe and successful Nissan Murano headlight bulb replacement.
Why Replace Your Murano's Headlight Bulb?
A burnt-out headlight is not only a safety hazard, reducing visibility during nighttime driving and inclement weather, but also a legal issue. Driving with a non-functional headlight can result in a ticket. Beyond these immediate concerns, replacing a failing headlight bulb promptly prevents potential issues with the electrical system. Addressing a headlight issue early can save you from more costly repairs down the line.
Dimming headlights are also a sign that replacement is imminent. Don't wait for the bulb to completely fail. Replacing both headlights at the same time is generally recommended, even if only one has burned out. This ensures consistent brightness and color, avoiding a mismatched appearance and preventing the other bulb from failing shortly after. Think of it like replacing tires – you usually do them in pairs.
Gathering Your Tools and Supplies
Before you begin, gather the necessary tools and supplies. This will streamline the replacement process and prevent frustration. Here's what you'll need:
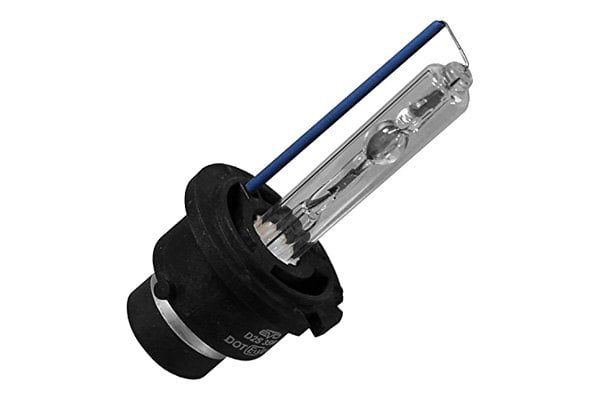
- New Headlight Bulbs: Consult your Nissan Murano's owner's manual to determine the correct bulb type. Common types include halogen, HID (High-Intensity Discharge), and LED. Ensure you purchase the correct wattage and voltage to avoid electrical problems.
- Gloves: Wearing gloves prevents skin oils from contaminating the new bulb. Oils can create hot spots on the bulb, significantly shortening its lifespan.
- Screwdriver or Socket Set: Depending on the year and model of your Murano, you may need a screwdriver or socket set to remove any retaining clips or screws holding the headlight assembly in place.
- Pliers (Optional): Pliers can be helpful for removing stubborn connectors or clips.
- Work Light or Flashlight: Adequate lighting is essential for a clear view of the work area.
- Safety Glasses: Protect your eyes from debris.
Finding the Correct Headlight Bulb for Your Nissan Murano
It's crucial to use the correct type of headlight bulb for your Murano. Using the wrong bulb can damage the electrical system, melt the headlight housing, or result in insufficient illumination. There are several ways to find the right bulb:
- Owner's Manual: Your owner's manual contains detailed specifications for all replacement parts, including headlight bulbs.
- Online Bulb Finders: Most auto parts retailers have online bulb finders. Simply enter your vehicle's year, make, and model, and the finder will provide a list of compatible bulbs.
- Auto Parts Store: Visit your local auto parts store and ask for assistance. A knowledgeable salesperson can help you identify the correct bulb based on your vehicle's information.
- Original Bulb: If possible, remove the old bulb and check the markings on its base. These markings usually indicate the bulb type and wattage.
Step-by-Step Headlight Bulb Replacement Guide
Now that you have your tools and supplies, follow these steps to replace your Nissan Murano's headlight bulb:
- Park and Prepare: Park your Murano on a level surface, turn off the engine, and engage the parking brake. Allow the engine to cool down completely before beginning.
- Access the Headlight Assembly: Open the hood and locate the headlight assembly on the side with the burnt-out bulb. The location of the assembly may vary slightly depending on the model year. Consult your owner's manual for specific instructions.
- Disconnect the Electrical Connector: Locate the electrical connector attached to the back of the headlight bulb. Gently squeeze the connector's release tab and pull it straight back to disconnect it. Do not pull on the wires.
- Remove the Bulb Retaining Mechanism: The headlight bulb is usually held in place by a retaining clip, spring, or rotating locking ring. Carefully release the retaining mechanism. This may involve pressing down on a clip and moving it to the side, or rotating a locking ring counterclockwise. The exact method will depend on your Murano's model year.
- Remove the Old Bulb: Once the retaining mechanism is released, carefully pull the old bulb straight out of the headlight assembly. Avoid touching the glass portion of the bulb.
- Install the New Bulb: Align the new bulb with the opening in the headlight assembly. Most bulbs have a specific orientation to ensure proper fit. Gently push the bulb into place until it is fully seated. Avoid touching the glass of the new bulb. If you accidentally touch it, clean it with rubbing alcohol and a clean cloth.
- Secure the Bulb Retaining Mechanism: Reinstall the retaining clip, spring, or locking ring to secure the new bulb in place. Ensure it is properly secured to prevent the bulb from coming loose.
- Reconnect the Electrical Connector: Reconnect the electrical connector to the back of the headlight bulb. Ensure it clicks into place securely.
- Test the Headlight: Turn on the headlights to verify that the new bulb is working correctly.
- Repeat for the Other Side (Recommended): If you haven't already, replace the headlight bulb on the other side as well. This ensures consistent brightness and color.
- Reinstall the Headlight Assembly (If Removed): If you had to remove the entire headlight assembly to access the bulb, carefully reinstall it, securing it with the screws or clips you removed earlier.
Troubleshooting Common Issues
While replacing a headlight bulb is generally straightforward, you may encounter some common issues:
- Bulb Not Lighting: Double-check the electrical connector to ensure it is securely attached. Also, verify that the new bulb is the correct type and wattage. If the bulb still doesn't light, check the headlight fuse.
- Difficulty Removing the Retaining Mechanism: Some retaining mechanisms can be tricky to release. Consult your owner's manual or search for online videos for specific instructions for your Murano's model year.
- Bulb Not Seating Properly: Ensure the bulb is aligned correctly with the opening in the headlight assembly. Do not force the bulb into place.
- Moisture in the Headlight Assembly: If you notice moisture inside the headlight assembly after replacing the bulb, check the seal around the bulb socket. The seal may be damaged or improperly installed.
Safety Precautions
Safety should always be your top priority when working on your vehicle. Here are some important safety precautions to keep in mind:
- Disconnect the Battery (Optional): While not always necessary, disconnecting the negative terminal of the battery can provide an extra layer of safety.
- Wear Safety Glasses: Protect your eyes from debris and potential hazards.
- Wear Gloves: Prevent skin oils from contaminating the new bulb and protect your hands from sharp edges.
- Allow the Engine to Cool Down: Avoid working on the engine while it is hot.
- Work in a Well-Lit Area: Adequate lighting is essential for a clear view of the work area.
- Dispose of Old Bulbs Properly: Headlight bulbs may contain hazardous materials. Dispose of them according to local regulations.
When to Seek Professional Help
While most Nissan Murano headlight bulb replacements can be done at home, there are situations where seeking professional help is recommended:
- Difficulty Accessing the Headlight Assembly: If you are unable to easily access the headlight assembly, it may be best to have a mechanic perform the replacement.
- Electrical Problems: If you suspect an electrical problem with your headlights, such as a blown fuse or faulty wiring, consult a qualified electrician.
- Damaged Headlight Assembly: If the headlight assembly is damaged, it may need to be replaced by a professional.
- Lack of Confidence: If you are not comfortable performing the replacement yourself, it is always best to err on the side of caution and seek professional assistance.
By following these steps and taking the necessary precautions, you can successfully replace your Nissan Murano headlight bulb and ensure safe driving conditions. Remember to consult your owner's manual for specific instructions and to always prioritize safety.