Nissan Murano Remote Start
So, you're thinking about adding remote start to your Nissan Murano, or maybe you're troubleshooting an existing system? Excellent choice. It's a fantastic convenience, especially during those scorching summers or frigid winters. We're going to dive deep into the technical aspects, covering everything from the factory system to aftermarket options, and how to diagnose common issues. Consider this your comprehensive guide, but remember, safety first! Always disconnect the battery before working on electrical components.
Understanding the Factory Nissan Murano Remote Start System
Nissan offers remote start as a factory option on many Murano trims. This system is deeply integrated into the vehicle's Body Control Module (BCM) and Engine Control Module (ECM). The BCM manages various electronic functions, including power windows, door locks, and, crucially, remote start functionality. The ECM, of course, controls the engine. When you activate remote start, the BCM sends a signal to the ECM, which then initiates the engine start sequence, provided all safety parameters are met (e.g., the transmission is in park, the hood is closed).
Key Components of the Factory System
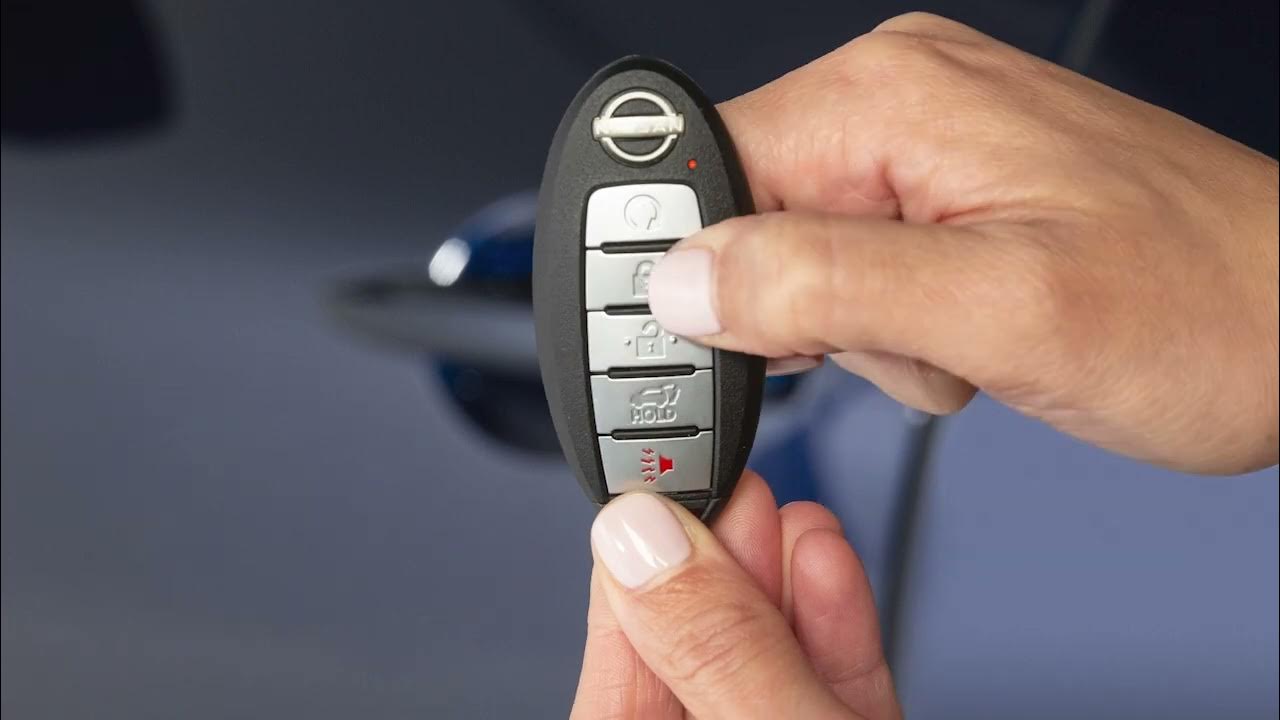
- Key Fob: This is your primary interface. The Nissan Intelligent Key fobs often have a dedicated remote start button, usually marked with a circular arrow icon.
- Antenna: This receives the signal from the key fob. It's typically located in the headliner or rear window area.
- BCM (Body Control Module): The brains of the operation, processing the remote start request and coordinating with other modules.
- ECM (Engine Control Module): Responsible for actually starting the engine based on the BCM's commands.
- Hood Switch: A safety feature. If the hood is open, remote start is disabled to prevent accidental operation during maintenance.
- Brake Pedal Switch: Another safety feature. The remote start system will shut down if the brake pedal is depressed.
- Security System Integration: The remote start is tied into the vehicle's immobilizer system to prevent theft.
The factory system is designed for seamless integration. That means it uses the existing CAN (Controller Area Network) bus to communicate between the different modules. The CAN bus is like a digital highway that allows various components in your car to talk to each other. This is important to know because any aftermarket system needs to properly interface with the CAN bus to avoid conflicts and errors.
Aftermarket Remote Start Systems: Exploring Your Options
If your Murano didn't come with factory remote start, or you're looking for extended range or more features, an aftermarket system is the way to go. There are two main types:
1. Standalone Remote Start Systems
These are self-contained systems that operate independently of the vehicle's factory electronics. They typically come with their own key fobs and wiring harnesses. The advantage is often cost, but the disadvantage is usually limited integration with the vehicle's existing systems. They generally require more extensive wiring and can be more difficult to install cleanly.
2. CAN Bus Interface Systems
These systems are designed to communicate with the vehicle's CAN bus. They intercept and interpret signals, allowing them to integrate more seamlessly with the car's existing electronics. This often means using the factory key fob for remote start (pressing the lock button a specific number of times), and improved integration with the security system and other vehicle functions.
When choosing an aftermarket system, consider the following:
- Range: How far away can you be and still start the car?
- Features: Do you want smartphone control, two-way communication (confirmation that the car started), or security system integration?
- Compatibility: Make sure the system is compatible with your Murano's year and trim level. Check the manufacturer's compatibility guide.
- Installation: Are you comfortable with wiring and accessing the vehicle's electrical system? If not, professional installation is highly recommended.
- Bypass Module: Most newer vehicles require a bypass module to temporarily disable the immobilizer system during remote start. This module allows the aftermarket system to start the car without triggering the anti-theft system.
Important Safety Tip: Always choose a reputable brand and follow the manufacturer's installation instructions carefully. Improper installation can damage your vehicle's electronics or create a safety hazard.
Installation Considerations and Wiring
Whether you're installing a factory or aftermarket system, proper wiring is crucial. Here are some key areas to focus on:
Essential Wiring Connections:
- Power (12V+ Constant): This provides the main power source for the remote start system. Locate a reliable 12V+ constant source, often found at the battery or a major fuse block. Use a multimeter to confirm the voltage is consistent.
- Ground: A solid ground connection is essential for proper operation. Connect to a clean, unpainted metal surface on the vehicle's chassis.
- Ignition Wire: This wire senses when the ignition is turned on. Connect to a wire that provides 12V+ only when the ignition is in the ON or START position.
- Starter Wire: This wire activates the starter motor. Be extremely careful when working with this wire, as it carries a high current.
- Accessory Wire: Powers accessories like the radio and climate control system during remote start.
- CAN Bus Connections (High and Low): If using a CAN bus interface system, you'll need to connect to the vehicle's CAN bus wires. Refer to the vehicle's wiring diagram and the remote start system's instructions for the correct locations. These are typically twisted pair wires.
- Hood Pin Switch Wire: Connect this to the hood pin switch to ensure remote start is disabled when the hood is open.
- Brake Switch Wire: Connect to the brake switch wire to ensure the engine shuts off when the brake pedal is pressed during remote start operation.
Tools You'll Need:
- Multimeter: For testing voltage and continuity. An absolute must.
- Wiring Diagram: Essential for identifying the correct wires in your Murano. You can often find these online or through a repair manual.
- Wire Strippers and Crimpers: For preparing and connecting wires.
- Soldering Iron and Solder (Optional): For creating more secure and reliable connections.
- Electrical Tape or Heat Shrink Tubing: For insulating connections.
- Zip Ties: For securing wires and keeping the installation neat.
- Panel Removal Tools: To avoid damaging interior trim panels.
Pro Tip: Always use proper wiring techniques, such as soldering and heat shrinking connections. Avoid using wire taps, as they can damage wires and cause reliability issues. Label all wires clearly to avoid confusion during installation and troubleshooting.
Troubleshooting Common Remote Start Problems
Remote start not working? Don't panic. Here's a systematic approach to troubleshooting:
1. Check the Basics:
- Battery Voltage: Make sure your car battery is fully charged. A weak battery can prevent remote start from working.
- Hood Switch: Ensure the hood is fully closed and the hood switch is functioning correctly. You can test the switch with a multimeter.
- Brake Pedal Switch: Verify that the brake pedal switch is not stuck or malfunctioning.
- Check Engine Light (CEL): If the CEL is on, it can disable remote start. Diagnose and resolve any underlying engine problems. Use an OBD-II scanner to read the trouble codes.
- Key Fob Battery: Replace the key fob battery to rule out a weak signal.
2. System-Specific Issues:
- Aftermarket System Programming: Ensure the system is properly programmed for your vehicle. Refer to the manufacturer's instructions.
- CAN Bus Communication Errors: If you're using a CAN bus interface system, check for any CAN bus communication errors. This may require a more advanced diagnostic tool.
- Bypass Module Problems: If the bypass module is not functioning correctly, it can prevent the remote start from working. Check the module's wiring and programming.
- Wiring Connections: Inspect all wiring connections for looseness, corrosion, or damage.
3. Diagnostic Tools:
- Multimeter: Essential for testing voltage, continuity, and resistance.
- OBD-II Scanner: For reading diagnostic trouble codes (DTCs).
- CAN Bus Analyzer (Advanced): For diagnosing CAN bus communication issues. This is typically only needed for complex problems.
Troubleshooting Tip: Start with the simplest solutions first and work your way up to the more complex ones. Document your troubleshooting steps and results to help you identify the root cause of the problem.
Advanced Topics: Security and Reprogramming
Modern vehicle security systems are sophisticated. When adding or modifying a remote start system, it's crucial to understand how it interacts with the vehicle's immobilizer and anti-theft features. If you are replacing the factory Remote Start system, you need to ensure that the existing security configurations for the car remain intact. In some cases, this might require reflashing the ECM or BCM by a certified technician.
Some aftermarket systems allow you to reprogram certain parameters, such as run time, temperature thresholds, and security features. However, be cautious when making changes, as incorrect settings can lead to problems. Always refer to the manufacturer's instructions and consult with a qualified technician if you're unsure.
Adding remote start to your Nissan Murano is a worthwhile project that can greatly enhance your driving experience. By understanding the technical aspects and following the proper procedures, you can ensure a successful and reliable installation. Remember to prioritize safety, use quality components, and seek professional help when needed. Happy remote starting!