Oil Change 2014 Nissan Altima
The 2014 Nissan Altima, known for its reliability and fuel efficiency, requires regular maintenance to keep it running smoothly. One of the most crucial maintenance tasks is the oil change. This article provides a practical guide for both car owners and mechanics on performing oil changes on a 2014 Nissan Altima, focusing on maintenance, troubleshooting, and real-world issues.
Oil Change Basics for the 2014 Nissan Altima
The 2014 Nissan Altima typically uses 0W-20 synthetic oil, although it's always best to consult your owner's manual for the specific recommendation for your engine (either the 2.5L 4-cylinder or the 3.5L V6). Using the correct oil type and viscosity is vital for optimal engine performance and longevity.
Recommended oil change interval: While Nissan *recommends* every 7,500 miles under normal driving conditions, consider shortening that interval to 5,000 miles, especially if you experience any of the symptoms described below or frequently drive in harsh conditions (stop-and-go traffic, extreme temperatures, towing).
Tools and Materials Required:
- New oil (typically 4.6 quarts for the 2.5L engine, 5.1 for the 3.5L V6 - verify in your owner's manual!)
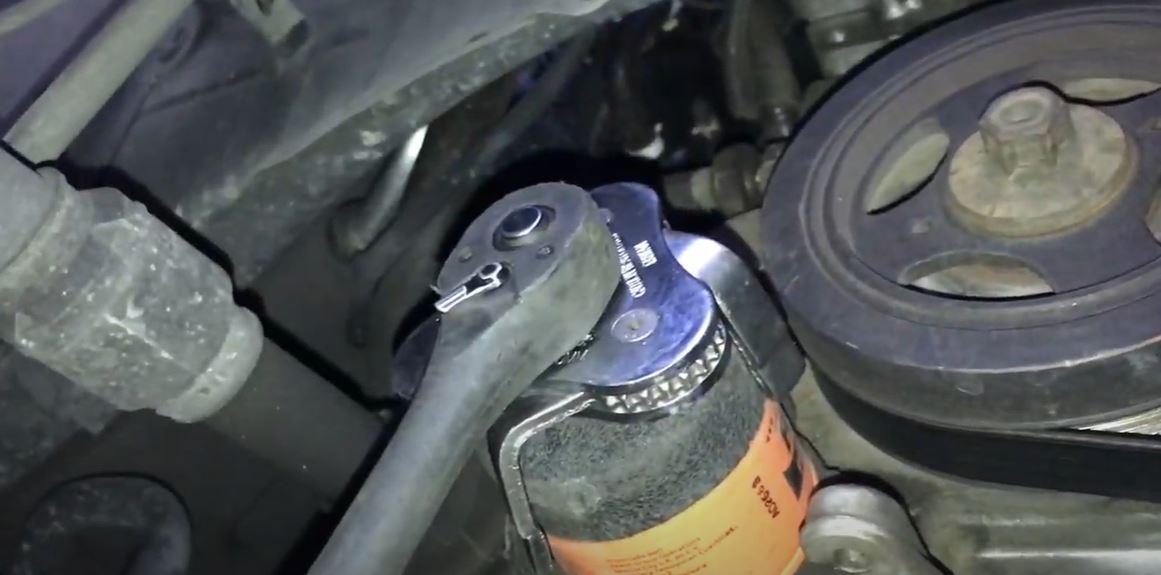
- New oil filter (ensure it's the correct one for your Altima)
- Wrench for the oil drain plug (usually 14mm or 19mm – check your specific vehicle)
- Oil filter wrench
- Oil drain pan
- Funnel
- Gloves
- Rags or shop towels
- Jack and jack stands (or ramps)
- Wheel chocks
Step-by-Step Oil Change Procedure
- Prepare the Vehicle: Park the Altima on a level surface. Engage the parking brake and use wheel chocks behind the rear wheels for safety.
- Raise the Vehicle: Use a jack to lift the front of the car and securely place it on jack stands. Never work under a vehicle supported only by a jack. Ramps can also be used if you have them and there is enough clearance.
- Locate the Oil Drain Plug: The oil drain plug is located on the bottom of the oil pan. It's a bolt (usually 14mm or 19mm) that's easily identifiable.
- Position the Drain Pan: Place the drain pan directly under the oil drain plug.
- Remove the Oil Drain Plug: Using the correct wrench, carefully loosen and remove the drain plug. Be prepared for the oil to flow out quickly. Let the oil drain completely (usually 15-20 minutes).
- Remove the Old Oil Filter: The oil filter is usually located near the front of the engine. Place the drain pan underneath the filter, as some oil will spill out when you remove it. Use the oil filter wrench to loosen and remove the old filter.
- Prepare the New Oil Filter: Lightly lubricate the rubber gasket on the new oil filter with fresh oil. This ensures a good seal.
- Install the New Oil Filter: Screw the new oil filter onto the engine by hand until the gasket makes contact. Then, tighten it an additional ¾ to 1 full turn, according to the instructions on the filter. Do not overtighten!
- Reinstall the Oil Drain Plug: Clean the oil drain plug and inspect the drain plug washer (gasket). If the washer is damaged or worn, replace it with a new one. Reinstall the drain plug and tighten it to the manufacturer's specified torque (check your repair manual for the correct torque). Do not overtighten! Overtightening can damage the oil pan.
- Lower the Vehicle: Carefully lower the vehicle back to the ground.
- Add New Oil: Locate the oil fill cap on the engine. Remove the cap and insert a funnel. Pour in the correct amount of new oil, as specified in your owner's manual (around 4.6 quarts for the 2.5L engine, 5.1 for the 3.5L V6 - verify!).
- Check the Oil Level: Replace the oil fill cap. Start the engine and let it run for a few minutes. Check for leaks around the oil drain plug and oil filter. Turn off the engine and wait a few minutes for the oil to settle. Use the dipstick to check the oil level. Add more oil if needed to reach the "full" mark.
- Reset the Oil Life Monitoring System: Consult your owner's manual for instructions on how to reset the oil life monitoring system. This is crucial for accurate maintenance tracking.
- Dispose of Used Oil Properly: Take the used oil and oil filter to a recycling center or auto parts store for proper disposal. Never pour used oil down the drain or into the ground.
Troubleshooting and Real-World Issues
Symptom: Low Oil Pressure Warning Light
Cause:
- Low oil level
- Faulty oil pressure sensor
- Clogged oil pump
- Excessive engine wear (leading to reduced oil pressure)
- Immediately check the oil level and add oil if needed.
- If the oil level is normal, have the oil pressure sensor tested.
- If the sensor is functioning correctly, have a mechanic check the oil pump and engine for wear. A clogged oil pump will prevent oil from reaching critical engine components.
Symptom: Engine Knocking or Ticking Noise
Cause:
- Low oil level
- Incorrect oil viscosity
- Worn engine bearings
- Oil sludge buildup
- Check the oil level and add oil if needed.
- Ensure you are using the correct oil viscosity (0W-20 is typically recommended).
- If the noise persists, have a mechanic inspect the engine for worn bearings or oil sludge. An engine flush might be necessary if sludge is present. Severe knocking requires immediate professional attention to prevent catastrophic engine damage.
Symptom: Excessive Oil Consumption
Cause:
- Worn piston rings
- Leaking valve stem seals
- External oil leaks
- Inspect the engine for external oil leaks (around the valve cover gasket, oil pan gasket, or rear main seal).
- If no external leaks are found, have a mechanic perform a compression test to check the condition of the piston rings.
- Worn valve stem seals can allow oil to leak into the combustion chamber. A leak-down test can help identify this.
- Consider using a high-mileage oil, which contains seal conditioners that can help reduce leaks. However, this is a temporary fix and doesn't address the underlying problem.
Symptom: Oil Leaks
Cause:
- Worn or cracked valve cover gasket
- Damaged oil pan gasket
- Leaking oil filter seal
- Loose oil drain plug
- Inspect the engine for visible oil leaks. Clean the area around the suspected leak to help pinpoint the source.
- Replace the valve cover gasket if it is cracked or brittle.
- Replace the oil pan gasket if it is leaking.
- Ensure the oil filter is properly tightened and the seal is not damaged.
- Make sure the oil drain plug is tightened to the correct torque and the drain plug washer is in good condition.
Symptom: Difficulty Removing the Oil Filter
Cause:
- Over-tightened oil filter during previous installation.
- Corrosion or rust buildup on the filter and engine mating surfaces.
- Incorrect oil filter wrench size.
- Ensure you are using the correct size oil filter wrench. Some wrenches are universal, but specific sizes provide a better grip.
- Try tapping the filter wrench with a hammer to help loosen the filter. Be careful not to damage the wrench or the filter.
- Use a rubber strap wrench for a better grip if a traditional wrench is slipping.
- As a last resort, carefully puncture the filter with a long screwdriver and use it as leverage to twist the filter off. Be extremely cautious as this can be messy and potentially dangerous.
- Apply anti-seize compound to the threads of the new oil filter during installation to prevent future seizing.
Symptom: Stripped Oil Drain Plug
Cause:
- Over-tightening the oil drain plug in the past.
- Using the wrong size wrench, damaging the corners of the plug.
- If the threads are only slightly damaged, try using a thread repair kit to restore the threads.
- Oversized drain plugs are available that can self-tap into the existing hole, creating new threads.
- As a last resort, the oil pan may need to be replaced. This is a more involved repair, but necessary if the threads are severely damaged.
- Preventative Measure: Always use a torque wrench when tightening the drain plug to the manufacturer's specification. Never over-tighten!
Keeping Your 2014 Nissan Altima in Top Condition
- Follow the recommended oil change intervals: Regular oil changes are the single most important maintenance task you can perform.
- Use the correct oil and filter: Consult your owner's manual for the specific recommendations.
- Inspect your car regularly: Check the fluid levels (oil, coolant, brake fluid, power steering fluid), tire pressure, and condition of belts and hoses.
- Address minor problems promptly: Don't ignore small issues. Addressing them early can prevent them from becoming major problems.
- Keep your car clean: Regular washing and waxing can protect the paint and prevent rust.
- Listen to your car: Pay attention to any unusual noises or vibrations.
- Keep detailed maintenance records: This will help you track your car's maintenance history and identify potential problems early on.
By following these tips, you can help keep your 2014 Nissan Altima running smoothly and reliably for years to come. Regular maintenance is an investment in the longevity and performance of your vehicle.