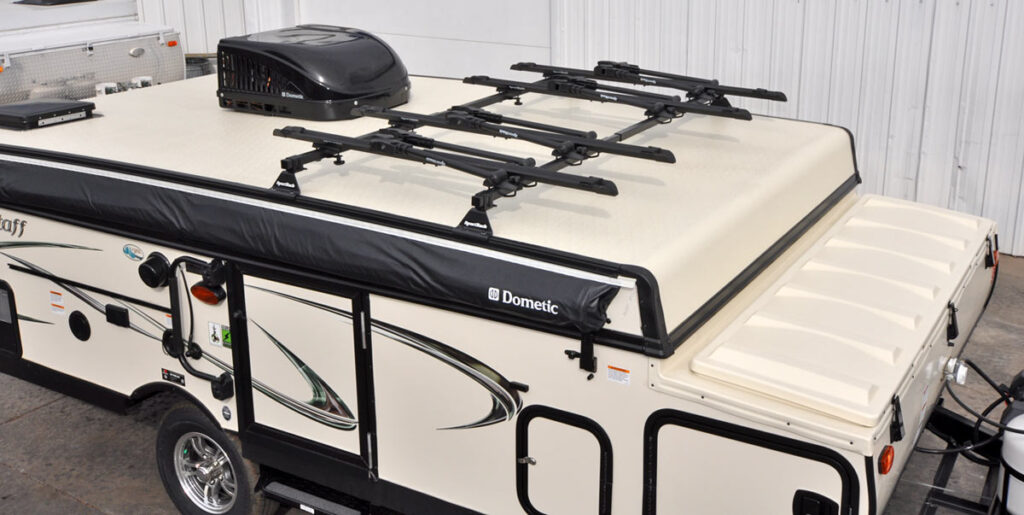
Pop Up Camper With Roof Rack
Pop-up campers with roof racks are a fantastic way to expand your vehicle's carrying capacity, whether you're hauling extra camping gear, kayaks, or bikes. However, integrating a roof rack with a pop-up camper introduces unique maintenance and troubleshooting challenges that both car owners and mechanics need to understand. This article delves into these issues, offering practical advice and solutions.
Understanding the Interplay: Camper, Rack, and Vehicle
Before diving into specific problems, it's crucial to grasp how the roof rack, camper, and vehicle interact. The roof rack's weight capacity, the camper's weight, and the vehicle's roof load limit are all critical factors. Exceeding any of these limits can lead to serious structural damage, handling instability, and even accidents.
Example: A Subaru Outback is a popular choice for towing pop-up campers. While it has decent towing capacity, its roof load limit is typically around 150-200 lbs. Adding a heavy roof rack and loading it with gear can easily exceed this limit, potentially damaging the roof or affecting the car's center of gravity.
Common Problems & Solutions
1. Roof Leaks Around Mounting Points
Symptom: Water stains inside the camper, dampness around the roof rack mounting points, musty odor.
Cause: The most frequent culprit is improper sealing or degradation of the sealant around the roof rack mounting hardware. Vibrations and weather exposure contribute to sealant breakdown.
Solution:
a. Inspection: Carefully inspect the sealant around each mounting point for cracks, gaps, or peeling. Use a bright light and a magnifying glass for a thorough examination.
b. Removal: If the sealant is damaged, carefully remove the old sealant using a plastic scraper or a specialized sealant removal tool. Avoid using metal tools, which can scratch the camper's roof.
c. Cleaning: Clean the area thoroughly with a solvent like isopropyl alcohol to remove any residue. Ensure the surface is completely dry before applying new sealant.
d. Resealing: Apply a high-quality, flexible sealant specifically designed for RVs and campers. Marine-grade sealant is also a good option due to its superior weather resistance. Apply the sealant generously around the mounting points, ensuring complete coverage. Smooth the sealant with your finger or a sealant smoothing tool.
e. Retightening: After the sealant has cured according to the manufacturer's instructions, carefully retighten the mounting hardware to the specified torque. Overtightening can damage the roof or strip the threads.
2. Rack Loosening and Vibration
Symptom: Rattling noises from the roof rack, visible movement of the rack while driving, difficulty tightening mounting bolts.
Cause: Vibration is a major enemy of roof racks. Over time, it can loosen mounting hardware and cause the rack to shift. Improper installation or use of incorrect hardware can also contribute to this problem.
Solution:
a. Inspection: Regularly inspect all mounting hardware for tightness. Check for stripped threads or damaged bolts.
b. Retightening: Retighten all bolts to the manufacturer's specified torque. Use a torque wrench to ensure proper tightness. Be careful not to overtighten, as this can damage the roof or strip the threads.
c. Threadlocker: Apply a threadlocker compound, such as Loctite, to the bolt threads to prevent them from loosening due to vibration. Choose a medium-strength threadlocker that can be removed if necessary.
d. Hardware Replacement: If any bolts or nuts are damaged, replace them immediately with high-quality replacements that meet the manufacturer's specifications.
e. Rack Padding: Consider adding padding or rubber shims between the rack and the camper roof to dampen vibrations and prevent chafing.
3. Weight Distribution Issues
Symptom: Unstable handling, swaying while driving, increased fuel consumption, uneven tire wear.
Cause: Improper weight distribution is a common issue when using roof racks on pop-up campers. Concentrating too much weight on the roof can raise the vehicle's center of gravity and make it more susceptible to swaying. Uneven weight distribution can also cause handling problems and tire wear.
Solution:
a. Weight Limits: Always adhere to the vehicle's roof load limit and the roof rack's weight capacity. Consult the vehicle's owner's manual and the roof rack manufacturer's instructions for specific weight limits.
b. Even Distribution: Distribute the weight evenly across the roof rack. Place heavier items in the center of the rack and lighter items towards the edges.
c. Lower Center of Gravity: Pack heavier items inside the camper or vehicle whenever possible to lower the center of gravity. This will improve handling and stability.
d. Professional Assessment: If you're unsure about weight distribution, consult a professional mechanic or RV technician for advice.
e. Suspension Upgrades: For vehicles that frequently carry heavy loads, consider upgrading the suspension with heavier-duty springs or shocks to improve stability and handling.
4. Damage to the Camper Roof
Symptom: Dents, cracks, or scratches on the camper roof around the roof rack mounting points. Water leaks.
Cause: Overtightening mounting hardware, using incorrect mounting hardware, or exceeding the roof load limit can damage the camper roof.
Solution:
a. Prevention: The best solution is prevention. Always use the correct mounting hardware and torque specifications. Avoid overtightening the bolts.
b. Repair: Minor dents and scratches can often be repaired with fiberglass or epoxy repair kits. Follow the manufacturer's instructions carefully.
c. Professional Repair: For more serious damage, such as cracks or large dents, consult a professional RV repair shop. They have the expertise and tools to properly repair the roof and ensure it is watertight.
d. Reinforcement: If the roof is prone to damage, consider adding reinforcement plates or supports to distribute the load more evenly. Consult a professional for advice on reinforcement options.
5. Corrosion
Symptom: Rust or corrosion on the roof rack or mounting hardware, particularly in coastal areas or climates with high humidity.
Cause: Exposure to moisture, salt, and other corrosive elements can cause rust and corrosion on the roof rack and mounting hardware. This can weaken the rack and make it more susceptible to failure.
Solution:
a. Regular Cleaning: Regularly clean the roof rack and mounting hardware with soap and water to remove dirt, salt, and other contaminants.
b. Corrosion Inhibitor: Apply a corrosion inhibitor to the metal surfaces to protect them from rust. WD-40 or similar products can be used for this purpose.
c. Paint Touch-Up: If the paint on the roof rack is chipped or scratched, touch it up with rust-resistant paint to prevent corrosion.
d. Hardware Replacement: Replace any corroded mounting hardware with stainless steel or other corrosion-resistant materials.
e. Storage: When not in use, store the roof rack in a dry place to prevent corrosion.
Real-World Examples
Ford Explorer: Owners often use Thule or Yakima roof racks. Issues include exceeding roof weight limits when carrying camping equipment, leading to suspension sag. Solution: Distribute weight inside the car and consider suspension upgrades.
Jeep Cherokee: Prone to leaks around aftermarket roof rack installations due to improper sealing. Solution: Use high-quality marine sealant and ensure proper torque on mounting bolts.
Maintaining Your Vehicle and Camper in Top Condition
Beyond the specific issues related to pop-up campers with roof racks, regular vehicle maintenance is crucial for safe and reliable travel. Here are some key tips:
- Regular Inspections: Inspect your vehicle and camper regularly for any signs of damage or wear. Pay close attention to the roof, tires, brakes, and suspension.
- Fluid Checks: Check and top off all fluids regularly, including engine oil, coolant, brake fluid, and transmission fluid.
- Tire Maintenance: Maintain proper tire pressure and rotate your tires regularly to ensure even wear. Inspect your tires for signs of damage or wear and replace them when necessary.
- Brake Maintenance: Inspect your brakes regularly and replace brake pads or shoes as needed. Have your brakes professionally serviced if you notice any unusual noises or performance issues.
- Suspension Maintenance: Inspect your suspension regularly for any signs of wear or damage. Replace worn shocks, struts, or springs as needed.
- Proper Storage: When storing your camper, cover it to protect it from the elements. This will help prevent damage from sun, rain, and snow.
- Professional Servicing: Schedule regular professional servicing for your vehicle and camper to ensure they are in top condition. A qualified mechanic or RV technician can identify and address potential problems before they become serious.
By understanding the specific challenges associated with pop-up campers and roof racks, and by following a regular maintenance schedule, you can ensure safe and enjoyable adventures for years to come. Always prioritize safety and consult with professionals when needed.