Rain Guards For House Windows
Are you tired of constantly wiping down your windows after every rain shower? Do you find yourself avoiding opening your windows for fresh air because you're worried about water damage or a soggy windowsill? You're not alone. Many homeowners face these frustrations, and luckily, there's a simple and effective solution: rain guards for windows.
Understanding the Problem: Rain and Your Windows
Before we dive into the solution, let's understand why rain can be such a problem for windows. Rainwater, driven by wind, can easily streak down your windows, leaving unsightly water spots and mineral deposits. Over time, this can damage the window's finish and even etch into the glass. Furthermore, rain can seep into the window frame, causing:
- Wood rot: Especially problematic for wooden window frames, leading to costly repairs.
- Mold and mildew growth: Creating an unhealthy indoor environment.
- Interior water damage: Affecting walls, paint, and flooring around the window.
Opening windows during or shortly after rain introduces even more moisture, accelerating these issues and making your home uncomfortable. This is where rain guards come in as a valuable tool for protecting your investment and improving your home's livability.
The Solution: Rain Guards to the Rescue!
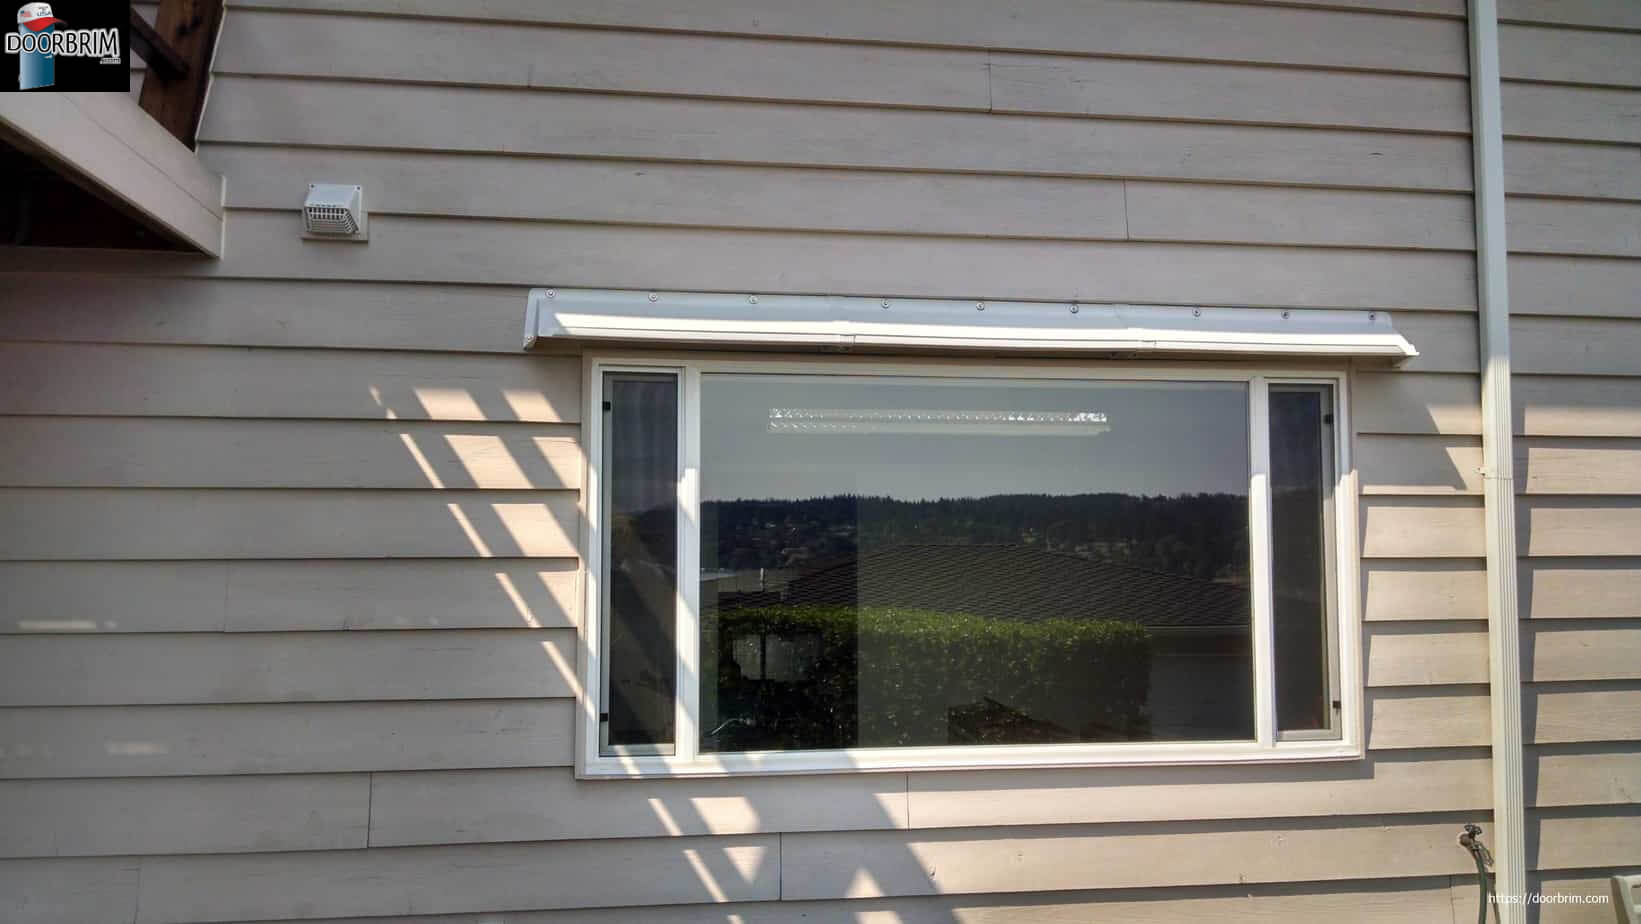
Rain guards, also known as window awnings or window visors, are designed to deflect rainwater away from your windows. They come in various shapes, sizes, and materials, but their primary function is the same: to provide a physical barrier against the elements. They're typically installed above the window, creating an overhang that prevents rain from directly hitting the glass and frame.
Benefits of Installing Rain Guards:
- Protection from Rain: This is the most obvious benefit. Rain guards effectively shield your windows from direct rainfall, reducing water spots, streaks, and potential water damage.
- Improved Ventilation: You can open your windows even during light rain without worrying about water pouring in. This allows for better airflow and natural ventilation, reducing the need for air conditioning and improving indoor air quality.
- Energy Savings: By blocking direct sunlight during the hottest parts of the day, rain guards can help keep your home cooler, reducing your air conditioning usage and lowering your energy bills.
- Enhanced Curb Appeal: Rain guards can add a touch of style and sophistication to your home's exterior. They come in various designs, allowing you to choose one that complements your architectural style.
- Reduced Maintenance: With less rain hitting your windows, you'll need to clean them less frequently, saving you time and effort.
Choosing the Right Rain Guards
When selecting rain guards, consider the following factors:
- Material: Common materials include aluminum, polycarbonate, acrylic, and fabric. Aluminum is durable and weather-resistant, while polycarbonate and acrylic are lightweight and transparent. Fabric awnings offer a classic look but may require more maintenance.
- Size: Choose a rain guard that is wide enough to adequately cover your window and extend slightly beyond the frame on each side. The projection (how far it extends outward) should be sufficient to effectively deflect rainwater.
- Style: Select a style that complements your home's architecture. Consider the color, shape, and overall design.
- Installation: Some rain guards are easy to install yourself, while others may require professional installation.
- Durability: Look for rain guards that are built to withstand the elements, including strong winds and heavy rain.
Installation: DIY vs. Professional
Installing rain guards can be a DIY project, especially for smaller, lighter models. However, for larger or more complex installations, professional assistance is recommended. Here's a breakdown:
DIY Installation:
Tools you'll likely need:
- Drill with appropriate drill bits
- Screwdriver
- Measuring tape
- Level
- Pencil
- Ladder (if necessary)
- Safety glasses
Steps:
- Read the manufacturer's instructions carefully.
- Measure and mark the location of the mounting brackets. Ensure they are level and properly aligned.
- Drill pilot holes. Use a drill bit that is slightly smaller than the screws you will be using.
- Attach the mounting brackets to the wall. Use appropriate screws for your wall type (e.g., wood screws for wood siding, masonry screws for brick or concrete).
- Attach the rain guard to the mounting brackets. Securely tighten all screws.
- Check for stability and alignment. Make sure the rain guard is level and securely attached.
Important Considerations:
- Wall type: Ensure you use the correct type of screws and anchors for your wall material. Incorrect fasteners can lead to unstable installations and potential damage.
- Safety: Always use a sturdy ladder and wear safety glasses when drilling or working at heights.
- Weather: Avoid installing rain guards in windy or rainy conditions.
Professional Installation:
If you're not comfortable with DIY projects or if you have a particularly large or complex installation, hiring a professional is a good idea. A professional installer will have the necessary tools, experience, and expertise to ensure a safe and proper installation. They can also advise you on the best type of rain guard for your specific needs and home's architecture.
Cost Considerations
The cost of rain guards varies depending on the material, size, style, and installation method. DIY installations are generally less expensive, as you only need to factor in the cost of the rain guards themselves and any necessary tools. Professional installations will include labor costs, which can vary depending on the installer's rates and the complexity of the job.
Approximate Costs:
- DIY Rain Guards: $50 - $200 per window (depending on size and material).
- Professional Installation: $100 - $500 per window (including the cost of the rain guards and labor).
These are just estimates, and the actual cost may vary depending on your location and specific needs. Get quotes from multiple installers before making a decision.
Maintenance Tips
Once your rain guards are installed, proper maintenance is essential to ensure their longevity and effectiveness. Here are a few tips:
- Regular Cleaning: Clean your rain guards regularly with soap and water to remove dirt, debris, and mildew.
- Inspect for Damage: Periodically inspect your rain guards for any signs of damage, such as cracks, dents, or loose screws. Repair any damage promptly to prevent further deterioration.
- Tighten Screws: Check the screws and bolts that hold the rain guards in place and tighten them as needed.
- Winter Preparation: In areas with heavy snowfall, consider removing or reinforcing your rain guards to prevent damage from the weight of the snow.
In Conclusion
Rain guards are a worthwhile investment for any homeowner looking to protect their windows from the elements, improve ventilation, save energy, and enhance their home's curb appeal. By understanding the benefits, choosing the right rain guards, and following proper installation and maintenance procedures, you can enjoy the peace of mind that comes with knowing your windows are well-protected. Whether you choose to tackle the installation yourself or hire a professional, the long-term benefits of rain guards make them a smart and practical addition to any home.