Remove Universal Joint From Drive Shaft
So, the dreaded day has arrived. Your trusty steed is vibrating like a washing machine full of bricks, and your gut tells you (or the mechanic confirmed it with a knowing smirk) that it's the U-joint. Replacing it is a rite of passage for any serious gearhead, but before you grab the biggest hammer you can find, let's talk about getting that old U-joint out of the driveshaft. It's not a one-size-fits-all operation, and the process varies depending on your vehicle.
Understanding the U-Joint Landscape
First, let's acknowledge the diversity of U-joints and driveshafts out there. We're mainly dealing with two types of U-joint retention methods: internal clips (also known as snap rings) and external clips. The location of these clips dictates your strategy.
Model-Specific Variations: Consider these common scenarios:
- Classic American Muscle (e.g., Mustang, Camaro, Charger): Often feature driveshafts with external snap rings. These are generally easier to work with, requiring less specialized tooling.
- Japanese Imports (e.g., Miata, Supra, 240SX): Can have either internal or external snap rings, or even staked-in U-joints (we'll touch on that later). Pay close attention before you start!
- Trucks and SUVs (e.g., F-150, Silverado, Wrangler): Typically employ heavy-duty driveshafts with larger U-joints and, more often than not, external snap rings for ease of maintenance.
Internal vs. External Snap Rings: A Key Difference
Internal Snap Rings: These sit inside the yoke, holding the bearing caps in place. You'll need to compress the bearing cap inward to reveal the snap ring groove. Removal requires precision and often a specialized U-joint press.
External Snap Rings: These are located on the outside of the yoke, around the bearing cap. Removal is simpler, typically involving pliers to spread the ring and allow the cap to be pushed out.
The Tools of the Trade
Regardless of the U-joint type, you'll need some basic tools:
- Penetrating Oil: A must. Liberally apply it to the bearing caps and yokes well in advance.
- Hammer: A standard hammer will do for initial tapping.
- Sockets (various sizes): Used as drifts to press out the bearing caps. A socket slightly smaller than the bearing cap diameter is ideal.
- Snap Ring Pliers (Internal and External): Essential for removing the snap rings without damaging them or the yoke.
- U-Joint Press (Highly Recommended): Makes the process significantly easier and reduces the risk of damaging the driveshaft. Harbor Freight has affordable options, but a quality press is an investment.
- Vise: To securely hold the driveshaft while you work.
- Safety Glasses: Always protect your eyes!
Optional but Helpful:
- Heat Gun: Applying gentle heat can help loosen stubborn bearing caps.
- Slide Hammer with U-Joint Adapter: For incredibly stubborn U-joints (often seen in older vehicles).
The Removal Process: Step-by-Step
Here's a general overview of the U-joint removal process. Remember to consult your vehicle's service manual for specific instructions and torque specifications.
- Safety First: Disconnect the battery and secure the vehicle on jack stands.
- Mark the Driveshaft: Before removing the driveshaft, mark its orientation relative to the differential flange. This ensures proper balance upon reinstallation.
- Remove the Driveshaft: Disconnect the driveshaft from the differential flange and the transmission. Be prepared for some fluid spillage.
- Secure the Driveshaft: Clamp the driveshaft in a vise, taking care not to damage the tube.
- Remove the Snap Rings: Identify the type of snap rings (internal or external) and use the appropriate pliers to remove them.
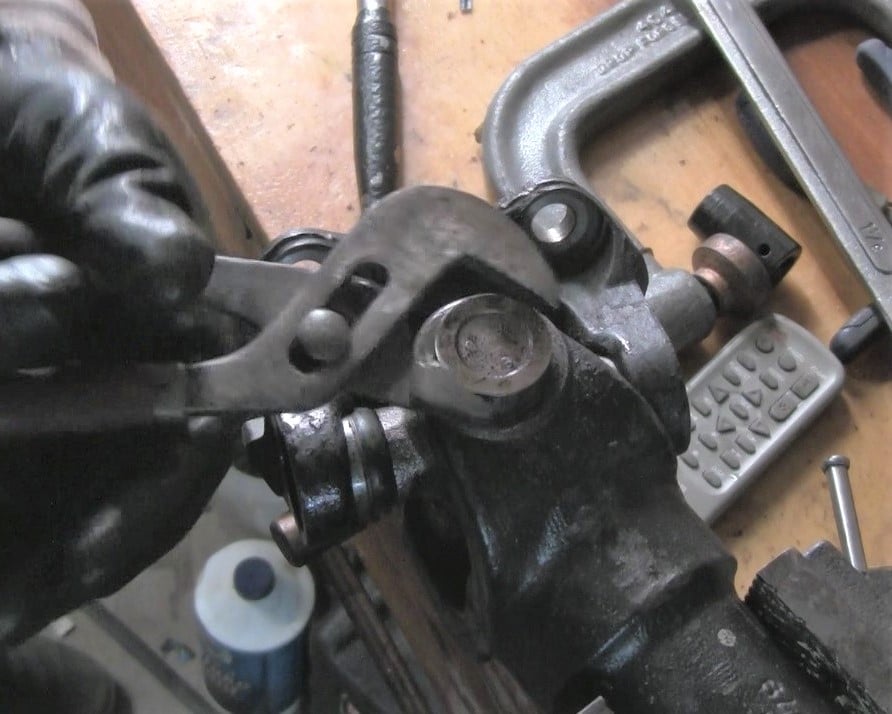
- Press Out the Bearing Caps: This is where the fun begins. Position the socket on one side of the bearing cap and use a hammer to tap it through the yoke. Alternatively, use a U-joint press for a smoother, more controlled removal. You may need to alternate tapping between both sides to get the cap to move evenly.
- Remove the Trunnion: Once you've pressed out two opposing bearing caps, you can remove the trunnion (the cross-shaped part of the U-joint).
- Repeat: Repeat steps 6 and 7 for the remaining bearing caps and trunnion arms.
- Clean Everything: Clean the yoke and bearing cap surfaces thoroughly before installing the new U-joint.
Staked-In U-Joints: A Different Beast
Some vehicles, particularly older Japanese models, use staked-in U-joints. Instead of snap rings, the yoke is dimpled or "staked" to retain the bearing caps. Removing these requires grinding down the staked areas before attempting to press out the caps. This is a more involved process and requires greater care to avoid damaging the yoke. Unless you have experience with this method, it's often best left to a professional.
Pros and Cons of DIY vs. Professional Installation
| Aspect | DIY | Professional |
|---|---|---|
| Cost | Lower (parts cost only) | Higher (labor and parts) |
| Time | More time consuming | Faster turnaround |
| Skill Required | Moderate to High | Low (for you) |
| Tool Investment | Potential for tool purchases | No tool investment |
| Risk of Damage | Higher risk of damaging driveshaft or yoke | Lower risk (generally) |
Real-World Driving Impressions (After U-Joint Replacement)
There's nothing quite like the feeling of a smooth, vibration-free ride after replacing worn U-joints. The difference can be dramatic, especially in older vehicles. Expect:
- Reduced Vibration: The most obvious improvement. No more shaking steering wheel or blurry rearview mirror.
- Smoother Acceleration: Power delivery feels more direct and responsive.
- Quieter Operation: Less driveline noise, especially at higher speeds.
- Improved Handling: In some cases, worn U-joints can affect handling, particularly during cornering. Replacing them can restore a more planted feel.
A Word on Upgrading
While you're replacing the U-joints, consider upgrading to heavy-duty units, especially if you frequently tow, off-road, or have a modified engine. Neapco and Spicer are reputable brands known for their durable U-joints.
Spec Table (Example - Not Exhaustive):
| Brand | Part Number | Material | Features | Application (Example) |
|---|---|---|---|---|
| Spicer | 5-1310X | Forged Steel | Greaseable, Heavy-Duty | Ford F-150 (various years) |
| Neapco | 1-0153 | Alloy Steel | Non-Greaseable, High Strength | Chevy Camaro (various years) |
| Mopar | 5014853AA | OEM Spec | Greaseable | Jeep Wrangler JK |
Engine/Technology Note: Higher horsepower engines and those utilizing forced induction (turbochargers or superchargers) put significantly more stress on the driveline, including the U-joints. Upgrading to stronger U-joints is highly recommended in these applications.
Torque Specs and Reassembly: When reinstalling the driveshaft, be sure to properly align the marks you made earlier. Use a torque wrench to tighten the flange bolts to the manufacturer's specifications. Always double-check your work before taking the vehicle for a test drive.
Final Thoughts: Removing a U-joint is a manageable task for the DIY enthusiast, but it requires patience, the right tools, and a healthy dose of common sense. If you're unsure about any part of the process, don't hesitate to seek professional assistance.
So, here's the fun part: greaseable or non-greaseable U-joints? Which camp are you in, and why? Let the debate begin! We know where we stand (hint: it depends on the application and how much you enjoy crawling under your car), but we're eager to hear your thoughts. Good luck, and happy wrenching!