Repair Scuffed Plastic Bumper
So, you've got a scuff on your plastic bumper? It's a rite of passage for any car owner, especially those of us who enjoy a bit of weekend wrenching. Don't despair! Repairing minor scuffs on a plastic bumper is a totally achievable DIY project. It requires patience, attention to detail, and the right materials, but the satisfaction of restoring your car's appearance is well worth the effort. This guide will walk you through the process step-by-step, providing the technical details you need while keeping it accessible for the experienced DIYer.
Understanding the Damage
Before you even think about grabbing sandpaper, it's crucial to assess the damage. Plastic bumpers, usually made from *Polypropylene (PP)* or *Thermoplastic Olefin (TPO)*, react differently to impacts. A minor scuff might just affect the surface, while a deeper gouge could compromise the integrity of the plastic. Run your fingers gently over the damaged area. Is it rough? Can you feel deep scratches? Does the plastic seem deformed? This initial assessment will determine the tools and techniques required.
Types of Scuffs and Their Solutions
Here's a breakdown of common scuff types and the recommended approach:
- Surface Scuffs: These are typically light scratches that haven't penetrated deeply into the plastic. They often appear as dull or hazy areas. These are usually easily addressed with wet sanding and polishing.
- Minor Scratches: Slightly deeper than surface scuffs, you can feel these with your fingernail, but they don't go all the way through the paint or plastic. Filling with plastic filler might be required for a perfect finish.
- Deep Gouges: These are significant indentations that have removed a considerable amount of plastic. They require plastic welding or patching to restore the bumper's original shape before any further work can begin. We won't cover plastic welding in depth here but be aware it is an option.
- Paint Transfer: Sometimes, the "scuff" is actually paint from another vehicle transferred onto your bumper. This is often the easiest to fix with specialized cleaners.
Materials and Tools
Having the right tools and materials is half the battle. Here's a comprehensive list:
- Cleaning Supplies: Automotive soap, degreaser, microfiber towels. Isopropyl alcohol is also useful for cleaning surfaces before painting.
- Sandpaper: A range of grits is essential: 320, 400, 600, 800, 1000, 1500, and 2000 grit wet/dry sandpaper.
- Sanding Block: A rubber or foam sanding block will ensure even pressure and prevent you from creating uneven surfaces.
- Plastic Filler (Bondo): A two-part epoxy-based plastic filler is necessary for filling deeper scratches or gouges. Make sure it's formulated for flexible plastics.
- Sanding Spreader/Applicator: For applying the plastic filler smoothly and evenly.
- Primer: Automotive-grade primer designed for plastics. Adhesion promoters are also available to improve primer bonding.
- Color-Matched Paint: The most critical element! Get the exact paint code for your vehicle. You can find this on a sticker located in the door jamb, glove box, or under the hood. Purchase both base coat and clear coat. Aerosol cans are fine for small repairs, but a spray gun will give a more professional finish.
- Clear Coat: Automotive-grade clear coat to protect the paint and provide a glossy finish.
- Rubbing Compound: Used to remove sanding scratches from the clear coat.
- Polishing Compound: Used to refine the finish after rubbing compound, creating a deep shine.
- Wax or Sealant: To protect the repaired area from the elements.
- Tack Cloth: Used to remove any remaining dust or debris before painting.
- Masking Tape and Paper: To protect surrounding areas from overspray.
- Safety Glasses and Gloves: Essential for protecting yourself from chemicals and debris.
- Respirator: Crucial when sanding and painting to avoid inhaling harmful particles and fumes.
Step-by-Step Repair Process
Alright, let's get to work! Follow these steps carefully for the best results:
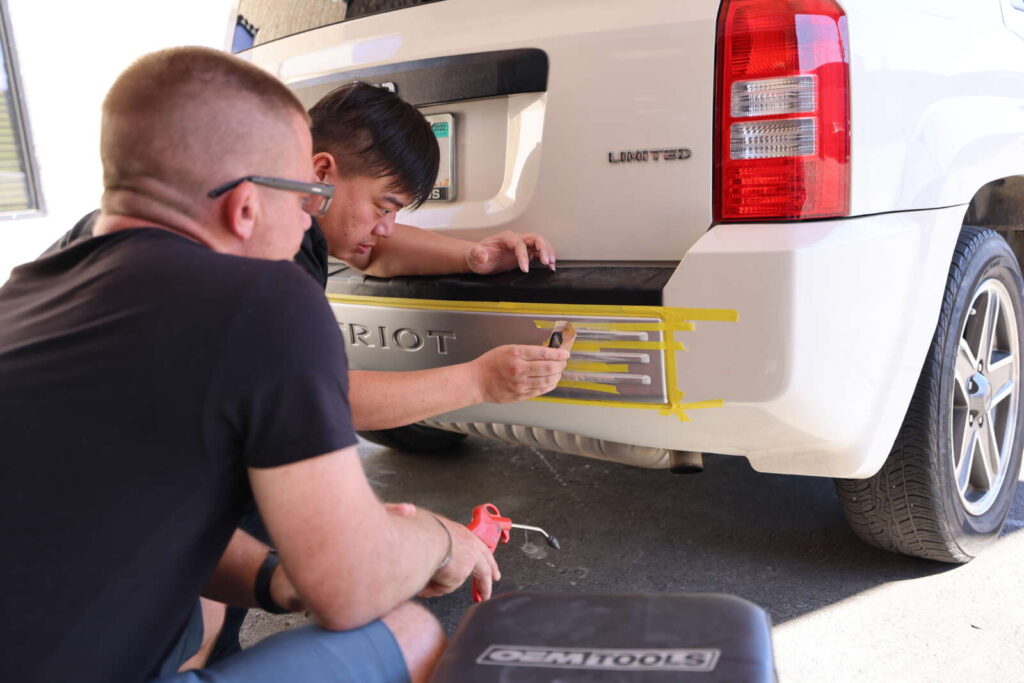
1. Cleaning and Preparation
The first step is thorough cleaning. Wash the entire bumper with automotive soap and water to remove dirt and grime. Then, use a degreaser to remove any wax, grease, or silicone. This is crucial for proper adhesion of the filler, primer, and paint. Rinse thoroughly and dry with a microfiber towel. Use the isopropyl alcohol to wipe down the scuffed area one last time, ensuring that it is completely clean and dry. Mask off the surrounding area with masking tape and paper to prevent overspray.
2. Sanding
Now comes the sanding. If it's just a surface scuff, start with 600-grit wet/dry sandpaper, used wet. Wet sanding prevents the sandpaper from clogging and reduces dust. Dip the sandpaper in water and gently sand the affected area in a circular motion, applying even pressure. Gradually move to finer grits (800, 1000, 1500, 2000) until the scuff is gone and the area is smooth. For deeper scratches, start with 320 or 400 grit to level the damage, then progress through the finer grits. The goal is to feather the edges of the damaged area so that it blends seamlessly with the surrounding paint. Remember to always use a sanding block to avoid creating uneven surfaces. Thoroughly clean the area after each sanding stage to inspect your work.
3. Applying Plastic Filler (If Necessary)
If the scuff is deep enough that you can feel it with your fingernail, you'll need to use plastic filler. Follow the manufacturer's instructions carefully for mixing the filler and hardener. Apply a thin, even layer of filler to the damaged area using a spreader. Do not apply too much at once; it's better to build up the filler in thin layers. Allow the filler to dry completely according to the manufacturer's instructions. Once dry, sand the filler smooth using progressively finer grits of sandpaper, starting with 320 or 400 and working your way up to 600. Again, use a sanding block to ensure a smooth, even surface. Feather the edges of the filler into the surrounding paint.
4. Priming
Once the surface is smooth and clean, it's time to prime. Apply several thin coats of automotive-grade plastic primer, allowing each coat to dry completely before applying the next. Primer provides a uniform surface for the paint to adhere to and helps to hide any minor imperfections. Follow the manufacturer's instructions for drying times and application techniques. After the primer is dry, lightly wet sand it with 800 or 1000 grit sandpaper to remove any imperfections and create a smooth surface for the paint. Clean the area thoroughly with a tack cloth before painting.
5. Painting
This is where patience and technique are paramount. Apply several thin coats of color-matched base coat paint, allowing each coat to dry completely before applying the next. Avoid applying too much paint at once, as this can lead to runs and drips. Use a sweeping motion and maintain a consistent distance from the surface. The goal is to achieve even coverage and a smooth, uniform finish. After the base coat is dry, apply several thin coats of clear coat, again allowing each coat to dry completely before applying the next. The clear coat protects the paint and provides a glossy finish. Again, avoid applying too much clear coat at once to prevent runs and drips. Refer to your paint's technical data sheet (TDS) for recommended dry times and application tips. Environmental factors like humidity and temperature can affect drying times.
6. Wet Sanding and Polishing the Clear Coat
After the clear coat has dried completely (usually 24-48 hours), you may notice some imperfections, such as orange peel (a textured surface). This is normal and can be corrected with wet sanding and polishing. Start by wet sanding the clear coat with 1500 or 2000 grit sandpaper, using a sanding block to ensure even pressure. The goal is to remove the orange peel and create a smooth, flat surface. Be careful not to sand through the clear coat! After wet sanding, use a rubbing compound to remove the sanding scratches. Apply the rubbing compound to a polishing pad and buff the area using a rotary or dual-action polisher. Follow the manufacturer's instructions for the rubbing compound and polisher. After rubbing compound, use a polishing compound to refine the finish and create a deep shine. Again, apply the polishing compound to a polishing pad and buff the area using a polisher.
7. Waxing and Sealing
The final step is to protect your hard work with a coat of wax or sealant. This will help to protect the paint from the elements and keep it looking its best. Apply the wax or sealant according to the manufacturer's instructions. Congratulations, you've successfully repaired your scuffed plastic bumper!
Important Considerations
- Color Matching: Getting an exact color match is crucial. If you're unsure about the paint code, consult with an automotive paint supplier. They can use a spectrophotometer to analyze your car's paint and provide a perfect match.
- Environmental Conditions: Painting in a well-ventilated area is essential. Avoid painting in direct sunlight or in humid conditions, as this can affect the drying process.
- Practice: Before tackling your bumper, consider practicing on a scrap piece of plastic to get a feel for the sanding, filling, and painting techniques.
- Safety: Always wear safety glasses, gloves, and a respirator when sanding and painting. Work in a well-ventilated area.
Repairing a scuffed plastic bumper takes time and patience, but the results are worth the effort. By following these steps and paying attention to detail, you can restore your car's appearance and save yourself a trip to the body shop. Happy wrenching!