Scraped Plastic Bumper Repair
Scraped bumpers. They’re the bane of every car owner's existence. Whether it's a minor brush against a parking bollard in your daily-driver Toyota Camry, or a more significant encounter with a rogue shopping cart attacking your beloved BMW M3, these unsightly marks can detract from your vehicle's appearance and, let's be honest, your pride. While a professional body shop repair is always an option, understanding the basics of plastic bumper repair can empower you to tackle minor scrapes yourself, saving you time and money.
Understanding the Enemy: Plastic Bumper Materials
Modern car bumpers aren't the heavy, chrome-laden behemoths of yesteryear. They are primarily made of various types of plastic polymers chosen for their flexibility, impact resistance, and ability to be molded into complex shapes. The most common type is Thermoplastic Olefin (TPO). Think of TPO as a versatile and resilient workhorse, used extensively in vehicles like Honda Civics and Ford F-150s. It's relatively easy to repair and paint, making it a popular choice for manufacturers.
Another common plastic is Polypropylene (PP). PP is also quite flexible and durable, and often found in the bumpers of vehicles like the Volkswagen Golf. However, PP can be more challenging to paint directly because it's less porous than TPO. Adhesion promoters are typically required to ensure the paint sticks properly.
Less frequently, you might encounter bumpers made from Polyurethane (PUR). PUR offers excellent impact resistance and is sometimes used in higher-performance vehicles like certain Porsche models, or on vehicles where a soft, energy-absorbing bumper is desired. PUR is generally considered more difficult to repair at home due to its specific chemical properties and the techniques required.
Knowing the type of plastic your bumper is made of is crucial for selecting the correct repair materials and techniques. Your owner's manual or a quick search online can often provide this information. If unsure, a local auto parts store may be able to help you identify the material.
The Anatomy of a Scrape: Assessing the Damage
Before diving into the repair process, take a close look at the damage. Is it just a superficial scratch in the paint, or does it penetrate the plastic itself? Is the bumper cracked, torn, or dented? The severity of the damage will dictate the repair method.
- Minor Scratches: These are usually surface-level imperfections that only affect the clear coat or the paint layer. They can often be removed with polishing compounds and a bit of elbow grease.
- Deeper Scratches: These penetrate through the paint and into the plastic. They require filling and painting to restore the original finish.
- Dents: Plastic bumpers are flexible, but significant impacts can cause dents. These can often be pushed out using heat and specialized tools.
- Cracks and Tears: These are the most severe type of damage and require more extensive repair techniques, such as plastic welding or the use of specialized adhesives.
Imagine you’ve lightly scraped the bumper of your Mazda MX-5 against a low wall. If it's just a minor scratch, you might be able to buff it out with a rubbing compound. However, if you've cracked the bumper of your Subaru Outback while off-roading, you're looking at a more involved repair.
DIY Repair Techniques: A Step-by-Step Guide
For minor to moderate damage, here's a breakdown of common DIY repair techniques:
1. Cleaning and Preparation:
This is the foundation of any successful repair. Start by thoroughly cleaning the damaged area with soap and water to remove dirt, grease, and grime. Follow up with a wax and grease remover to ensure a pristine surface for the repair materials to adhere to. Sanding is a critical step to prepare the surface. Use progressively finer grits of sandpaper (e.g., 320, 400, 600 grit) to feather the edges of the scratch or damaged area, creating a smooth transition between the damaged and undamaged paint.
2. Filling Deep Scratches:
For scratches that penetrate the plastic, you'll need to use a plastic filler. These fillers are specifically formulated to bond to plastic and can be sanded smooth. Apply the filler in thin layers, allowing each layer to dry completely before applying the next. Overfilling is better than underfilling, as you can always sand away excess material. Once the filler is dry, sand it smooth using progressively finer grits of sandpaper, blending it seamlessly with the surrounding area. An example is using a 2-part epoxy filler on a deep scratch on a Jeep Wrangler bumper.
3. Dent Removal:
Dents in plastic bumpers can often be pushed out using heat. A heat gun (used carefully!) or even a hair dryer can soften the plastic, making it more pliable. Apply heat to the dented area in short bursts, being careful not to overheat the plastic, which can cause it to melt or distort. While heating, gently push the dent out from the back side of the bumper. Specialized dent removal tools, like those used for PDR (Paintless Dent Repair), can also be helpful. For example, on a Toyota RAV4 bumper dented in a parking lot, a heat gun and some careful pushing from behind might do the trick.
4. Priming:
Priming is essential to create a uniform surface for the paint to adhere to. Use a plastic-specific primer to ensure proper adhesion. Apply several thin coats of primer, allowing each coat to dry completely before applying the next. Sand the primer lightly with fine-grit sandpaper (e.g., 600 grit) to create a smooth, even surface.
5. Painting:
This is where color matching becomes crucial. You'll need to obtain paint that matches your vehicle's original color code. This code can usually be found on a sticker located on the driver's side doorjamb or in the engine compartment. Automotive paint supply stores can mix paint to match your specific color code. Apply the paint in several thin coats, allowing each coat to dry completely before applying the next. Avoid applying too much paint in one coat, as this can lead to runs and drips. After the final coat of paint has dried, apply a clear coat to protect the paint and give it a glossy finish. Again, several thin coats are better than one thick coat. For example, matching the metallic silver paint on a Nissan Altima requires careful attention to the application technique to achieve an even finish.
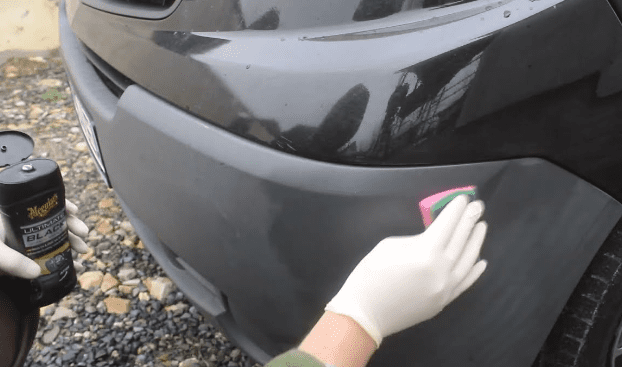
6. Blending and Polishing:
To blend the repaired area seamlessly with the surrounding paint, you can use a blending solvent or clear coat blender. This will help to soften the edges of the repaired area and create a smooth transition. Once the paint is fully cured, use a polishing compound and a polishing pad to remove any imperfections and restore the gloss to the finish. A final wax application will protect the paint and enhance its shine.
Essential Tools and Materials
Here's a list of essential tools and materials for DIY plastic bumper repair:
- Soap and Water: For initial cleaning.
- Wax and Grease Remover: For preparing the surface for repair.
- Sandpaper (various grits): For feathering edges and smoothing filler.
- Plastic Filler: For filling deep scratches.
- Heat Gun or Hair Dryer: For dent removal.
- Plastic Primer: For creating a uniform surface for paint.
- Automotive Paint (matched to your vehicle's color code): For restoring the original color.
- Clear Coat: For protecting the paint and adding gloss.
- Blending Solvent or Clear Coat Blender: For blending repaired area.
- Polishing Compound: For removing imperfections and restoring gloss.
- Polishing Pads: For applying polishing compound.
- Wax: For protecting the paint and enhancing shine.
- Tack Cloth: For removing dust and debris before painting.
- Masking Tape and Paper: For protecting surrounding areas from overspray.
- Safety Glasses and Gloves: For protecting yourself from chemicals and debris.
When to Call in the Pros
While DIY repair can be a rewarding and cost-effective option for minor to moderate damage, there are situations where it's best to consult a professional body shop.
- Extensive Damage: Large cracks, tears, or significant structural damage to the bumper require specialized equipment and expertise to repair properly.
- Sensor Damage: Modern bumpers often house parking sensors or other electronic components. If these are damaged, it's best to have them repaired or replaced by a qualified technician.
- Uncertainty: If you're unsure about the repair process or lack the necessary skills or tools, it's always best to err on the side of caution and seek professional help.
Attempting a DIY repair beyond your capabilities can potentially worsen the damage and lead to more costly repairs down the line. A professional body shop has the tools, experience, and knowledge to restore your bumper to its original condition safely and effectively.
Practical Takeaways
* Identify the plastic type before starting any repair to ensure you use compatible materials. * Preparation is key. Thorough cleaning and sanding are crucial for a successful repair. * Apply materials in thin layers. Multiple thin coats are always better than one thick coat. * Take your time. Rushing the repair process can lead to mistakes and a less-than-satisfactory result. * Don't be afraid to seek professional help. If you're unsure about any aspect of the repair process, it's always best to consult a qualified technician.By understanding the basics of plastic bumper repair, you can confidently tackle minor scrapes and scratches, keeping your vehicle looking its best and saving you money along the way. Remember, a well-maintained car is a happy car!