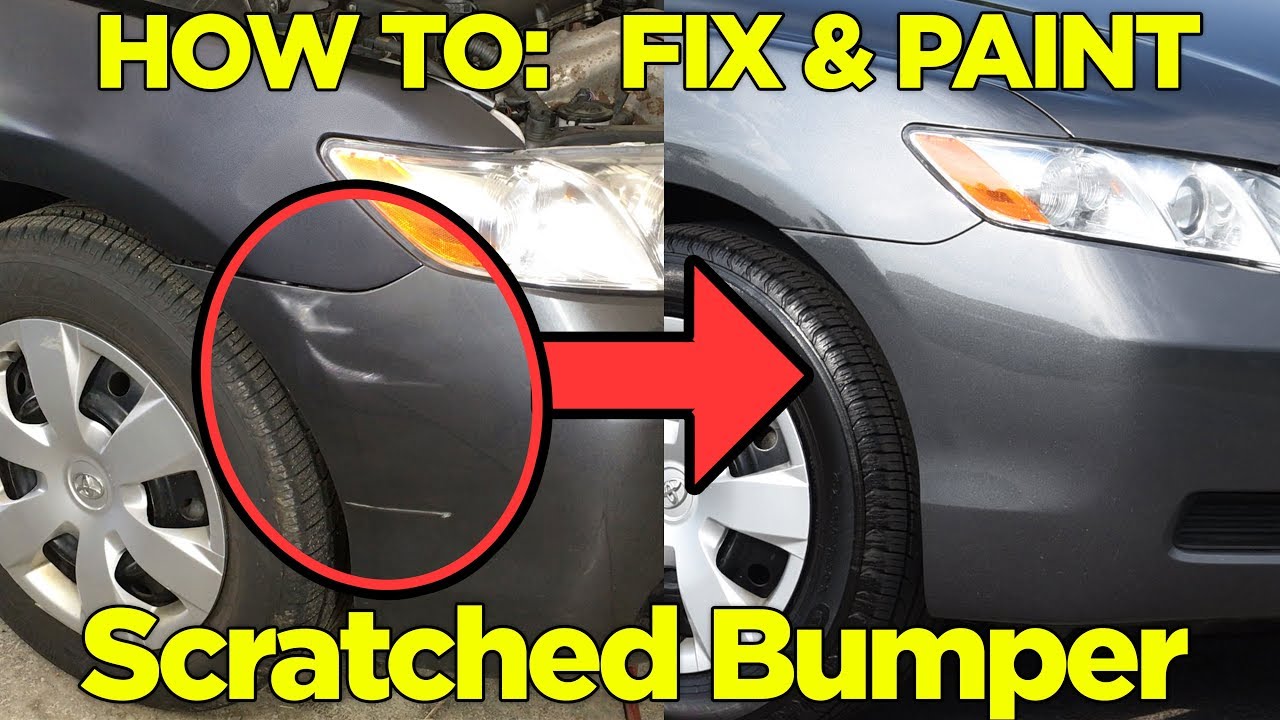
Scratch On Plastic Bumper Repair
Understanding Scratches on Plastic Bumpers: A Comprehensive Guide to Repair
Plastic bumpers, ubiquitous on modern vehicles, offer impact resistance and contribute to aerodynamic efficiency. However, their susceptibility to scratches is a persistent aesthetic challenge. This article delves into the intricacies of scratch repair on plastic bumpers, covering everything from identifying scratch types to executing professional-grade repairs.
The Anatomy of a Plastic Bumper and Common Scratch Types
Most modern bumpers are constructed from thermoplastic polymers like polypropylene (PP), polyurethane (PUR), or a blend of both. These materials are chosen for their flexibility, impact resistance, and ability to be molded into complex shapes. Understanding the type of plastic is crucial, as repair methods vary accordingly. Identification stamps are often located on the bumper's inner surface.
Scratches can be broadly categorized based on their severity:
- Surface Scratches: These are the most common and affect only the clear coat or the topmost layer of paint. They typically appear as faint lines and can often be removed with polishing.
- Mid-Level Scratches: These penetrate through the clear coat and into the base coat of paint. They are more noticeable than surface scratches and require more aggressive repair techniques.
- Deep Scratches: These extend through the paint layers and into the plastic substrate. They are the most challenging to repair and often require filling and repainting. In some cases, the scratch might also leave a visible gouge or deformation on the bumper's surface.
Essential Tools and Materials for Plastic Bumper Scratch Repair
Successful scratch repair hinges on having the right tools and materials. Here's a comprehensive list:
- Cleaning Supplies: Microfiber cloths, automotive soap, degreaser (e.g., isopropyl alcohol).
- Sanding Materials: Assorted grits of sandpaper (e.g., 400, 600, 800, 1000, 1500, 2000 grit), sanding block.
- Filler (for deep scratches): Plastic filler specifically designed for automotive bumpers. Two-part epoxy fillers are generally preferred for their strength and durability.
- Primer: Automotive primer compatible with the filler and topcoat.
- Paint: Automotive paint matching the bumper's original color code (available in spray cans or for use with a paint sprayer). Clear coat (optional, but recommended for a durable and glossy finish).
- Polishing Compounds: Rubbing compound (for aggressive correction), polishing compound (for fine polishing), wax (for protection).
- Polishing Pads and Machine (Optional): Foam polishing pads, dual-action polisher. A polisher significantly speeds up the polishing process and yields better results.
- Masking Tape and Paper: For protecting surrounding areas from overspray.
- Safety Gear: Gloves, respirator (especially when sanding and painting), eye protection.
Step-by-Step Guide to Repairing Scratches on Plastic Bumpers
This section outlines the repair process, tailored to different scratch levels. Always work in a well-ventilated area and wear appropriate safety gear.
Repairing Surface Scratches
- Cleaning: Thoroughly clean the area around the scratch with automotive soap and water. Follow with a degreaser to remove any wax or silicone.
- Polishing: Apply a small amount of rubbing compound to a microfiber cloth or polishing pad. Polish the scratched area using circular motions. For deeper surface scratches, a dual-action polisher can be used.
- Fine Polishing: After using the rubbing compound, switch to a polishing compound to refine the finish and remove any remaining swirl marks.
- Waxing: Apply a coat of wax to protect the repaired area and enhance the shine.
Repairing Mid-Level Scratches
- Cleaning: Same as above.
- Sanding: Wet-sand the scratched area with 800-grit sandpaper to feather the edges of the scratch. Use a sanding block to ensure even sanding. Follow with 1000-grit and then 1500-grit sandpaper, progressively refining the surface.
- Polishing: Follow the polishing steps outlined for surface scratches.
- Touch-Up Paint (Optional): If the scratch is still visible after polishing, apply a thin layer of touch-up paint matching the bumper's color code. Allow the paint to dry completely before proceeding to the next step.
- Clear Coat (Optional): Apply a thin layer of clear coat over the touch-up paint (if used) to blend it seamlessly with the surrounding paint.
- Final Polish and Wax: Once the clear coat is dry, polish the area and apply wax.
Repairing Deep Scratches
- Cleaning: Same as above.
- Sanding: Sand the scratched area with 400-grit sandpaper to create a smooth surface for the filler to adhere to. Remove any loose plastic fragments.
- Filler Application: Mix the two-part epoxy filler according to the manufacturer's instructions. Apply the filler to the scratch, slightly overfilling it.
- Curing: Allow the filler to cure completely according to the manufacturer's instructions.
- Sanding: Sand the filler with 400-grit sandpaper to level it with the surrounding surface. Use a sanding block to ensure even sanding. Progress to finer grits (600, 800) to refine the surface.
- Priming: Apply several thin coats of automotive primer to the filled area, allowing each coat to dry before applying the next. This creates a uniform surface for painting.
- Wet Sanding (Primer): Once the primer is dry, wet-sand it with 1000-grit sandpaper to remove any imperfections.
- Painting: Apply several thin coats of automotive paint matching the bumper's color code, allowing each coat to dry before applying the next.
- Clear Coat (Optional, but Recommended): Apply several thin coats of clear coat to protect the paint and provide a glossy finish.
- Wet Sanding (Clear Coat): After the clear coat has dried completely (typically 24-48 hours), wet-sand it with 2000-grit sandpaper to remove any orange peel or imperfections.
- Polishing: Polish the area with rubbing compound, followed by polishing compound, to restore the shine.
- Waxing: Apply a coat of wax to protect the repaired area.
Advanced Techniques and Considerations
For severely damaged bumpers with cracks or deformation, plastic welding may be necessary. This involves using a specialized tool to melt and fuse the plastic, creating a stronger bond. Plastic welding requires experience and skill and is often best left to professionals.
Color matching is crucial for a seamless repair. Obtaining the correct paint code for your vehicle is essential. Most manufacturers list the paint code on a sticker located on the driver's side door jamb, in the glove compartment, or under the hood.
Proper surface preparation is key to long-lasting repairs. Thorough cleaning, sanding, and degreasing ensure that the filler, primer, and paint adhere properly to the bumper.
When using spray cans, maintain a consistent distance from the surface and use smooth, overlapping strokes to avoid runs and uneven coverage. Multiple thin coats are always better than one thick coat.
Temperature and humidity can affect the drying time and adhesion of paints and fillers. Follow the manufacturer's recommendations for optimal application conditions.
Real-World Example: Repairing a Deep Scratch on a Polypropylene Bumper
A common scenario involves a deep scratch caused by a minor parking lot fender-bender. Consider a 2018 Honda Civic with a deep scratch on its polypropylene (PP) bumper. The scratch penetrated through the paint and into the plastic. To repair this, the steps outlined for deep scratches would be followed meticulously, paying particular attention to the selection of a filler specifically designed for PP plastic. The flexibility of PP requires a flexible filler to prevent cracking under stress. The use of a heat gun, cautiously applied, can aid in shaping the filler during application. A final step might involve using a plastic adhesion promoter before priming to ensure optimal paint adhesion to the repaired area.
Cost Considerations: DIY vs. Professional Repair
DIY scratch repair can be a cost-effective solution for minor damage. The cost of materials typically ranges from $50 to $200, depending on the severity of the scratch and the quality of the products used.
Professional repair costs vary depending on the extent of the damage and the labor rates in your area. Minor scratch repairs can range from $150 to $300, while more extensive repairs requiring filling and repainting can cost upwards of $500. For severe damage, bumper replacement might be the most cost-effective option.
Conclusion: Restoring Your Bumper's Aesthetics
Repairing scratches on plastic bumpers is a manageable task for the DIY enthusiast, provided they have the necessary tools, materials, and patience. By understanding the different types of scratches and following the appropriate repair techniques, you can restore your bumper's aesthetics and protect it from further damage. For more complex repairs, consulting a professional auto body shop is always recommended. Remember to prioritize safety by wearing appropriate protective gear and working in a well-ventilated area. With careful attention to detail and the right approach, you can achieve professional-looking results and keep your vehicle looking its best.